


![]()
Portworx is a Red Hat Certified Technology for OpenShift Container Platform.
This post is part of our ongoing series on running MySQL on Kubernetes. We’ve published a number of articles about running MySQL on Kubernetes for specific platforms and for specific use cases. If you are looking for a specific Kubernetes platform, check out these related articles.
Running HA MySQL on Amazon Elastic Container Service for Kubernetes (EKS)
Running HA MySQL on Azure Kubernetes Service (AKS)
Running HA MySQL on Google Kubernetes Engine (GKE)
How to Backup and Restore MySQL on Red Hat OpenShift
Running HA MySQL on IBM Cloud Kubernetes Service (IKS)
Running HA MySQL on Rancher Kubernetes Engine (RKE)
Running HA MySQL on IBM Cloud Private
And now, onto the post…
OpenShift Container Platform is Red Hat’s private, on-premise cloud application deployment and hosting platform. Many customers have been using OpenShift to run stateless applications, but running stateful applications like databases has been a challenge on OpenShift. Red Hat offers a portfolio of enterprise-class storage solutions, but neither GlusterFS (the basis for what Red Hat calls “Container Native Storage”) or Ceph were designed to run high-performance low-latency databases. GlusterFS and Ceph are great projects, but they both have specific drawbacks for database workloads. These drawbacks have prevented OpenShift users from getting the most out of the platform and they have tended to forego running data services on OpenShift. BUT, good news is on the way! Using the popular open source database MySQL as an example, this blog post will answer the question, “How do I run a database on OpenShift?”
The key to running a database on OpenShift is to leverage a cloud native storage solution designed from the ground up for high-performance databases or other stateful services. Portworx is the solution for running stateful containers in production designed with DevOps in mind. With Portworx, users can manage any database or stateful service on any infrastructure using any container scheduler, including OpenShift, Kubernetes, Mesosphere DC/OS, and Docker Swarm.
OpenShift released version 3.7 with support for external volume plugins allowing you to take advantage of Portworx’s enterprise-class storage features to encrypt, snapshot, backup, and ensure high availability to protect your mission critical databases.
In this post we will show you how to run an HA MySQL database on OpenShift in 5 steps. They are:
Also, if you want to learn more from the experts about how you can run high-performance databases on OpenShift, watch this video showing how to use Portworx with OpenShift 3.7.
Read on for more detailed information about how to run an HA MySQL database on OpenShift.
Portworx installs as a daemonset in OpenShift. Go to https://install.portworx.com create your px-spec.yaml file and run oc apply –f px-spec.yaml.
Please read the Documentation for installing Portworx on OpenShift. It can be found here.
Once Portworx is installed we will need to create a StorageClass that we will use for dynamic provisioning of volumes for our MySQL instances. Below is a sample StorageClass that we will use to create our volumes.
kind: StorageClass

apiVersion: storage.k8s.io/v1beta1

metadata:

name: px-demo-sc

provisioner: kubernetes.io/portworx-volume

parameters:

repl: "2"

priority_io: “high”

snap_interval: “60”
In this StorageClass example we are going to create a StorageClass called px-demo-sc and we are using a couple of Portworx parameters:
repl: “2”We are able to specify how many copies of this volume we want in the cluster. Portworx supports a replication factor of 1|2|3. Setting a replication factor of 2 or 3 insures that Portworx is synchronous in replicating the volume to 2 or 3 nodes in the cluster, insuring the data is persistent. In the case of a node failure, Portworx works with OpenShift to redeploy the pod to another worker node in the cluster were the Portworx volume is.
priority_io: “high”o Portworx allows you to create three storage pools: High, Medium, and Low. You can have servers with SSD, HDD, and SATA for example and the SSD would be high, HDD medium, and SATA would be low. This also can be done in the cloud with Provisioned IOPs. When selecting a High StorageClass, Portworx will schedule the pod on a server with a SSD storage pool.
snap_interval: “60”o Portworx will create snapshot every 60 minutes. These snapshots can be used to roll back your database, test upgrades, and for dev testing.
A complete list of StorageClass parameters are located here.
*** Note: Portworx also supports backing up your container volumes to an ObjectStore either on premises or in the cloud. You can create a schedule for your backups and these can be encrypted and recovered to the same or different Portworx cluster.
Creating a MySQL Template in OpenShift
Portworx has created a sample MySQL OpenShift template located here.
From the OpenShift console select import YAML/JSON and copy and paste the Portworx MySQL template. Then click on Create.
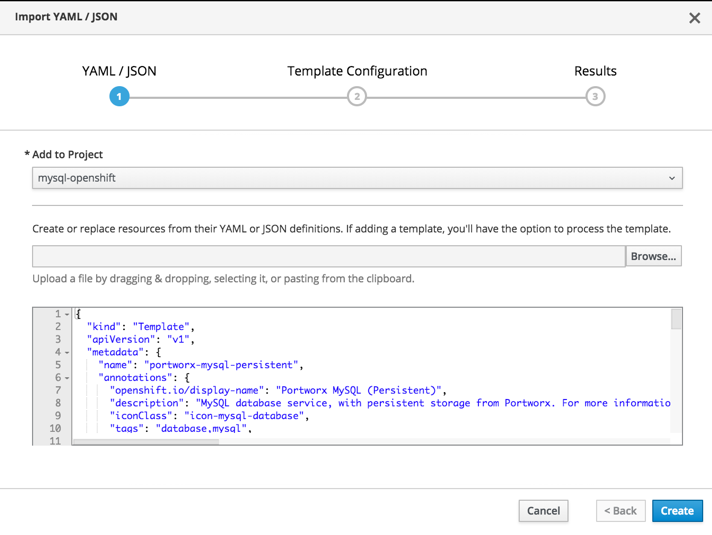
This will bring up the Portworx MySQL (Persistent) template configuration. You can select Memory limit and all the MySQL parameters or have them auto generated for you. You can also set the size of the volume and the StorageClass you want to use. Make sure the StorageClass you entered matches the StorageClass you created earlier.

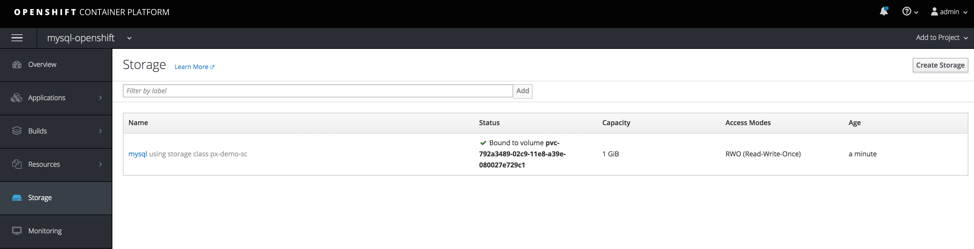
Go into your project and verify the PVC has been created and bound by clicking on Storage.
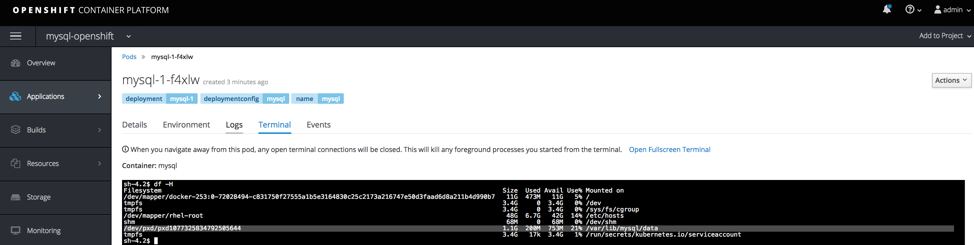
The container should take a minute or two to come up. After the container is running, verify the storage has been connected by clicking on Applications, and Pods, and selecting your MySQL pod and going into the terminal and type df –H. You can see that the /var/lib/mysql/data directory is mounted to a Portworx-backed PX-volume.
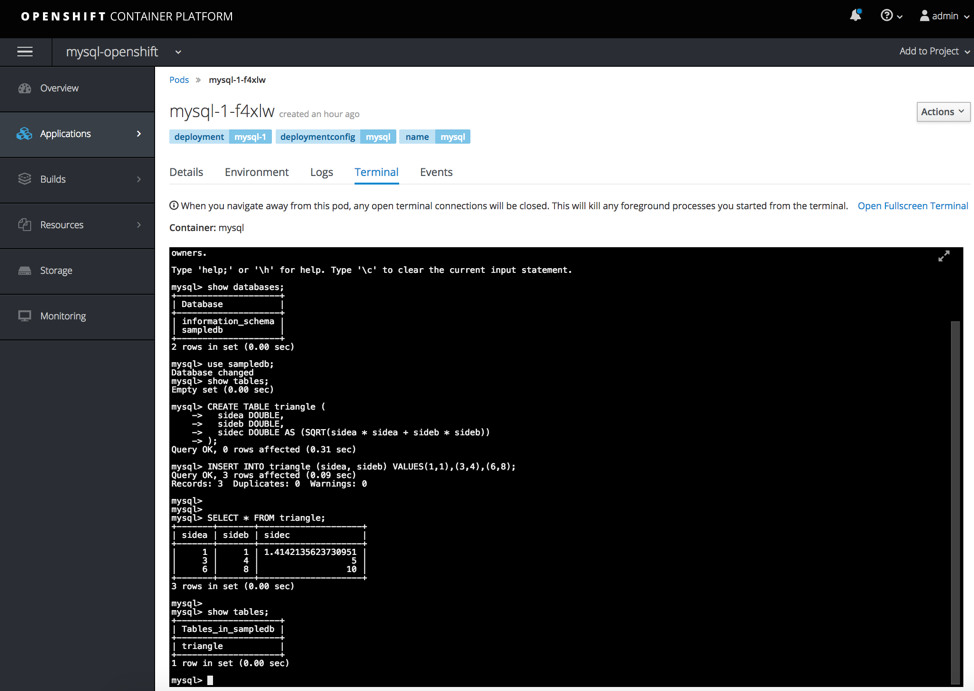
Login to the database and create a table.
Determine what node the pod is running on.
oc get pods -n mysql-openshift -o wide

NAME READY STATUS RESTARTS AGE IP NODE

mysql-1-f4xlw 1/1 Running 0 1h 10.130.0.34 70-0-107-155.pools.spcsdns.net
Cordon off the node that the pod is running on.
oc adm cordon 70-0-107-155.pools.spcsdns.net
Verify that scheduling is disabled on that node.
oc get nodes

NAME STATUS AGE VERSION

70-0-107-155.pools.spcsdns.net Ready,SchedulingDisabled 23d v1.7.6+a08f5eeb62
Delete the MySQL pod.
oc delete pod mysql-1-q88qq -n mysql-openshift

pod "mysql-1-q88qq" deleted
Verify the pod has been rescheduled on another node in the cluster.
oc get pods -n mysql-openshift -o wide

NAME READY STATUS RESTARTS AGE IP NODE

mysql-1-j97tw 1/1 Running 0 1m 10.128.0.63 70-0-40-193.pools.spcsdns.net
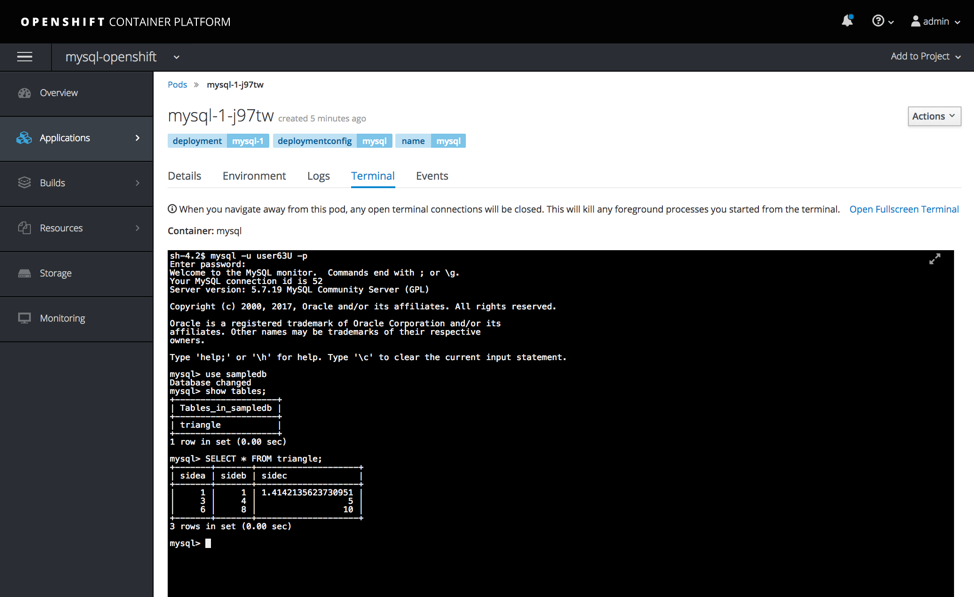
Go to the OpenShift console, select your project, and go to Applications, and Pods, and click on the new MySQL pod, then terminal. Verify the table is still there.
In summary, we have just seen how to run an HA MySQL database on OpenShift in 5 easy steps:
If you want to learn more about how you can run high-performance databases on OpenShift, watch this video which explains how to use Portworx with OpenShift 3.7.


