Wiring Up a Midi Controller to a Three-Node Docker Swarm Cluster Running 16 MySQL Containers with Portworx Volumes
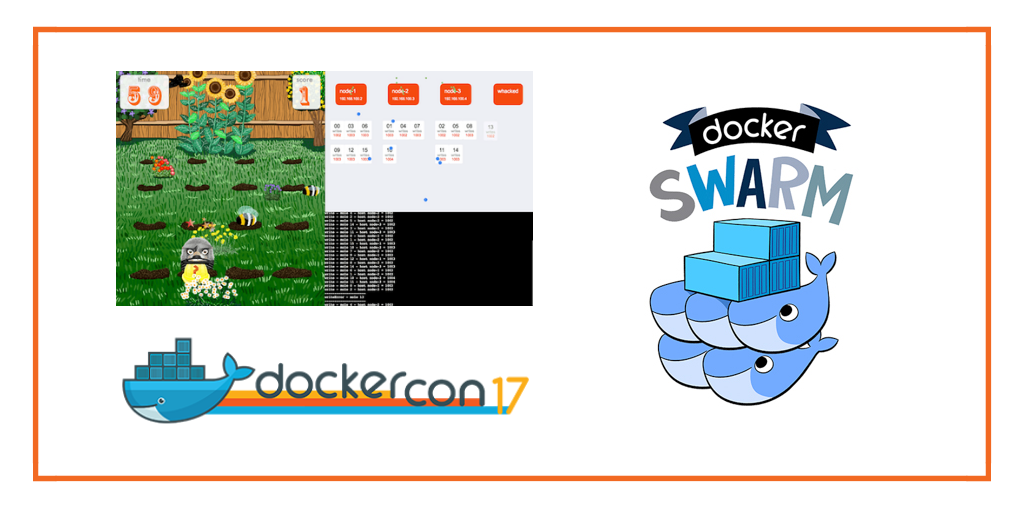
Portworx was a Gold sponsor at Dockercon 2017 last month in Austin, Texas. DockerCon is the biggest container event of the year and Austin is dubbed the live music capital of the world, so it was a momentous event both technically and socially.
The Portworx team was there in force and we had a great time! There were so many knowledgable folks in attendance and the enthusiasm and quality of the conversations was on another level.
Gou’s Talk
Here’s our very own CTO, Gou Rao as he drops the mic in his talk: The Solution for Stateful Containers
The Booth
Our booth looked great:

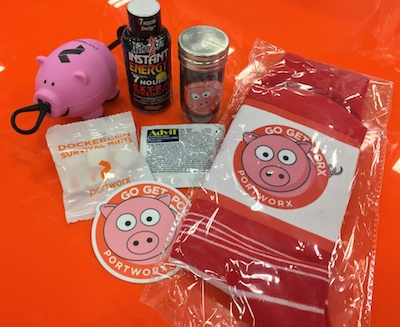
And we obviously had the best swag bag at the show:
Whack-a-Mole
We wanted to have a demo that showed off Portworx and because it was Dockercon, we also wanted to have some fun!
So, we came up with a game that involved whacking moles using an external midi controller. The cool thing is each mole is a real MySQL container running on a Portworx enabled Docker Swarm cluster.
Each time you whack a mole, a MySQL container is killed. Moments later, Portworx and Docker swarm will kick in and the container and its data is re-scheduled to another node – the MySQL container starts to find all it’s data still there!
This is possible because of the awesome power of Portworx replicated volumes.
The idea is no matter how fast you whack the moles – you can never bring the Portworx cluster down or loose any data.
This blog post explores how this mad adventure into midi-signal driven cluster destruction was unleashed upon the world.

The Demo
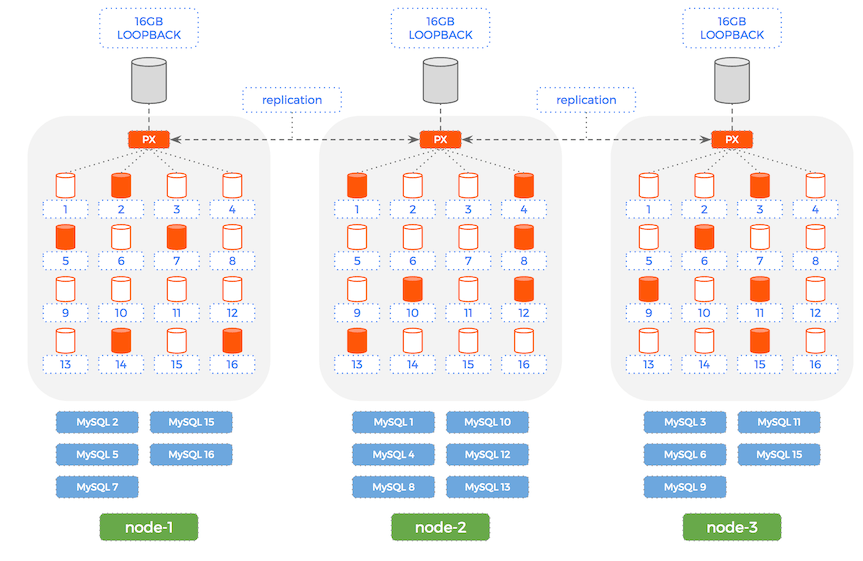
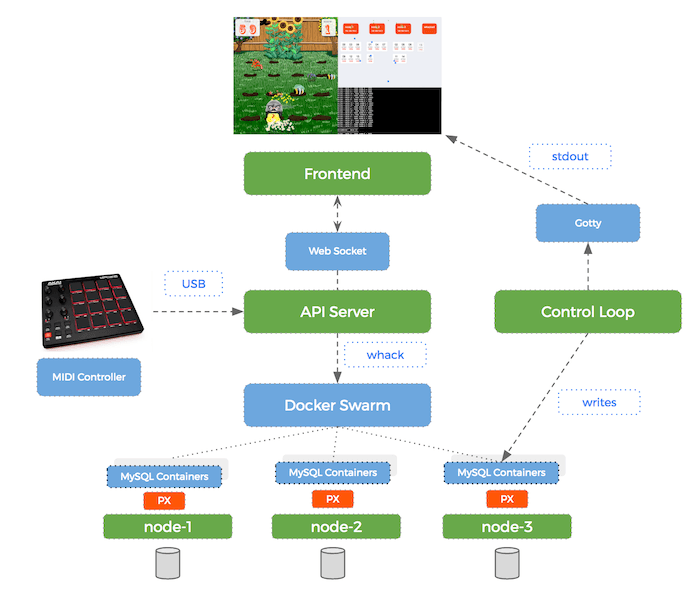
We are using the AKAI MPD218 midi controller for the game and this has 16 buttons so we sensibly decide that 16 MySQL containers is right for our demo.
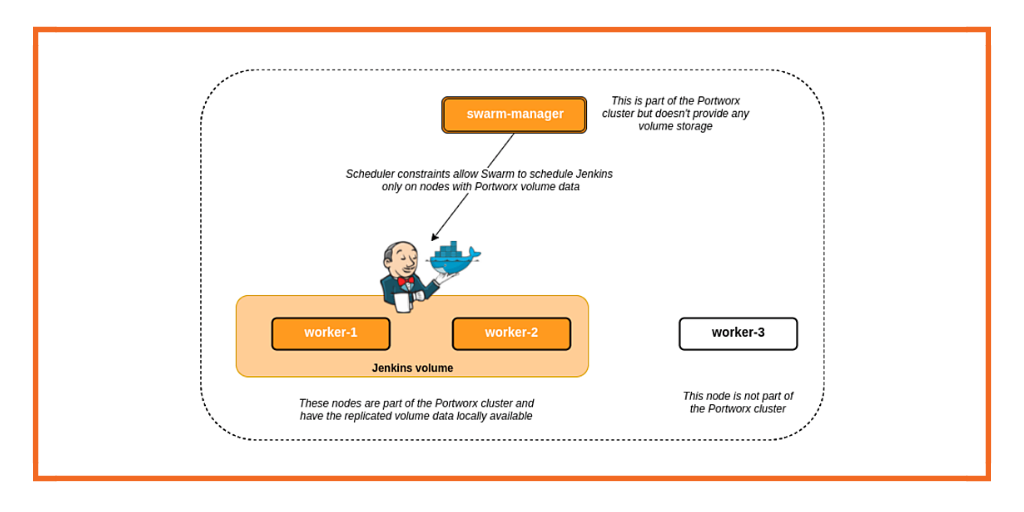
There are 3 nodes running in the Docker Swarm Cluster and Portworx is running on each node. We have created 16 Portworx volumes with a -repl 3 setting. This means that any data written by a MySQL container will be replicated to the other 2 nodes.
Here is a diagram of our cluster before we start whacking:
Portworx Replication
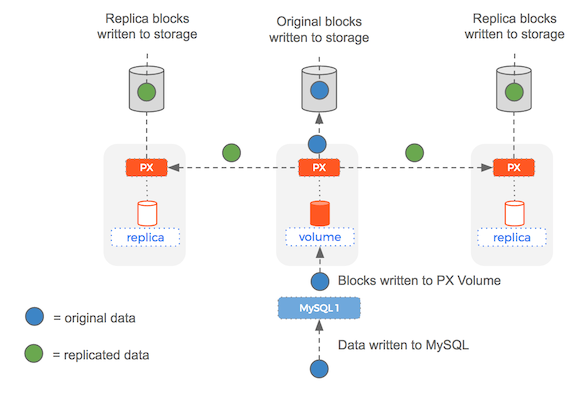
As each write is made by a single MySQL container – it is written to the underlying Portworx volume.
Because our volumes have a replication factor of 3 – the data will be sent to the other 2 nodes before the write is acknowledged (Portworx replication is immediately consistent).
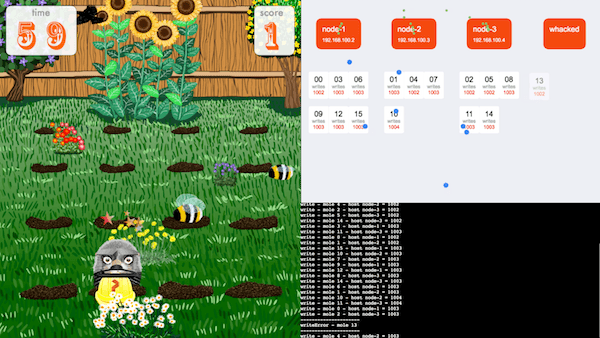
You can see this happening in the visualisation tool for a single node:
The blue dots are incoming writes – the green dots are replication writes going to and from the node to the other 2 nodes in the cluster.
Here is a diagram of the Portworx replication working for a single write:
Whacked Moles
When a mole (= MySQL container) is whacked – it is moved into the `Whacked` column. During this time – Docker swarm is rescheduling the container to another node and the Portworx volume (with all the data intact because of the replica) is being mounted.
Once this is complete – the container returns back into the cluster and writes carry on as normal:
Control loop
The control loop is constantly making writes – we can see in the terminal output that when a container is being rescheduled, it has a few write failures:
The Game
No whack a mole game would be complete without some moles to whack:
Video
You can watch a full cycle of the game being played here:
The Setup
Because we are running in a booth right in the middle of Dockercon, we decide not to rely on notoriously flaky conference wi-fi and settle on using a 3 node vagrant cluster running locally on a Dell xps laptop.
In the real world, if a node became unresponsive it would be replaced with a new node (e.g. using a cloud api). However – our faithful demo laptop does not have infinite memory and so we will say that killing a MySQL container represents killing a node for the purpose of this demo.
Here are the various components of our setup:
Storage
Each node has a `16GB` block device mounted to a file – this avoids needing extra disks or doing some crazy Virtualbox setup:
$ dd if=/dev/zero of=/root/diskimage bs=1M count=16348
$ losetup /dev/loop0 /root/diskimage
/root/diskimage will now show up if we lsblk.
Volumes
We run an etcd server on one of the nodes and start the Portworx container (using the portworx/px-dev image) on all three nodes.
Now we can use /opt/pwx/bin/pxctl to create a volume for each of our moles, umm, MySQL containers.
We have 3 x `16GB` total storage across 3 nodes. This means we can create 16 volumes of `1GB` with 3 replicas and have enough space across our storage pool.
Here is the script we use to create these 16 volumes:
for i in `seq 0 15`;
do
sudo /opt/pwx/bin/pxctl volume create --size 1 --repl 3 "mole${i}"
done
Now when we /opt/pwx/bin/pxctl volume list we can see all 16 volumes ready to go.
Midi Controller
After having read a lot about ALSA and how MIDI works on Linux – we are able to craft the following Dockerfile that includes the important libasound2-dev package.
FROM node:6.10.0
RUN apt-get update
RUN apt-get install -y libasound2-dev
WORKDIR /app
COPY ./package.json /app/package.json
RUN npm install
COPY ./src /app/src
ENTRYPOINT ["node", "src/index.js"]
Our node.js api server can use the midi package combined with the socket.io package from npm and boom we have:
a USB midi-controller connected to a Docker container that can send midi events to a Web-Socket
The last challenge is to get the midi controller recognised by the VM running inside Vagrant. Thankfully – these magic lines in our Vagrantfile do the trick and now we can see midi events in the browser:
node.vm.provider :virtualbox do |v|
  v.customize ["modifyvm", :id, "--usb", "on"]
  v.customize ["modifyvm", :id, "--usbehci", "on"]
  v.customize ["usbfilter", "add", "0",
    "--target", :id,
    "--name", "AKAI MIDI Controller",
    "--manufacturer", "Akai",
    "--product", "MPD218"]
end
Graphics
We need a way to render smooth, animated graphics in the browser – so naturally we choose WebGL so we can take advantage of the graphics card on our XPS laptop.
We don’t want to waste time using low level OpenGL primitives and so use the PixiJS library to handle things like the stage, render loops and sprites.
That is how we can animate the underlying bitmaps:
API Server
The api server handles incoming events from the midi-controller and broadcasts them on the web-socket.
It also listens for incoming instructions from the game (like a mole was whacked) and will communicate with the Docker swarm cluster to kill containers.
Control Loop
The control loop has 16 MySQL clients which are connected to their MySQL servers using DNS. This means when containers move nodes – the MySQL clients will gracefully re-connect.
Terminal
We need a way of rendering the output of the control loop (i.e. writes made and failed) to the browser.
To solve this, we use a great tool called gotty which usefully streams the output of a process (in this case the control loop) to a browser using a web-socket.
Containers
Finally – we need to get Docker swarm services for 16 MySQL containers.
We use a Docker service definition and create 16 of them. Here is an example of the service manifest we are using:
{
Name: 'mole3',
TaskTemplate: {
  ContainerSpec: {
    Image: 'mariadb',
    Env: [
      'MYSQL_ROOT_PASSWORD=moles',
      'MYSQL_DATABASE=moles',
      'MYSQL_USER=moles',
      'MYSQL_PASSWORD=moles'
    ],
    Hostname: 'mole3',
    Mounts: [{
      Source: 'mole3',
      Target: '/var/lib/mysql',
      Type: 'volume'
    }]
  },
  Placement: {
    Constraints: 'node.hostname == node-2'
  }
},
Mode: {
  Replicated: {
    Replicas: 1
  }
}
}
The key values in this file:
* Mounts[0].Source = mole3 – this points to the Portworx volume this MySQL container will use.
* Placement.Constraints = node-2 – this constrains the container onto a certain node
You might question why we would use constraints like this – the answer is that when a container is killed and we move it, we want to make sure it ends up on a different node than last time (otherwise the demo is pointless). The constraint is there is make sure the container actually moves if you whack a mole (rather than just restarts on the same host).
Conclusion
We had a great Dockercon! If you’d like you learn more about Docker persistent storage, you know where to find us. And we promise, no moles were harmed in the making of this blog post.
Share
Subscribe for Updates
About Us
Portworx is the leader in cloud native storage for containers.
Thanks for subscribing!

Kai Davenport
Kai has worked on internet-based systems since 1998 and currently spends his time using Kubernetes, Docker and other container tools and programming in Node.js and Go.