


With the release of Portworx 2.13, Cloud Drives support is now generally available for the Oracle Cloud Infrastructure (OCI) managed Kubernetes service Oracle Container Engine for Kubernetes (OKE). Portworx Cloud Drives provides the ability to automatically provision and scale storage. This is great news for anyone using Portworx on OKE, as it means we no longer need to pre-create OCI Block Volumes and attach them to the OKE worker nodes before installing Portworx.
So, let’s see how much simpler it is to deploy Portworx with Cloud Drives.
For this blog post, I will be using a 3-node v1.25.4 Kubernetes cluster, which I have created using the OKE Wizard within the uk-london-1 region, as shown below.
kubectl get nodes -L topology.kubernetes.io/region,topology.kubernetes.io/zone
NAME          STATUS   ROLES   AGE    VERSION   REGION        ZONE
10.0.10.127   Ready    node    2m3s   v1.25.4   uk-london-1   UK-LONDON-1-AD-2
10.0.10.13    Ready    node    2m9s   v1.25.4   uk-london-1   UK-LONDON-1-AD-3
10.0.10.16    Ready    node    2m2s   v1.25.4   uk-london-1   UK-LONDON-1-AD-1
OCI provides two Kubernetes storage classes: oci, and oci-bv. The oci block volume (oci-bv) is now the default and is used by the CSI volume plugin. The oci class is considered legacy and is only used by the FlexVolume plugin.
kubectl get sc
NAME               PROVISIONER                       RECLAIMPOLICY   VOLUMEBINDINGMODE      ALLOWVOLUMEEXPANSION   AGE
oci                oracle.com/oci                    Delete          Immediate              false                  5m47s
oci-bv (default)   blockvolume.csi.oraclecloud.com   Delete          WaitForFirstConsumer   true                   5m47s
Before we do anything, let’s create a dedicated namespace for Portworx using kubectl create ns.
kubectl create ns portworx
namespace/portworx created
To install the Portworx Operator, we need to create a Kubernetes secret to allow Portworx to manage OCI block storage using our Oracle API signing key and fingerprint details, for example.
kubectl create secret generic ociapikey \
--namespace <namespace> \
--from-file=oci_api_key.pem=/Users/rekins/.oci/oci_api_key.pem \
--from-literal=PX_ORACLE_user_ocid="<ocid>" \
--from-literal=PX_ORACLE_fingerprint="<fingerprint>"
Check to be sure the secret has been created in the correct namespace.
kubectl get secret -n portworx
NAME        TYPE     DATA   AGE
Ociapikey   Opaque   3      9s
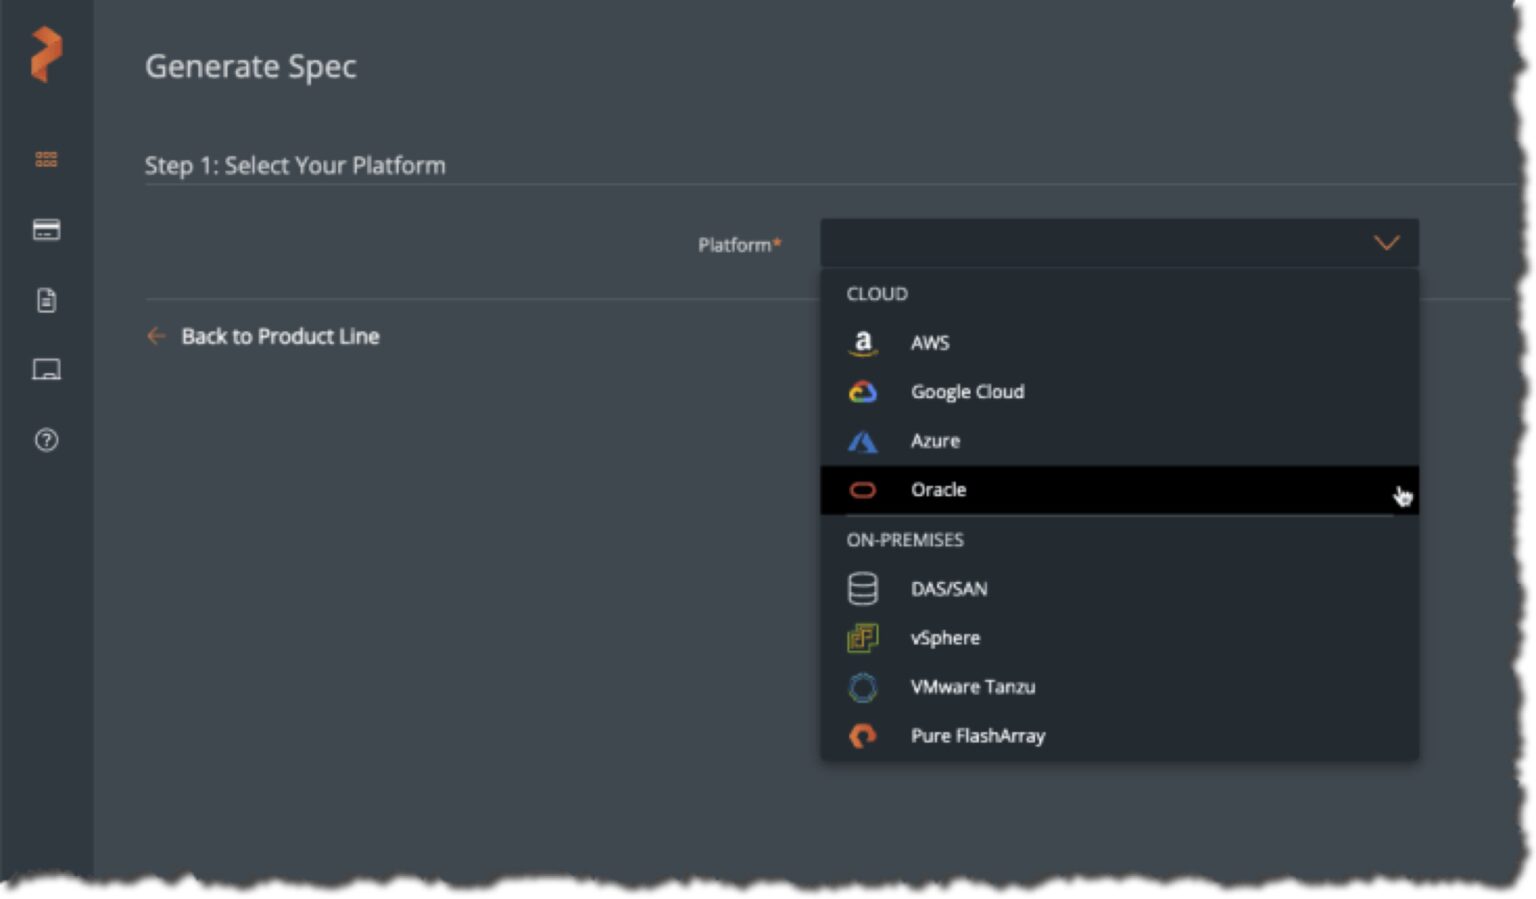
Visit https://central.portworx.com and log on, then select Portworx Enterprise, and then select Portworx Essentials or Portworx Enterprise. We can see the spec generator now includes Oracle as a Cloud option; select Oracle.
Confirm the Kubernetes namespace.
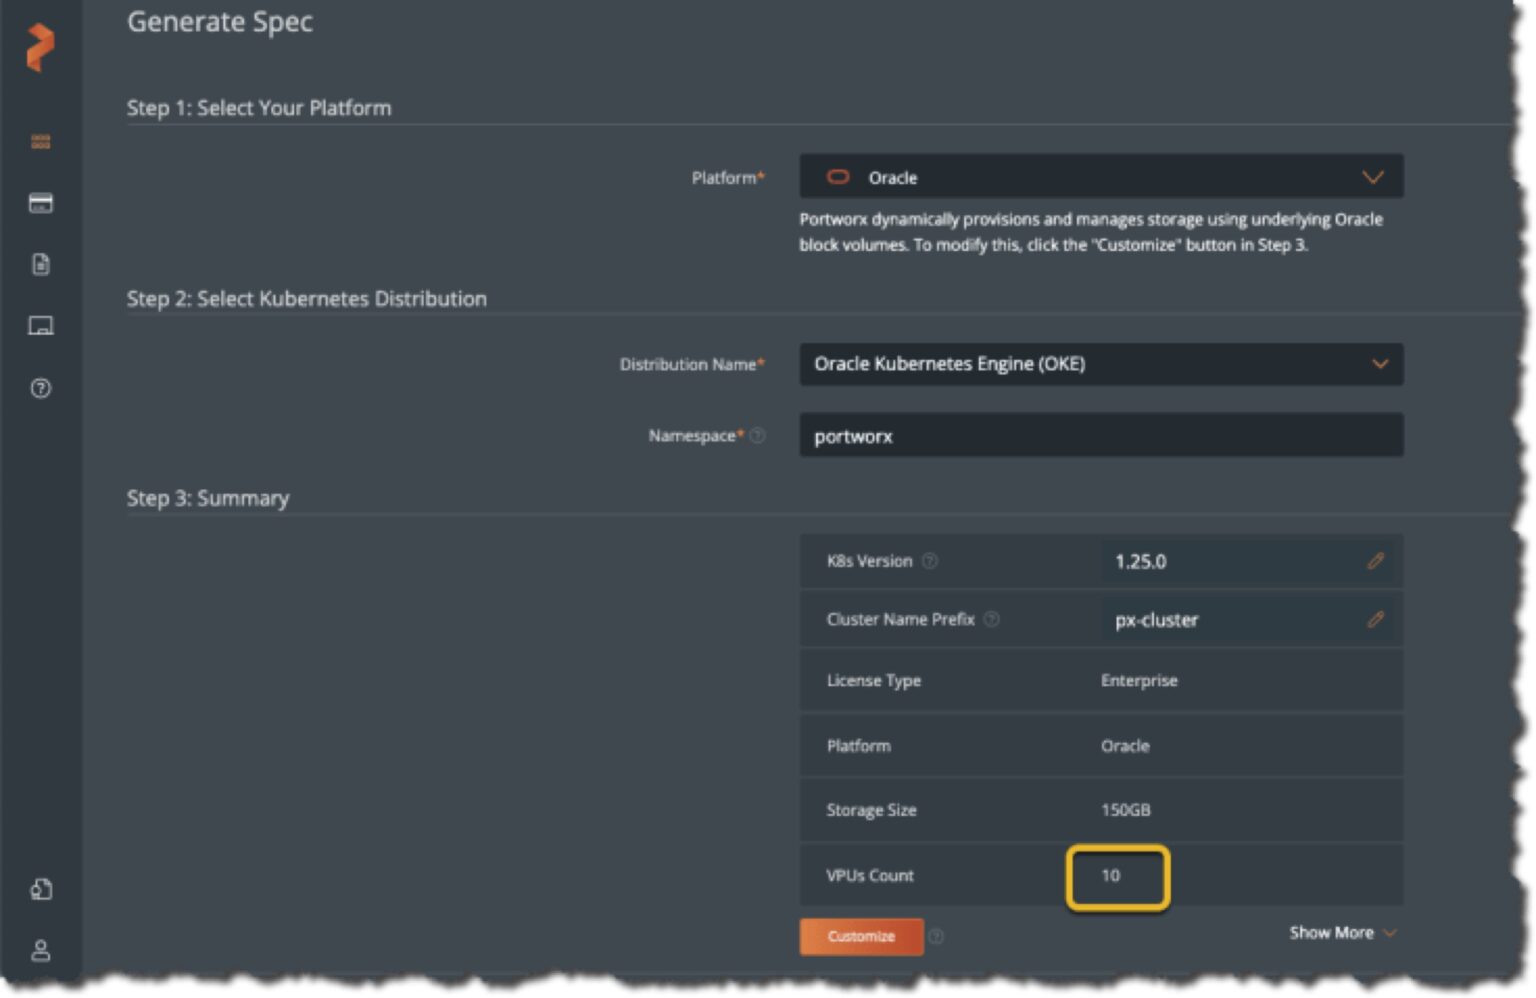
Review the Summary and click Show More if required. Take special notice of the Storage Size and VPUs Count and set them to match application performance requirements. The tables below are provided for reference.


Complete the wizard and grab the Portworx deployment commands.
To install the Portworx Operator use
kubectl apply -f 'https://install.portworx.com/2.13?comp=pxoperator&kbver=1.25.4&ns=portworx'
serviceaccount/portworx-operator created
clusterrole.rbac.authorization.k8s.io/portworx-operator created
clusterrolebinding.rbac.authorization.k8s.io/portworx-operator created
deployment.apps/portworx-operator created
To deploy the StorageCluster, use the second command provided by PX-Central:
kubectl apply -f
'https://install.portworx.com/2.13?operator=true&mc=false&kbver=1.25.4&ns=portworx&b=true&kd=type%3Dpv-10%2Csize%3D150&cp=oracle&s=%22type%3Dpv-20%2Csize%3D150%22&c=px-cluster-888de70e-bdc2-4761-99db-7c306df72e97&oke=true&stork=true&csi=true&mon=true&tel=false&st=k8s&promop=true'
storagecluster.core.libopenstorage.org/px-cluster-888de70e-bdc2-4761-99db-7c306df72e97 created
Using kubectl get sc, we can see a number of new storage classes have been created by Portworx:
kubectl get sc
NAME                                 PROVISIONER                       RECLAIMPOLICY   VOLUMEBINDINGMODE      ALLOWVOLUMEEXPANSION   AGE
oci                                  oracle.com/oci                    Delete          Immediate              false                  166m
oci-bv (default)                     blockvolume.csi.oraclecloud.com   Delete          WaitForFirstConsumer   true                   166m
px-csi-db                            pxd.portworx.com                  Delete          Immediate              true                   2m13s
px-csi-db-cloud-snapshot             pxd.portworx.com                  Delete          Immediate              true                   2m12s
px-csi-db-cloud-snapshot-encrypted   pxd.portworx.com                  Delete          Immediate              true                   2m12s
px-csi-db-encrypted                  pxd.portworx.com                  Delete          Immediate              true                   2m13s
px-csi-db-local-snapshot             pxd.portworx.com                  Delete          Immediate              true                   2m12s
px-csi-db-local-snapshot-encrypted   pxd.portworx.com                  Delete          Immediate              true                   2m12s
px-csi-replicated                    pxd.portworx.com                  Delete          Immediate              true                   2m13s
px-csi-replicated-encrypted          pxd.portworx.com                  Delete          Immediate              true                   2m12s
px-db                                kubernetes.io/portworx-volume     Delete          Immediate              true                   2m13s
px-db-cloud-snapshot                 kubernetes.io/portworx-volume     Delete          Immediate              true                   2m13s
px-db-cloud-snapshot-encrypted       kubernetes.io/portworx-volume     Delete          Immediate              true                   2m13s
px-db-encrypted                      kubernetes.io/portworx-volume     Delete          Immediate              true                   2m13s
px-db-local-snapshot                 kubernetes.io/portworx-volume     Delete          Immediate              true                   2m13s
px-db-local-snapshot-encrypted       kubernetes.io/portworx-volume     Delete          Immediate              true                   2m13s
px-replicated                        kubernetes.io/portworx-volume     Delete          Immediate              true                   2m13s
px-replicated-encrypted              kubernetes.io/portworx-volume     Delete          Immediate              true                   2m13s
stork-snapshot-sc                    stork-snapshot                    Delete          Immediate              true                   2m19s
Using pxctl status, we can see a summary of the deployment.
PX_POD=$(kubectl get pods -l name=portworx -n portworx -o jsonpath='{.items[0].metadata.name}')

kubectl exec -it $PX_POD -n portworx -- /opt/pwx/bin/pxctl status
Defaulted container "portworx" out of: portworx, csi-node-driver-registrar
Status: PX is operational
Telemetry: Disabled or Unhealthy
Metering: Disabled or Unhealthy
License: Trial (expires in 31 days)
Node ID: 93b4f96a-292c-4e1a-8184-0399288ff823
       IP: 10.0.10.127
       Local Storage Pool: 1 pool
       POOL   IO_PRIORITY   RAID_LEVEL    USABLE USED                 STATUS    ZONE                 REGION
       0      HIGH          raid0         150 GiB       9.5 GiB       Online    UK-LONDON-1-AD-2     uk-london-1
      Local Storage Devices: 1 device
      Device Path          Media Type           Size          Last-Scan
       0:1    /dev/sdb      STORAGE_MEDIUM_SSD  150 GiB              27 Feb 23 16:37 UTC
       total                -                     150 GiB
       Cache Devices:
        * No cache devices
       Kvdb Device:
       Device Path  Size
       /dev/sdc     150 GiB
        * Internal kvdb on this node is using this dedicated kvdb device to store its data.a
Cluster Summary
       Cluster ID: px-cluster-888de70e-bdc2-4761-99db-7c306df72e97
       Cluster UUID: 9354debc-188a-4bf6-8470-015daf6af996
       Scheduler: kubernetes
       Nodes: 3 node(s) with storage (3 online)
       IP            ID                                  SchedulerNodeName   Auth      StorageNode   Used       Capacity    Status   StorageStatus  Version          Kernel                             OS
       10.0.10.16   c4b3011d-0a65-433c-869f-176b0f0bdacc    10.0.10.16       Disabled  Yes           9.5 GiB    150 GiB     Online   Up             2.13.0-9793db5   5.4.17-2136.314.6.2.el8uek.x86_64  Oracle Linux Server 8.6
       10.0.10.127  93b4f96a-292c-4e1a-8184-0399288ff823    10.0.10.127      Disabled  Yes           9.5 GiB    150 GiB     Online   Up(This node)  2.13.0-9793db5   5.4.17-2136.314.6.2.el8uek.x86_64  Oracle Linux Server 8.6
       10.0.10.13   6bbf1b2c-054e-4739-a464-7b2669595cad    10.0.10.13       Disabled  Yes           9.5 GiB    150 GiB     Online   Up             2.13.0-9793db5   5.4.17-2136.314.6.2.el8uek.x86_64  Oracle Linux Server 8.6
Global Storage Pool
       Total Used          :  29 GiB
       Total Capacity      :  450 GiB
The pxctl cluster provision-status command lists the Portworx storage pools in the cluster.
pxctl cluster provision-status
Defaulted container "portworx" out of: portworx, csi-node-driver-registrar
NODE                                    IP            NODE STATUS   POOL                                    POOL STATUS   IO_PRIORITY   SIZE     AVAILABLE     USED       PROVISIONED   ZONE REGION          RACK
6bbf1b2c-054e-4739-a464-7b2669595cad    10.0.10.13    Up            829b1d90-20cb-450c-85fa-422c620faa93    Online        HIGH          150 GiB  140GiB        9.5 GiB    0 B           UK-LONDON-1-AD-3     uk-london-1
93b4f96a-292c-4e1a-8184-0399288ff823    10.0.10.127   Up            41f1e1a9-a00f-4a04-bb5e-506dc90453f2    Online        HIGH          150 GiB  140GiB        9.5 GiB    0 B           UK-LONDON-1-AD-2     uk-london-1
c4b3011d-0a65-433c-869f-176b0f0bdacc    10.0.10.16    Up            75bd75e6-14ee-4689-a59e-5482ca878c18    Online        HIGH          150 GiB  140GiB        9.5 GiB    0 B           UK-LONDON-1-AD-1     uk-london-1
The pxctl clouddrive command is useful for getting more insight into the OCI block volumes provisioned by Portworx, including the OCID for each block volume.
pxctl clouddrive list
Defaulted container "portworx" out of: portworx, csi-node-driver-registrar
Cloud Drives Summary
       Number of nodes in the cluster:  3
       Number of storage nodes:  3
       List of storage nodes:  [6bbf1b2c-054e-4739-a464-7b2669595cad 93b4f96a-292c-4e1a-8184-0399288ff823 c4b3011d-0a65-433c-869f-176b0f0bdacc]
       List of storage less nodes:  []
Drive Set List
       NodeID                               InstanceID                                                                                      Zone                       State    Drive IDs
       6bbf1b2c-054e-4739-a464-7b2669595cad ocid1.instance.oc1.uk-london-1.anwgiljs54aw2uacoz4uqw7ks7kmz7ieucs2vw34wg5zgf5yrhorxaokgbpq     iXvO:UK-LONDON-1-AD-3      In Use   ocid1.volume.oc1.uk-london-1.abwgiljs5l7eoilq7q5rvfmuxwzjyhxxdzzntoghxqhngrw2hv2ex6g4im6a(kvdb),ocid1.volume.oc1.uk-london-1.abwgiljse6z2b4oq2jzaefu3l5ncxol6wvtlogabbj372wxtxa2u67mstspq(data)
       93b4f96a-292c-4e1a-8184-0399288ff823 ocid1.instance.oc1.uk-london-1.anwgiljt54aw2uacmuqthy2zliqowvyxfidcginnd2zwhku5ofb62pzd2qpa     iXvO:UK-LONDON-1-AD-2      In Use   ocid1.volume.oc1.uk-london-1.abwgiljtknazvy2mdy3exkh3f56uatd4tuqqge2okoy224nox34o7piqlopq(data),ocid1.volume.oc1.uk-london-1.abwgiljtzvjmlawkiesffretu77s4itj65ux7lzrkc3ygw7ojhhoo4ngfypq(kvdb)
       C4b3011d-0a65-433c-869f-176b0f0bdacc Ocid1.instance.oc1.uk-london-1.anwgiljr54aw2uacxedxr2zlwe2zbzpca53arexhoe3ywrkbouobu5vyhaq      iXvO:UK-LONDON-1-AD-1      In Use   Ocid1.volume.oc1.uk-london-1.abwgiljrkqnshvfqur22lrvfzw2btha7524z7f2qwm74hizoxpjyadk4wa(data),ocid1.volume.oc1.uk-london-1.abwgiljrzjp6nzdqewmzwdpnugkk74y6o5ry7li2szhbuhvoa5eh444a(kvdb)
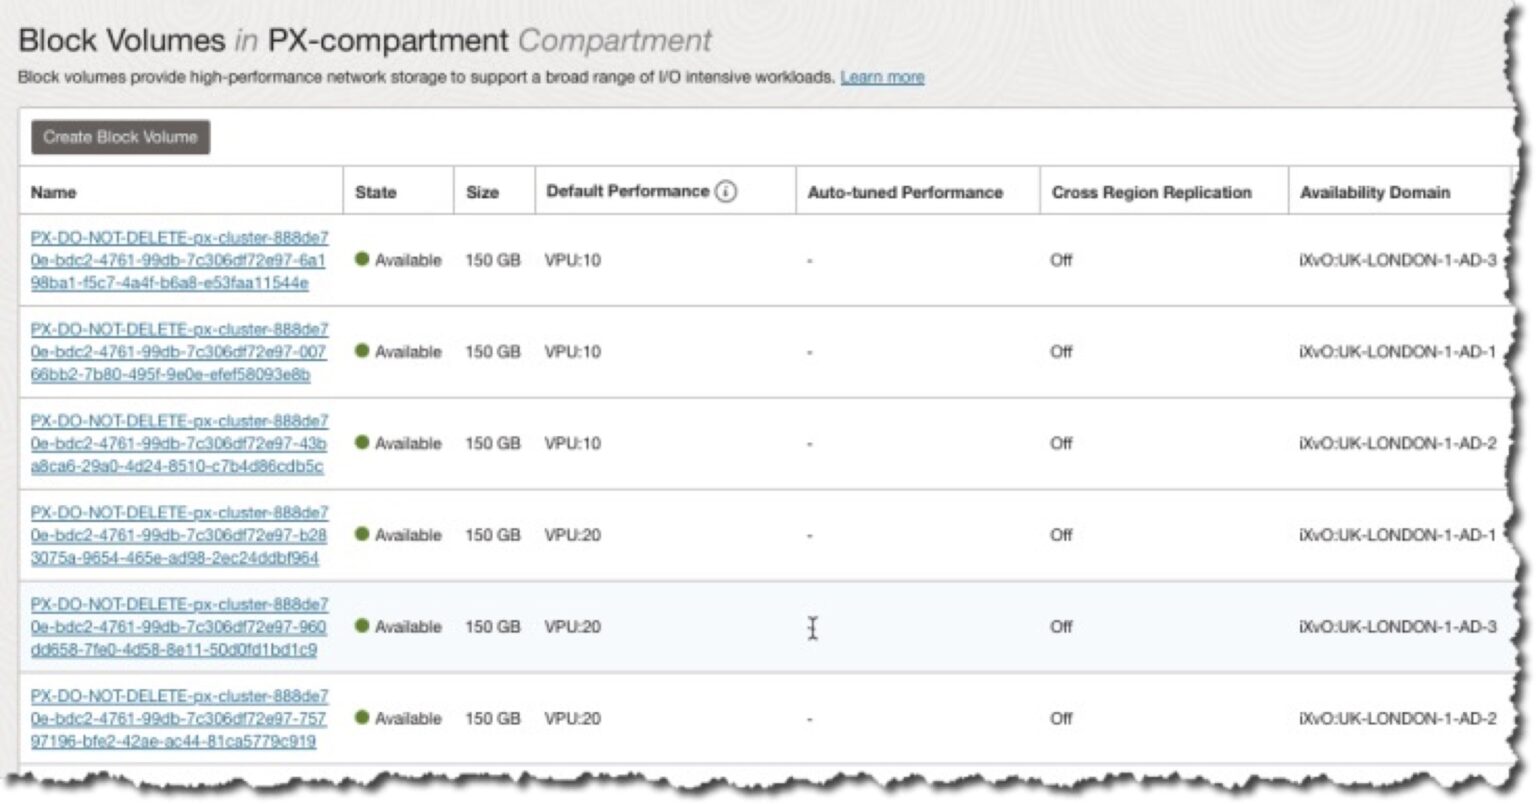
Portworx has automatically created a block volume in each of my three availability domains and attached it to the worker nodes as per the image below.
Use oci bv volume list command with –lifecyle-state “Available” to list OCI block volumes in a JSON format, for example, to see only display-name.
oci bv volume list --compartment-id <compartment id> --lifecycle-state "Available" | grep display-name
      "display-name": "PX-DO-NOT-DELETE-px-cluster-888de70e-bdc2-4761-99db-7c306df72e97-b283075a-9654-465e-ad98-2ec24ddbf964",
      "display-name": "PX-DO-NOT-DELETE-px-cluster-888de70e-bdc2-4761-99db-7c306df72e97-00766bb2-7b80-495f-9e0e-efef58093e8b",
      "display-name": "PX-DO-NOT-DELETE-px-cluster-888de70e-bdc2-4761-99db-7c306df72e97-75797196-bfe2-42ae-ac44-81ca5779c919",
      "display-name": "PX-DO-NOT-DELETE-px-cluster-888de70e-bdc2-4761-99db-7c306df72e97-43ba8ca6-29a0-4d24-8510-c7b4d86cdb5c",
      "display-name": "PX-DO-NOT-DELETE-px-cluster-888de70e-bdc2-4761-99db-7c306df72e97-960dd658-7fe0-4d58-8e11-50d0fd1bd1c9",
      "display-name": "PX-DO-NOT-DELETE-px-cluster-888de70e-bdc2-4761-99db-7c306df72e97-6a198ba1-f5c7-4a4f-b6a8-e53faa11544e",
Alternatively, return to the OCI console to see the newly created block volumes.
Navigate to the compute instance to confirm the Block Volume, Device Path, the way it’s attached, Access mode, Size and volume performance (VPU).
 Attached block volumes
In this post, we have shared how to install Porworx Enterprise 2.13 on OKE and demonstrated the automated provisioning of OCI Block Storage, which is now possible with the support of Portworx Cloud Drives.
Learn more about why Portworx is the gold standard when it comes to Kubernetes Storage and Data Management by downloading the 2022 GigaOM Radar for Enterprise Kubernetes Data Storage.