In this post, we will walk you through a simple way to deploy a highly available MySQL cluster on your Amazon EKS using Portworx Data Services.
MySQL is one of the most popular Relational Database Management Systems (RDBMS), an open-source database that enables you to store, manage, and query colossal amounts of data using a Structured Query Language (SQL).
Portworx Data Services (PDS) allows organizations to deploy not only MySQL, but also many other modern data services like PostgreSQL, Cassandra, Redis, Kafka, Zookeeper and RabbitMQ on any Kubernetes cluster that is registered to the PDS control plane. Using PDS, developers and DevOps administrators can deploy a highly available MySQL instance on their Kubernetes cluster. PDS also automates Day-2 operations on your data services layer, such as scale up, scale out and backup.
The diagram below shows a simple sample MySQL deployment on an AWS EKS cluster using PDS.

To quickly deploy your first MySQL instances, click the MySQL button under the Deploy Data Service heading in the PDS console. Enter the following details:
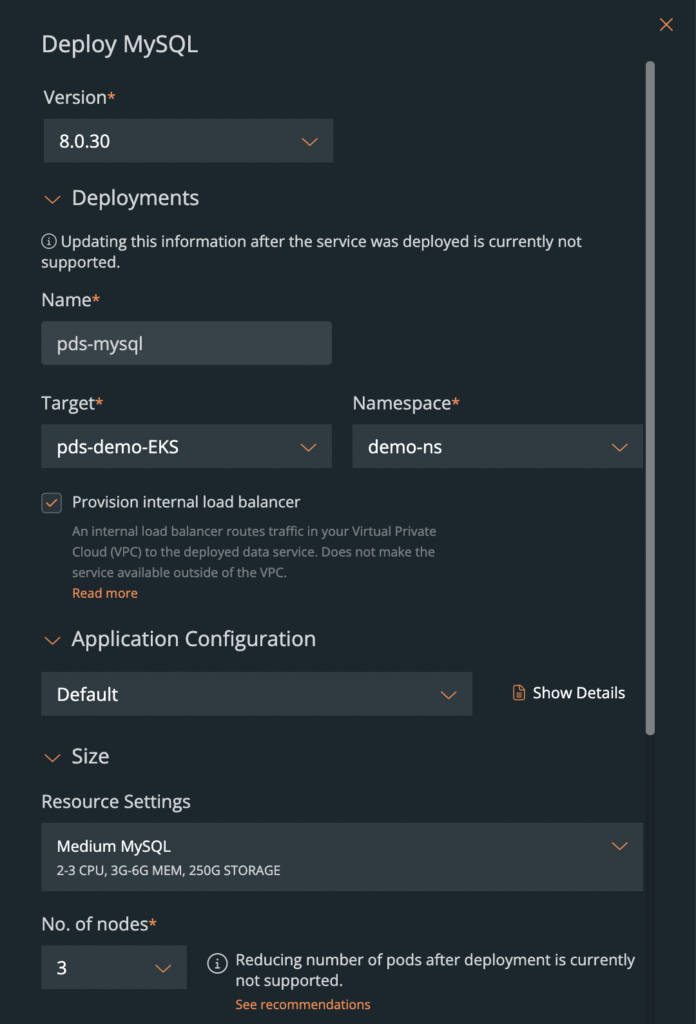
Once you hit the Deploy button, PDS will initiate the deployment of a MySQL cluster, and once it completes successfully, it will share the connection strings and credentials that you can start using in your application.
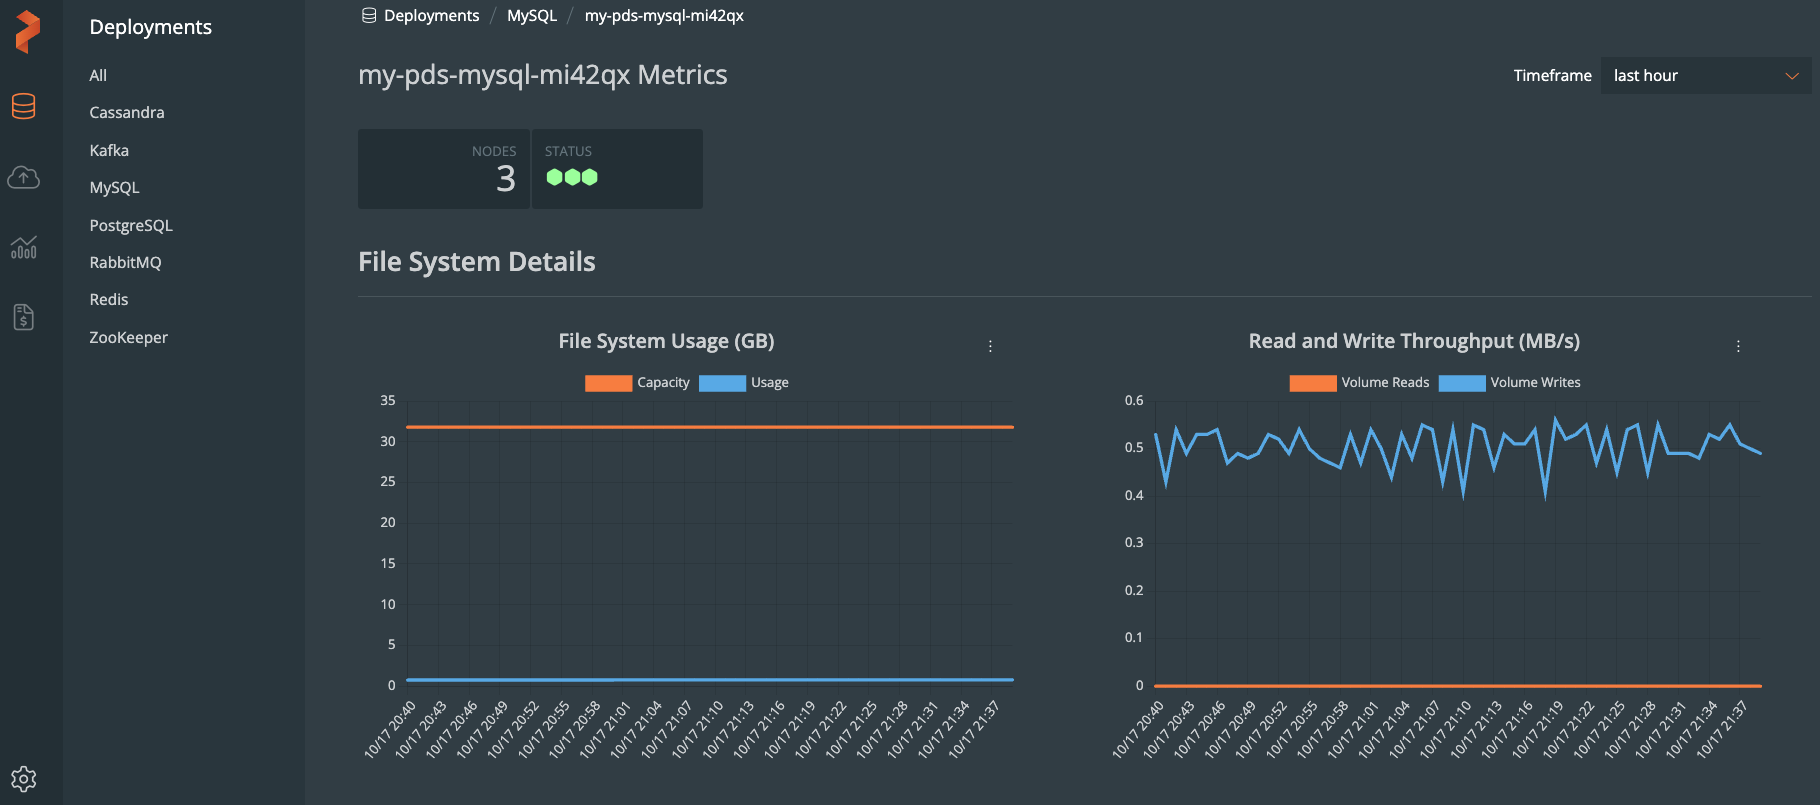
You can monitor real-time application activities within PDS by entering the Metrics page. It shows the list of commonly used performance metrics for your application.
To validate MySQL deployment, we deployed a popular MySQL client application called phpMyAdmin. You can use the YAML file below to try it out by yourself.
apiVersion: v1
kind: Secret
metadata:
 name: mysql-secrets
 namespace: demo-ns
type: Opaque
data:
 ROOT_PASSWORD: cG9ydHdvcngK
---
apiVersion: apps/v1
kind: Deployment
metadata:
 name: phpmyadmin-deployment
 namespace: demo-ns
 labels:
   app: phpmyadmin
spec:
 replicas: 1
 selector:
   matchLabels:
     app: phpmyadmin
 template:
   metadata:
     labels:
       app: phpmyadmin
   spec:
     containers:
       - name: phpmyadmin
         image: phpmyadmin/phpmyadmin
         ports:
           - containerPort: 80
         env:
           - name: PMA_HOST
             value: <put_mysql_router_FQDN_from_connection_page>
           - name: PMA_PORT
             value: "6446"
           - name: MYSQL_ROOT_PASSWORD
             valueFrom:
               secretKeyRef:
                 name: mysql-secrets
                 key: ROOT_PASSWORD
           - name: MYSQL_USER
             value: pds
           - name: MYSQL_PASSWORD
             value: "enter_password_on_the_web_gui"
---
apiVersion: v1
kind: Service
metadata:
 name: phpmyadmin-service
 namespace: demo-ns
spec:
 type: LoadBalancer
 selector:
   app: phpmyadmin
 ports:
 - protocol: TCP
   port: 80
   targetPort: 80
Once phpMyAdmin pod is deployed, run the following command to get the URL to access its web page. Enter the username and password provided by the PDS MySQL connection page and you should be able to log into the phpMyAdmin console as below.
kubectl get service -n <your_namespace>
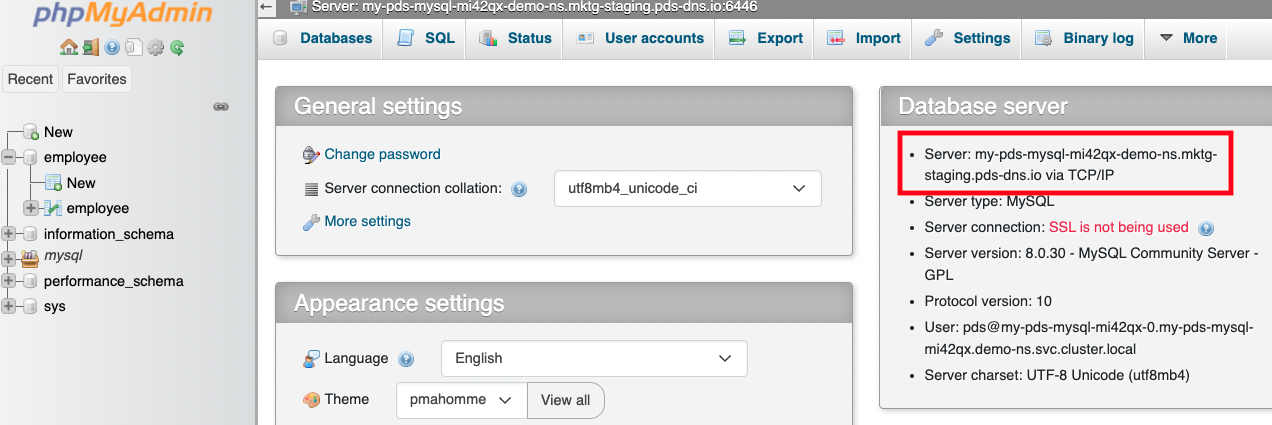
From this phpMyAdmin client, we can create a database and some sample data. In the demo video below, we have created an “employee” table, and inserted a couple of names from this web console. We have also validated that the newly created data in MySQL cluster is properly replicated among the MySQL pods. Check out the demo below to see this in action.
Once you have tested your MySQL deployment, optionally, the following are some of the day-2 operations that you can perform from PDS.
If you want to learn more about Portworx Data Services, click here!