


This post is part of our ongoing series on running MySQL on Kubernetes. We’ve published a number of articles about running MySQL on Kubernetes for specific platforms and for specific use cases. If you are looking for a specific Kubernetes platform, check out these related articles.
Running HA MySQL on Amazon Elastic Container Service for Kubernetes (EKS)
Running HA MySQL on Azure Kubernetes Service (AKS)
Running HA MySQL on Google Kubernetes Engine (GKE)
Running HA MySQL on Red Hat OpenShift
And now, onto the post…
Red Hat OpenShift is a comprehensive enterprise-grade application platform built for containers powered by Kubernetes. OpenShift lets developers quickly build, develop, and deploy applications on nearly any infrastructure, public or private. It offers enterprises full control over their Kubernetes environments, whether they’re on-premise or in the public cloud, giving teams freedom to build and run applications anywhere.
Portworx recently achieved Red Hat certification for Red Hat OpenShift Container Platform and PX-Enterprise is available in the Red Hat Container Catalog. This certification enables enterprises to confidently run high-performance stateful applications like databases, big and fast data workloads, and machine learning applications on the Red Hat OpenShift Container Platform. Learn more about Portworx & OpenShift in our Product Brief.

A common question that we are asked by our OpenShift users is how do I backup and recover a database on OpenShift?
This tutorial is a walk-through of the steps involved in deploying, managing, and backing up a highly available MySQL database on OpenShift.
In summary, to backup and recover an HA MySQL database on OpenShift you need to:
OpenShift Origin can be deployed in a variety of environments ranging from VirtualBox to a public cloud IaaS such as Amazon, Google, Azure. Refer to the official installation guide for the steps involved in setting up your own cluster. For this guide, we run an OpenShift Origin cluster in Microsoft Azure. Follow the instructions mentioned in Azure documentation.
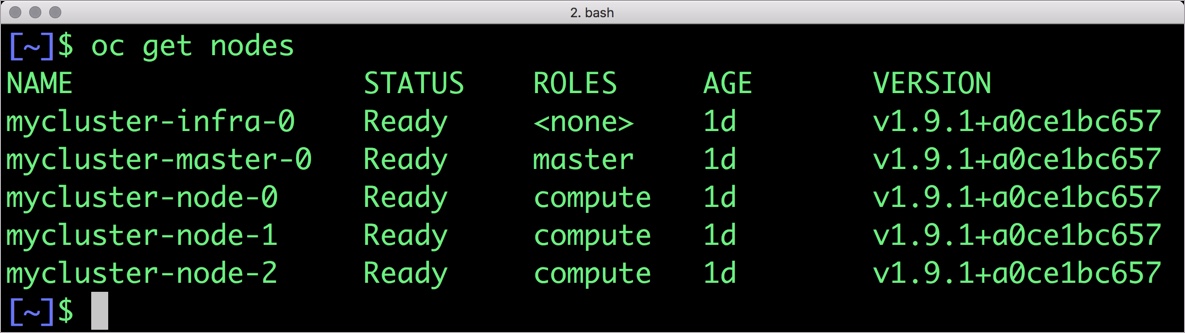
Your OpenShift cluster setup should look similar to the below configuration. It is recommended that you run at least 3 nodes for the HA configuration.
$ oc get nodes
NAME                 STATUS    ROLES     AGE       VERSION
mycluster-infra-0    Ready     none      8d        v1.9.1+a0ce1bc657
mycluster-master-0   Ready     master    8d        v1.9.1+a0ce1bc657
mycluster-node-0     Ready     compute   8d        v1.9.1+a0ce1bc657
mycluster-node-1     Ready     compute   8d        v1.9.1+a0ce1bc657
mycluster-node-2     Ready     compute   8d        v1.9.1+a0ce1bc657
Though almost all the steps can be performed through the OpenShift Console, we are using the oc CLI. Please note that most of the kubectl commands are available through oc tool. You may find the tools used interchangeably.
Since OpenShift is based on Kubernetes, the steps involved in installing Portworx are not very different from the standard Kubernetes installation. Portworx documentation has a detailed guide with the prerequisites and all the steps to install on OpenShift.
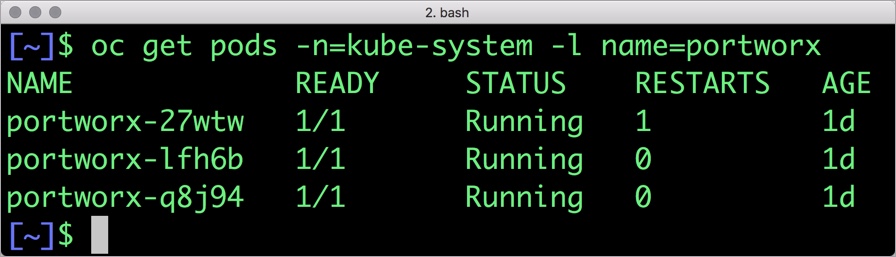
Before proceeding further, ensure that Portworx is up and running on OpenShift.
$ oc get pods -n=kube-system -l name=portworx
portworx-27wtw   1/1       Running   1          1d
portworx-lfh6b   1/1       Running   0          1d
portworx-q8j94   1/1       Running   0          1d
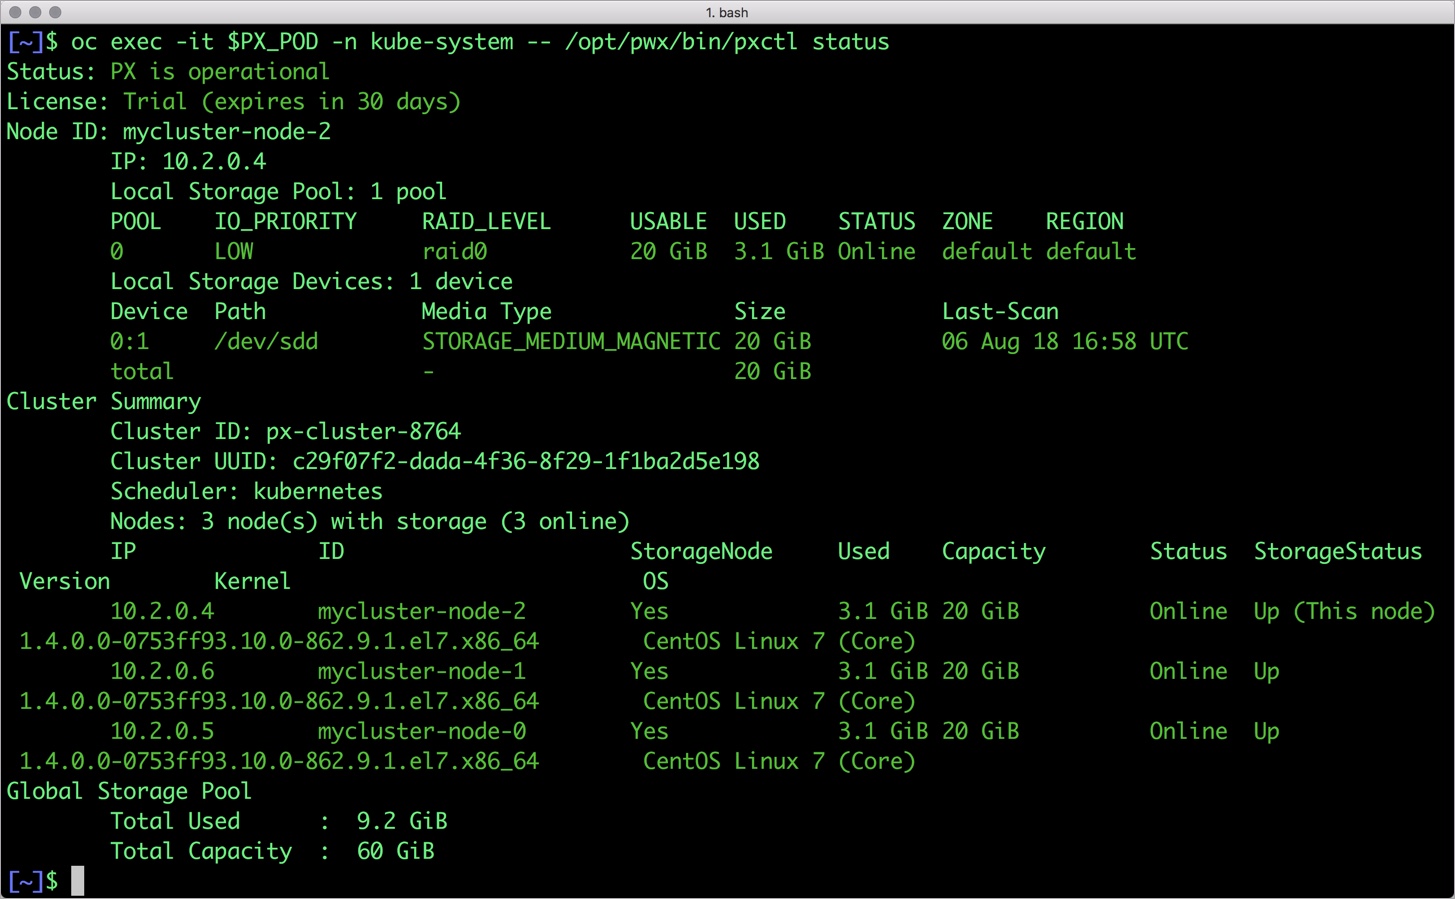
We can check the status of Portworx by running the following commands:
$ PX_POD=$(oc get pods -l name=portworx -n kube-system -o jsonpath='{.items[0].metadata.name}')

$ oc exec -it $PX_POD -n kube-system -- /opt/pwx/bin/pxctl status
Status: PX is operational
License: Trial (expires in 30 days)
Node ID: mycluster-node-2
	IP: 10.2.0.4
 	Local Storage Pool: 1 pool
	POOL	IO_PRIORITY	RAID_LEVEL	USABLE	USED	STATUS	ZONE	REGION
	0	LOW		raid0		20 GiB	3.1 GiB	Online	default	default
	Local Storage Devices: 1 device
	Device	Path		Media Type		Size		Last-Scan
	0:1	/dev/sdd	STORAGE_MEDIUM_MAGNETIC	20 GiB		06 Aug 18 16:58 UTC
	total			-			20 GiB
Cluster Summary
	Cluster ID: px-cluster-8764
	Cluster UUID: c29f07f2-dada-4f36-8f29-1f1ba2d5e198
	Scheduler: kubernetes
	Nodes: 3 node(s) with storage (3 online)
	IP		ID			StorageNode	Used	Capacity	Status	StorageStatus  	Version		Kernel				OS
	10.2.0.4	mycluster-node-2	Yes		3.1 GiB	20 GiB		Online	Up (This node) 	1.4.0.0-0753ff93.10.0-862.9.1.el7.x86_64	CentOS Linux 7 (Core)
	10.2.0.6	mycluster-node-1	Yes		3.1 GiB	20 GiB		Online	Up	       	1.4.0.0-0753ff93.10.0-862.9.1.el7.x86_64	CentOS Linux 7 (Core)
	10.2.0.5	mycluster-node-0	Yes		3.1 GiB	20 GiB		Online	Up	       	1.4.0.0-0753ff93.10.0-862.9.1.el7.x86_64	CentOS Linux 7 (Core)
Global Storage Pool
	Total Used    	:  9.2 GiB
	Total Capacity	:  60 GiB
Once OpenShift Origin cluster is up and running and Portworx is installed and configured, we will deploy a highly available MySQL database.
Through storage class objects, an admin can define different classes of Portworx volumes that are offered in a cluster. These classes will be used during the dynamic provisioning of volumes. The storage class defines the replication factor, IO profile (e.g. for a database or a CMS), and priority (e.g. SSD or HDD). These parameters impact the availability and throughput of workload and can be specified for each volume. This is important because a production database will have different requirements than a development Jenkins cluster.
In this example, the storage class that we deploy has a replication factor of 3 with I/O profile set to “db,” and priority set to “high.” This means that the storage will be optimized for low latency database workloads like MySQL and automatically placed on the highest performance storage available in the cluster. Notice that we also mention the filesystem, xfs in the storage class.
$ cat > px-mysql-sc.yaml << EOF
kind: StorageClass
apiVersion: storage.k8s.io/v1beta1
metadata:
    name: px-ha-sc
provisioner: kubernetes.io/portworx-volume
parameters:
   repl: "3"
   io_profile: "db"
   io_priority: "high"
   fs: "xfs"
EOF
$ oc create -f px-mysql-sc.yaml
storageclass.storage.k8s.io "px-ha-sc" created

$ oc get sc
NAME                PROVISIONER                     AGE
px-ha-sc            kubernetes.io/portworx-volume   10s
stork-snapshot-sc   stork-snapshot                  3d
Create the storage class and verify its available in the default namespace.
$ oc create -f px-mysql-sc.yaml
storageclass.storage.k8s.io "px-ha-sc" created

$ oc get sc
NAME                PROVISIONER                     AGE
generic (default)   kubernetes.io/azure-disk        52m
px-ha-sc            kubernetes.io/portworx-volume   13s
stork-snapshot-sc   stork-snapshot                  17m
We can now create a Persistent Volume Claim (PVC) based on the Storage Class. Thanks to dynamic provisioning, the claims will be created without explicitly provisioning a persistent volume (PV).
$ cat > px-mysql-pvc.yaml << EOF
kind: PersistentVolumeClaim
apiVersion: v1
metadata:
   name: px-mysql-pvc
   annotations:
     volume.beta.kubernetes.io/storage-class: px-ha-sc
spec:
   accessModes:
     - ReadWriteOnce
   resources:
     requests:
       storage: 1Gi
EOF

$
persistentvolumeclaim "px-mysql-pvc" created

$ oc  get pvc
NAME           STATUS    VOLUME                                     CAPACITY   ACCESS MODES   STORAGECLASS   AGE
px-mysql-pvc   Bound     pvc-739a7151-9a8d-11e8-9135-000d3a1a1cdf   1Gi        RWO            px-ha-sc       13s
Finally, let’s create a MySQL instance as a Kubernetes deployment object. For simplicity’s sake, we will just be deploying a single mysql pod. Because Portworx provides synchronous replication for High Availability, a single MySQL instance might be the best deployment option for your MySQL database. Portworx can also provide backing volumes for multi-node MySQL cluster. The choice is yours.
$ cat > px-mysql-app.yaml << EOF
apiVersion: extensions/v1beta1
kind: Deployment
metadata:
  name: mysql
spec:
  strategy:
    rollingUpdate:
      maxSurge: 1
      maxUnavailable: 1
    type: RollingUpdate
  replicas: 1
  template:
    metadata:
      labels:
        app: mysql
    spec:
      schedulerName: stork
      containers:
      - name: mysql
        image: mysql:5.6
        imagePullPolicy: "Always"
        env:
        - name: MYSQL_ROOT_PASSWORD
          value: password
        ports:
        - containerPort: 3306
        volumeMounts:
        - mountPath: /var/lib/mysql
          name: mysql-data
      volumes:
      - name: mysql-data
        persistentVolumeClaim:
          claimName: px-mysql-pvc
EOF
$ oc create -f px-mysql-app.yaml
deployment "mysql" created
The MySQL deployment defined above is explicitly associated with the PVC, px-mysql-pvc created in the previous step.
This deployment creates a single pod running MySQL backed by Portworx.
$ oc get pods
NAME                       READY     STATUS    RESTARTS   AGE
docker-registry-2-7dwtc    1/1       Running   1          1d
mysql-654cc68f68-gxxbd     1/1       Running   0          22s
registry-console-1-j9cg2   1/1       Running   1          1d
router-1-lqsxs             1/1       Running   1          1d
We can inspect the Portworx volume by accessing the pxctl tool running with the MySQL pod.
$ VOL=`oc get pvc | grep px-mysql-pvc | awk '{print $3}'`
$ PX_POD=$(oc get pods -l name=portworx -n kube-system -o jsonpath='{.items[0].metadata.name}')
$ oc exec -it $PX_POD -n kube-system -- /opt/pwx/bin/pxctl volume inspect ${VOL}
Volume	:  984374852040473937
	Name            	 :  pvc-739a7151-9a8d-11e8-9135-000d3a1a1cdf
	Size            	 :  1.0 GiB
	Format          	 :  xfs
	HA              	 :  3
	IO Priority     	 :  LOW
	Creation time   	 :  Aug 7 22:01:35 UTC 2018
	Shared          	 :  no
	Status          	 :  up
	State           	 :  Attached: mycluster-node-1 (10.2.0.6)
	Device Path     	 :  /dev/pxd/pxd984374852040473937
	Labels          	 :  pvc=px-mysql-pvc
	Reads           	 :  138
	Reads MS        	 :  62
	Bytes Read      	 :  2371584
	Writes          	 :  659
	Writes MS       	 :  96013
	Bytes Written   	 :  172965888
	IOs in progress 	 :  0
	Bytes used      	 :  126 MiB
	Replica sets on nodes:
		Set 0
		  Node 		 : 10.2.0.6 (Pool 0)
		  Node 		 : 10.2.0.5 (Pool 0)
		  Node 		 : 10.2.0.4 (Pool 0)
	Replication Status	 :  Up
	Volume consumers	 :
		- Name           : mysql-654cc68f68-gxxbd (e9daceb6-9a8d-11e8-9135-000d3a1a1cdf) (Pod)
		  Namespace      : default
		  Running on     : mycluster-node-1
		  Controlled by  : mysql-654cc68f68 (ReplicaSet)
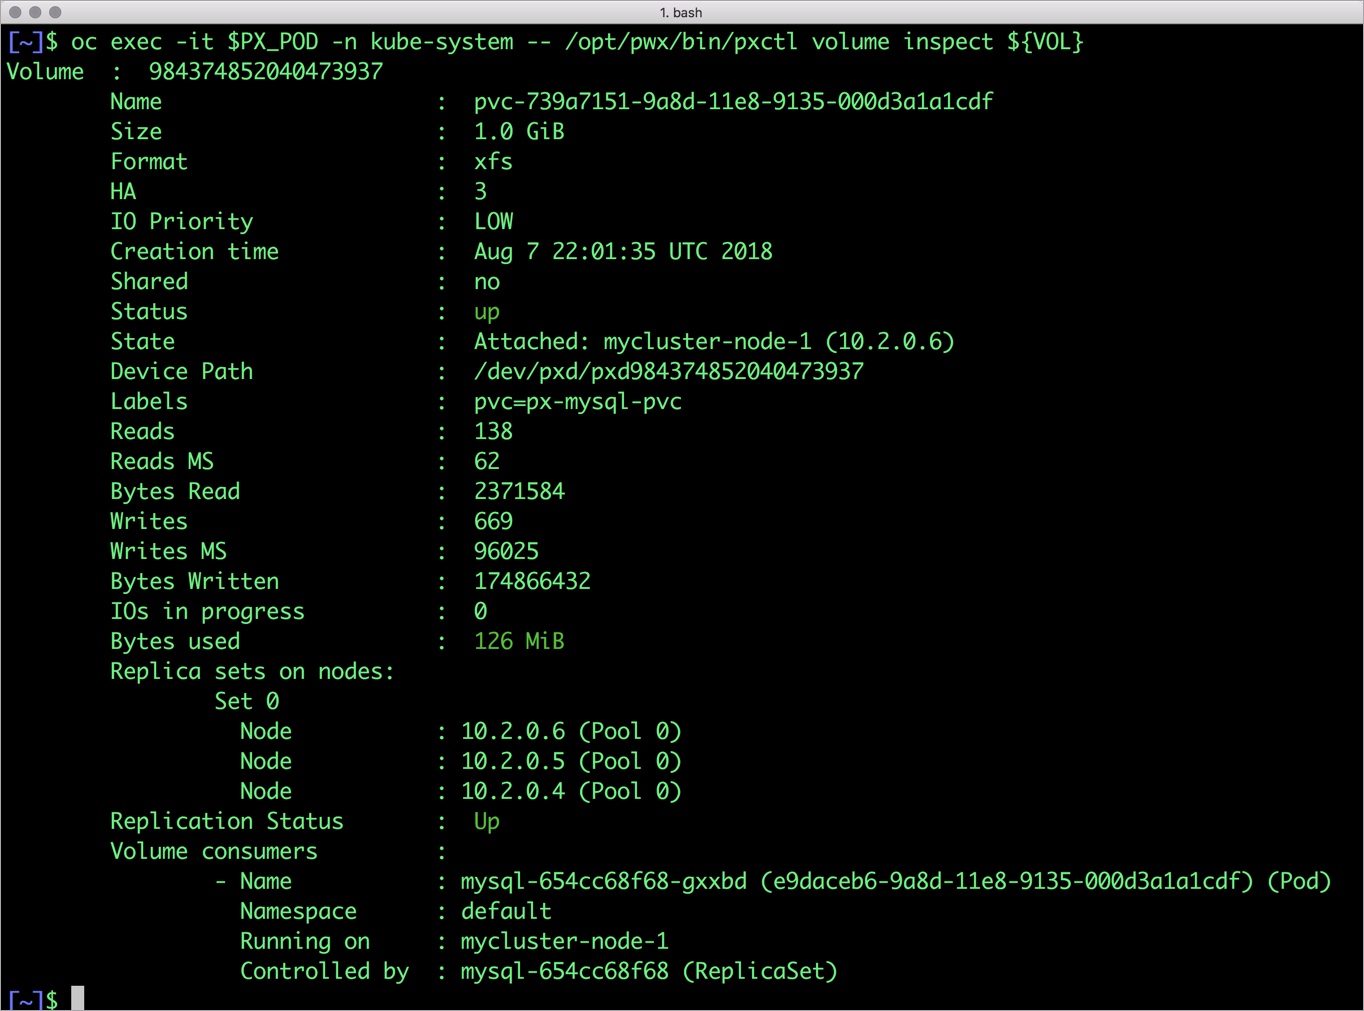
The output from the above command confirms the creation of volumes that are backing MySQL database instance.
Let’s populate the database with some sample data.
We will first find the pod that’s running MySQL to access the shell.
$ POD=`oc get pods -l app=mysql | grep Running | grep 1/1 | awk '{print $1}'`

$ oc exec -it $POD -- mysql -uroot -ppassword
Welcome to the MySQL monitor.  Commands end with ; or \g.
Your MySQL connection id is 1
Server version: 5.6.40 MySQL Community Server (GPL)

Copyright (c) 2000, 2018, Oracle and/or its affiliates. All rights reserved.

Oracle is a registered trademark of Oracle Corporation and/or its
affiliates. Other names may be trademarks of their respective
owners.

Type 'help;' or '\h' for help. Type '\c' to clear the current input statement.

mysql>
Now that we are inside the shell, we can populate create a sample database and table.
mysql> CREATE DATABASE `classicmodels`;

mysql> USE `classicmodels`;

mysql> CREATE TABLE `offices` (
  `officeCode` varchar(10) NOT NULL,
  `city` varchar(50) NOT NULL,
  `phone` varchar(50) NOT NULL,
  `addressLine1` varchar(50) NOT NULL,
  `addressLine2` varchar(50) DEFAULT NULL,
  `state` varchar(50) DEFAULT NULL,
  `country` varchar(50) NOT NULL,
  `postalCode` varchar(15) NOT NULL,
  `territory` varchar(10) NOT NULL,
  PRIMARY KEY (`officeCode`)
) ENGINE=InnoDB DEFAULT CHARSET=latin1;

mysql> insert  into `offices`(`officeCode`,`city`,`phone`,`addressLine1`,`addressLine2`,`state`,`country`,`postalCode`,`territory`) values
('1','San Francisco','+1 650 219 4782','100 Market Street','Suite 300','CA','USA','94080','NA'),
('2','Boston','+1 215 837 0825','1550 Court Place','Suite 102','MA','USA','02107','NA'),
('3','NYC','+1 212 555 3000','523 East 53rd Street','apt. 5A','NY','USA','10022','NA'),
('4','Paris','+33 14 723 4404','43 Rue Jouffroy D\'abbans',NULL,NULL,'France','75017','EMEA'),
('5','Tokyo','+81 33 224 5000','4-1 Kioicho',NULL,'Chiyoda-Ku','Japan','102-8578','Japan'),
('6','Sydney','+61 2 9264 2451','5-11 Wentworth Avenue','Floor #2',NULL,'Australia','NSW 2010','APAC'),
('7','London','+44 20 7877 2041','25 Old Broad Street','Level 7',NULL,'UK','EC2N 1HN','EMEA');
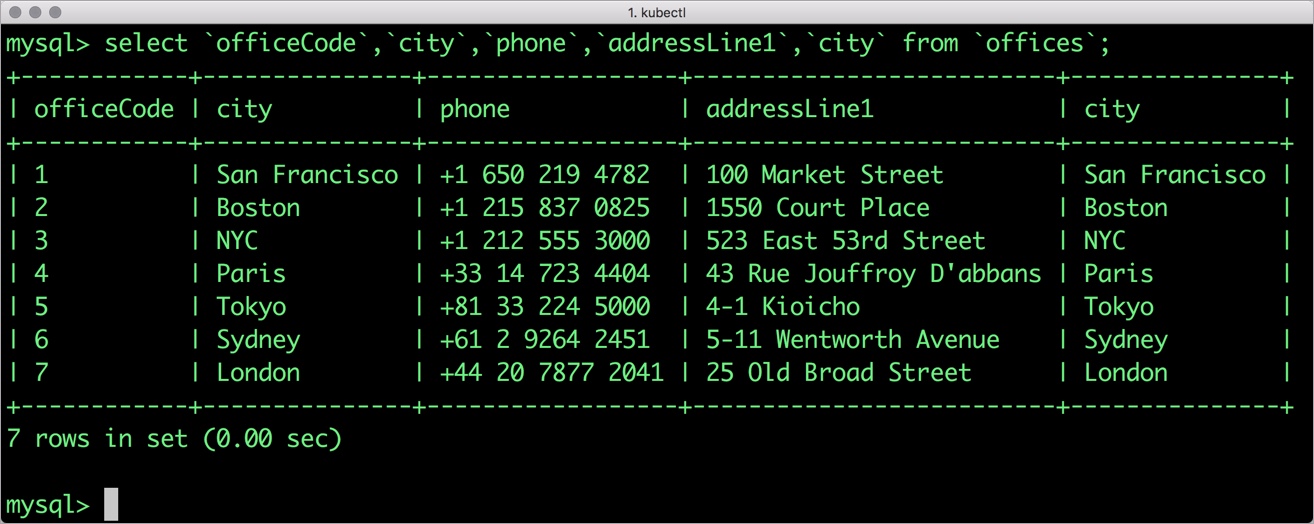
Let’s run a few queries on the table.
mysql> select `officeCode`,`city`,`phone`,`addressLine1`,`city` from `offices`;
+------------+---------------+------------------+--------------------------+---------------+
| officeCode | city          | phone            | addressLine1             | city          |
+------------+---------------+------------------+--------------------------+---------------+
| 1          | San Francisco | +1 650 219 4782  | 100 Market Street        | San Francisco |
| 2          | Boston        | +1 215 837 0825  | 1550 Court Place         | Boston        |
| 3          | NYC           | +1 212 555 3000  | 523 East 53rd Street     | NYC           |
| 4          | Paris         | +33 14 723 4404  | 43 Rue Jouffroy D'abbans | Paris         |
| 5          | Tokyo         | +81 33 224 5000  | 4-1 Kioicho              | Tokyo         |
| 6          | Sydney        | +61 2 9264 2451  | 5-11 Wentworth Avenue    | Sydney        |
| 7          | London        | +44 20 7877 2041 | 25 Old Broad Street      | London        |
+------------+---------------+------------------+--------------------------+---------------+
7 rows in set (0.01 sec)
Find all the offices in USA.
mysql> select `officeCode`, `city`, `phone`  from `offices` where `country` = "USA";
+------------+---------------+-----------------+
| officeCode | city          | phone           |
+------------+---------------+-----------------+
| 1          | San Francisco | +1 650 219 4782 |
| 2          | Boston        | +1 215 837 0825 |
| 3          | NYC           | +1 212 555 3000 |
+------------+---------------+-----------------+
3 rows in set (0.00 sec)
Exit from the MySQL shell to return to the host.
Now, let’s simulate node failure by cordoning off the OpenShift node on which MySQL is running.
$ NODE=`oc get pods -l app=mysql -o wide | grep -v NAME | awk '{print $7}'`

$ oc adm cordon ${NODE}
node "mycluster-node-1" cordoned
The above command disabled scheduling on one of the nodes.
$ oc get nodes
NAME                                            STATUS                     ROLES     AGE       VERSION
NAME                 STATUS                     ROLES     AGE       VERSION
mycluster-infra-0    Ready                          1h        v1.9.1+a0ce1bc657
mycluster-master-0   Ready                      master    1h        v1.9.1+a0ce1bc657
mycluster-node-0     Ready                      compute   1h        v1.9.1+a0ce1bc657
mycluster-node-1     Ready,SchedulingDisabled   compute   1h        v1.9.1+a0ce1bc657
mycluster-node-2     Ready                      compute   1h        v1.9.1+a0ce1bc657
Now, let’s go ahead and delete the mysqlDB pod.
$ POD=`oc get pods -l app=mysql -o wide | grep -v NAME | awk '{print $1}'`
$ oc delete pod ${POD}
pod "mysql-654cc68f68-gxxbd" deleted
As soon as the pod is deleted, it is relocated to the node with the replicated data. STorage ORchestrator for Kubernetes (STORK), a Portworx-contributed open source storage scheduler, ensures that the pod is co-located on the exact node where the data is stored. It ensures that an appropriate node is selected for scheduling the pod.
Let’s verify this by running the below command. We will notice that a new pod has been created and scheduled in a different node.
$ oc get pods -l app=mysql -o wide
NAME                     READY     STATUS    RESTARTS   AGE       IP               NODE
mysql-97b758c4c-sssfg   1/1       Running   0          18s       10.129.0.7   mycluster-node-2
Let’s uncordon the node to bring it back to action.
$ oc adm uncordon ${NODE}
node "mycluster-node-1" uncordoned
Finally, let’s verify that the data is still available.
Let’s find the pod name and run the ‘exec’ command, and then access the MySQL shell.
$ oc exec -it $POD -- mysql -uroot -ppassword
Welcome to the MySQL monitor.  Commands end with ; or \g.
Your MySQL connection id is 1
Server version: 5.6.40 MySQL Community Server (GPL)

Copyright (c) 2000, 2018, Oracle and/or its affiliates. All rights reserved.

Oracle is a registered trademark of Oracle Corporation and/or its
affiliates. Other names may be trademarks of their respective
owners.

Type 'help;' or '\h' for help. Type '\c' to clear the current input statement.

mysql>
We will query the database to verify that the data is intact.
mysql> USE `classicmodels`;
mysql> select `officeCode`, `city`, `phone`  from `offices` where `country` = "USA";
+------------+---------------+-----------------+
| officeCode | city          | phone           |
+------------+---------------+-----------------+
| 1          | San Francisco | +1 650 219 4782 |
| 2          | Boston        | +1 215 837 0825 |
| 3          | NYC           | +1 212 555 3000 |
+------------+---------------+-----------------+
3 rows in set (0.00 sec)
Observe that the database table is still there and all the content is intact! Exit from the client shell to return to the host.
Portworx supports creating snapshots for OpenShift PVCs.
Let’s create a snapshot for the PVC we created for MySQL.
cat >  px-mysql-snap.yaml << EOF
apiVersion: volumesnapshot.external-storage.k8s.io/v1
kind: VolumeSnapshot
metadata:
  name: px-mysql-snapshot
  namespace: default
spec:
  persistentVolumeClaimName: px-mysql-pvc
EOF
$ oc create -f px-mysql-snap.yaml
volumesnapshot.volumesnapshot.external-storage.k8s.io "px-mysql-snapshot" created
Verify the creation of volume snapshot.
$ oc get volumesnapshot
NAME                AGE
px-mysql-snapshot   30s
$ oc get volumesnapshotdatas
NAME                                                       AGE
k8s-volume-snapshot-6ab731c7-9278-11e8-b018-e2f4b6cbb690   34s
With the snapshot in place, let’s go ahead and delete the database.
$ POD=`oc get pods -l app=mysql | grep Running | grep 1/1 | awk '{print $1}'`
$ oc exec -it $POD -- mysql -uroot -ppassword
drop database classicmodels;
Since snapshots are just like volumes, we can use it to start a new instance of MySQL. Let’s create a new instance of MySQL by restoring the snapshot data.
$ cat > px-mysql-snap-pvc << EOF
apiVersion: v1
kind: PersistentVolumeClaim
metadata:
  name: px-mysql-snap-clone
  annotations:
    snapshot.alpha.kubernetes.io/snapshot: px-mysql-snapshot
spec:
  accessModes:
     - ReadWriteOnce
  storageClassName: stork-snapshot-sc
  resources:
    requests:
      storage: 2Gi
EOF

$ oc create -f px-mysql-snap-pvc.yaml
persistentvolumeclaim "px-mysql-snap-clone" created
From the new PVC, we will create a MySQL pod.
$ cat < px-mysql-snap-restore.yaml >> EOF
apiVersion: extensions/v1beta1
kind: Deployment
metadata:
  name: mysql-snap
spec:
  strategy:
    rollingUpdate:
      maxSurge: 1
      maxUnavailable: 1
    type: RollingUpdate
  replicas: 1
  template:
    metadata:
      labels:
        app: mysql-snap
    spec:
      affinity:
        nodeAffinity:
          requiredDuringSchedulingIgnoredDuringExecution:
            nodeSelectorTerms:
            - matchExpressions:
              - key: px/running
                operator: NotIn
                values:
                - "false"
              - key: px/enabled
                operator: NotIn
                values:
                - "false"
    spec:
      containers:
      - name: mysql
        image: mysql:5.6
        imagePullPolicy: "Always"
        env:
        - name: MYSQL_ROOT_PASSWORD
          value: password
        ports:
        - containerPort: 3306
        volumeMounts:
        - mountPath: /var/lib/mysql
          name: mysql-data
      volumes:
      - name: mysql-data
        persistentVolumeClaim:
          claimName: px-mysql-snap-clone
EOF
$ oc create -f px-mysql-snap-restore.yaml
deployment "mysql-snap" created
Verify that the new pod is in running state.
$ oc get pods -l app=mysql-snap
NAME                         READY     STATUS    RESTARTS   AGE
mysql-snap-5ddd6b6848-bb6wx   1/1       Running   0          30s
Finally, let’s access the sample data created earlier in the walkthrough.
$ POD=`oc get pods -l app=mysql-snap | grep Running | grep 1/1 | awk '{print $1}'`
$ oc exec -it $POD -- mysql -uroot -ppassword
mysql> USE `classicmodels`;
mysql> select `officeCode`, `city`, `phone`  from `offices` where `country` = "USA";
+------------+---------------+-----------------+
| officeCode | city          | phone           |
+------------+---------------+-----------------+
| 1          | San Francisco | +1 650 219 4782 |
| 2          | Boston        | +1 215 837 0825 |
| 3          | NYC           | +1 212 555 3000 |
+------------+---------------+-----------------+
3 rows in set (0.00 sec)
Notice that the collection is still there with the data intact.
The above steps involved creating a local snapshot and using it to restore our MySQL database. This is useful for testing upgrades or feature branches, but is not typically what you would do to create a real backup of your application. For that, we will use Portworx Cloudsnaps, which work just like the snapshots we saw above, except that they will be pushed to Azure Blob Storage for safekeeping until they are needed. Then, we can simply pull the Kubernetes PV down into our environment, and redeploy our pods using the backed up persistent volume.
We’ll use kubectl to take a snapshot of our MySQL volume, and push it Azure Blob Storage. We will do these commands manually in this blog but in practice, you would automate this process using the Portworx SDK. This allows you to backup your database on an hourly basis, for example. The first backup uploaded to the cloud is a full backup. After that, subsequent backups are incremental. After 6 incremental backups, every 7th backup is a full backup.
We will need to authenticate to Azure in order post our PV volume snapshot. For this, we will use pxctl credentials create command. These cloud credentials are stored in an external secret store. Before you use the command to create credentials, ensure that you have configured a secret provider of your choice. Here is a summary of available options.
# pxctl credentials create

NAME:
   pxctl credentials create - Create a credential for cloud-snap

USAGE:
   pxctl credentials create [command options] [arguments...]

OPTIONS:
   --provider value                            Object store provider type [s3, azure, google]
   --s3-access-key value
   --s3-secret-key value
   --s3-region value
   --s3-endpoint value                         Endpoint of the S3 server, in host:port format
   --s3-disable-ssl
   --azure-account-name value
   --azure-account-key value
   --google-project-id value
   --google-json-key-file value
   --encryption-passphrase value,
   --enc value  Passphrase to be used for encrypting data in the cloudsnaps
For Azure, we will run the following command to create an Azure account key
# pxctl credentials create --provider azure --azure-account-name portworxtest --azure-account-key zbJSSpOOWENBGHSY12ZLERJJV
The pxctl credentials create enables the user to configure the credentials for each supported cloud provider.
An additional encryption key can also be provided for each credential. If provided, all the data being backed up to the cloud will be encrypted using this key. The same key needs to be provided when configuring the credentials for restore to be able to decrypt the data successfully.
Now, we will use pxctl credentials list to verify the credentials supplied.
# pxctl credentials list


Azure Credentials
UUID                                        ACCOUNT NAME        ENCRYPTION
c0e559a7-8d96-4f28-9556-7d01b2e4df33        portworxtest        false
pxctl credentials list only displays non-secret values of the credentials. Secrets are neither stored locally nor displayed. These credentials will be stored as part of the secret endpoint given for PX for persisting authentication across reboots.
Now that we have our credentials created, we are ready to backup our Kubernetes persistent volume to the cloud.
First we will create a cloud snapshot for a PVC called mysql-data backed by a Portworx volume.
apiVersion: volumesnapshot.external-storage.k8s.io/v1
kind: VolumeSnapshot
metadata:
  name: px-mysql-cloud-snapshot
  namespace: default
  annotations:
    portworx/snapshot-type: cloud
spec:
  persistentVolumeClaimName: mysql-data
Once you apply the above object you can check the status of the snapshots using kubectl:
$ kubectl get volumesnapshot
NAME                                      AGE
volumesnapshots/px-mysql-cloud-snapshot   2s
$ kubectl get volumesnapshotdatas
NAME                                                                            AGE
volumesnapshotdatas/k8s-volume-snapshot-2bc36c2d-227f-11e8-a3d4-5a34ec89e61c    1s
The creation of the volumesnapshotdatas object indicates that the snapshot has been created. If you describe the volumesnapshotdatas object you can see the Portworx Cloud Snapshot ID and the PVC for which the snapshot was created.
$ kubectl describe volumesnapshotdatas
Name:         k8s-volume-snapshot-2bc36c2d-227f-11e8-a3d4-5a34ec89e61c
Namespace:
Labels:
Annotations:
API Version:  volumesnapshot.external-storage.k8s.io/v1
Kind:         VolumeSnapshotData
Metadata:
  Cluster Name:
  Creation Timestamp:             2018-03-08T03:17:02Z
  Deletion Grace Period Seconds:
  Deletion Timestamp:
  Resource Version:               29989636
  Self Link:                      /apis/volumesnapshot.external-storage.k8s.io/v1/k8s-volume-snapshot-2bc36c2d-227f-11e8-a3d4-5a34ec89e61c
  UID:                            2bc3a203-227f-11e8-98cc-0214683e8447
Spec:
  Persistent Volume Ref:
    Kind:  PersistentVolume
    Name:  pvc-f782bf5c-20e7-11e8-931d-0214683e8447
  Portworx Volume:
    Snapshot Id:  687c60d0-73cb-4055-a08f-33c5ab8d4d8e/149813028909420894-125009403033610837-incr
  Volume Snapshot Ref:
    Kind:  VolumeSnapshot
    Name:  default/px-mysql-cloud-snapshot-2b2150dd-227f-11e8-98cc-0214683e8447
Status:
  Conditions:
    Last Transition Time:
    Message:
    Reason:
    Status:
    Type:
  Creation Timestamp:
Events:
You may have noticed that we didn’t reference the credentials that we created in a previous step. That is because they were automatically applied by Portworx. If you had multiple sets of credentials, say for Azure and AWS object stores, you would use the cloud-cred-id option in the snapshot spec.
portworx/cloud-cred-id: (Optional) This specifies the credentials UUID if you have configured credentials for multiple cloud providers. In a situation where a single cloud provider is configured, this is not required.
As we saw before, since snapshots are just like volumes, we can use it to start a new instance of MySQL, except this time, instead of using a local snapshot, we will use our restored cloud snapshot. Let’s create a new instance of MySQL by restoring the snapshot data.
$ cat > px-mysql-cloudsnap-pvc << EOF
apiVersion: v1
kind: PersistentVolumeClaim
metadata:
  name: mysql-cloudsnap
  annotations:
    snapshot.alpha.kubernetes.io/snapshot: px-mysql-cloud-snapshot
spec:
  accessModes:
     - ReadWriteOnce
  storageClassName: stork-snapshot-sc
  resources:
    requests:
      storage: 2Gi
EOF

$ oc create -f px-mysql-cloudsnap-pvc.yaml
persistentvolumeclaim "px-mysql-cloudsnap-clone" created
From the new PVC, we will create a MySQL pod.
$ cat < px-mysql-cloudsnap-restore.yaml >> EOF
apiVersion: extensions/v1beta1
kind: Deployment
metadata:
  name: mysql-cloudsnap
spec:
  strategy:
    rollingUpdate:
      maxSurge: 1
      maxUnavailable: 1
    type: RollingUpdate
  replicas: 1
  template:
    metadata:
      labels:
        app: mysql-cloudsnap
    spec:
      affinity:
        nodeAffinity:
          requiredDuringSchedulingIgnoredDuringExecution:
            nodeSelectorTerms:
            - matchExpressions:
              - key: px/running
                operator: NotIn
                values:
                - "false"
              - key: px/enabled
                operator: NotIn
                values:
                - "false"
    spec:
      containers:
      - name: mysql
        image: mysql:5.6
        imagePullPolicy: "Always"
        env:
        - name: MYSQL_ROOT_PASSWORD
          value: password
        ports:
        - containerPort: 3306
        volumeMounts:
        - mountPath: /var/lib/mysql
          name: mysql-data
      volumes:
      - name: mysql-data
        persistentVolumeClaim:
          claimName: px-mysql-cloudsnap-clone
EOF
$ oc create -f px-mysql-snap-restore.yaml
deployment "mysql-cloudsnap" created
Verify that the new pod is in running state.
$ oc get pods -l app=mysql-cloudsnap
NAME                         READY     STATUS    RESTARTS   AGE
mysql-cloudsnap-7bbb8n9918-bb8ee   1/1       Running   0          30s
Finally, let’s access the sample data created earlier in the walkthrough.
$ POD=`oc get pods -l app=mysql-cloudsnap | grep Running | grep 1/1 | awk '{print $1}'`
$ oc exec -it $POD -- mysql -uroot -ppassword
mysql> USE `classicmodels`;
mysql> select `officeCode`, `city`, `phone`  from `offices` where `country` = "USA";
+------------+---------------+-----------------+
| officeCode | city          | phone           |
+------------+---------------+-----------------+
| 1          | San Francisco | +1 650 219 4782 |
| 2          | Boston        | +1 215 837 0825 |
| 3          | NYC           | +1 212 555 3000 |
+------------+---------------+-----------------+
3 rows in set (0.00 sec)
Notice that the collection is still there with the data intact.
Portworx can be easily deployed on Red Hat OpenShift to run stateful workloads in production, including mission-critical data management functions like backup and restore. Through the integration of Portworx and OpenShift, DevOps and DataOps teams can seamlessly run highly available database clusters in OpenShift. They can perform traditional operations such as volume expansion, snapshots, backup and recovery for the cloud-native applications.


