This post is part of our ongoing series on running Kafka on Kubernetes. We’ve published a number of articles about running Kafka on Kubernetes for specific platforms and for specific use cases. If you are looking for a specific Kubernetes platform, check out these related articles.
Running HA Kafka on Azure Kubernetes Service (AKS)
Running HA Kafka on Google Kubernetes Engine (GKE)
Running HA Kafka on Amazon Elastic Container Service for Kubernetes (EKS)
Running HA Kafka on Amazon Elastic Container Service (ECS)
Running HA Kafka on IBM Kubernetes Service (IKS)
Running HA Kafka with Rancher Kubernetes Engine (RKE)
Running HA Kafka on IBM Cloud Private
And now, onto the post…
Red Hat OpenShift is a comprehensive enterprise-grade application platform built for containers powered by Kubernetes. OpenShift lets developers quickly build, develop, and deploy applications on nearly any infrastructure, public or private. It offers enterprises full control over their Kubernetes environments, whether they’re on-premise or in the public cloud, giving teams freedom to build and run applications anywhere.
Portworx recently achieved Red Hat certification for Red Hat OpenShift Container Platform and PX-Enterprise is available in the Red Hat Container Catalog. This certification enables enterprises to confidently run high-performance stateful applications like databases, big and fast data workloads, and machine learning applications on the Red Hat OpenShift Container Platform. Learn more about Portworx & OpenShift in our Product Brief.

Portworx is a cloud native storage platform to run persistent workloads deployed on a variety of orchestration engines including Kubernetes. With Portworx, customers can manage the database of their choice on any infrastructure using any container scheduler. It provides a single data management layer for all stateful services, no matter where they run.
This tutorial is a walk-through of the steps involved in deploying and managing a highly available Kafka cluster on OpenShift as a StatefulSet. Kafka is a popular open source streaming platform that can be used with scenarios such as streaming clickstream data from web applications and sensor data from IoT devices. Portworx customer NIO, for example, uses Kafka to stream data off of self-driving cars. As a stateful application, Kafka itself needs a solution for persistence but so does one of its primary dependencies, ZooKeeper.
In summary, to run an HA Kafka cluster on OpenShift you need to:
- Launch an OpenShift cluster
- Install a cloud native storage solution like Portworx as a daemon set on OpenShift
- Create a storage class defining your storage requirements like replication factor, snapshot policy, and performance profile
- Deploy ZooKeeper as a StatefulSet
- Deploy Kafka as a StatefulSet
- Test failover by killing or cordoning nodes in your cluster
- Perform backup and restore Kafka nodes
How to install and configure an OpenShift Origin cluster
OpenShift Origin can be deployed in a variety of environments ranging from VirtualBox to a public cloud IaaS such as Amazon, Google, Azure. Refer to the official installation guide for the steps involved in setting up your own cluster. For this guide, we run an OpenShift Origin (OKD) cluster in AWS.
Your OpenShift cluster setup should look similar to the below configuration. It is recommended that you run at least 3 nodes for the HA configuration.
$ oc get nodes
NAME                                          STATUS    ROLES          AGE       VERSION
ip-172-31-34-178.us-west-2.compute.internal   Ready     compute        1d        v1.11.0+d4cacc0
ip-172-31-35-140.us-west-2.compute.internal   Ready     infra,master   1d        v1.11.0+d4cacc0
ip-172-31-37-244.us-west-2.compute.internal   Ready     compute        1d        v1.11.0+d4cacc0
ip-172-31-40-7.us-west-2.compute.internal     Ready     compute        1d        v1.11.0+d4cacc0

Though almost all the steps can be performed through the OpenShift Console, we are using the kubectl commands are available through oc tool. You may find the tools used interchangeably.
Installing Portworx in OpenShift
Since OpenShift is based on Kubernetes, the steps involved in installing Portworx are not very different from the standard Kubernetes installation. Portworx documentation has a detailed guide with the prerequisites and all the steps to install on OpenShift.
Before proceeding further, ensure that Portworx is up and running on OpenShift.
$ oc get pods -n=kube-system -l name=portworx
NAME             READY     STATUS    RESTARTS   AGE
portworx-44jt6   1/1       Running   2          1d
portworx-mxgpg   1/1       Running   2          1d
portworx-t9787   1/1       Running   1          1d

Create a storage class for ZooKeeper and Kafka
Once the OKD cluster is up and running, and Portworx is installed and configured, we will deploy a highly available Kafka cluster in Kubernetes.
Through storage class objects, an admin can define different classes of Portworx volumes that are offered in a cluster. These classes will be used during the dynamic provisioning of volumes. The storage class defines the replication factor, I/O profile (e.g., for a database or a CMS), and priority (e.g., SSD or HDD). These parameters impact the availability and throughput of workloads and can be specified for each volume. This is important because a production database will have different requirements than a development Jenkins cluster.
In this step, we will create two storage classes for ZooKeeper and Kafka clusters.
Notice that we the replication factor for ZooKeeper storage class is set to 1. That’s because ZooKeeper servers keep their entire state machine in memory, and write every mutation to a durable WAL (Write Ahead Log) on storage media. When a server crashes, it can recover its previous state by replaying the WAL. To prevent the WAL from growing without bound, ZooKeeper servers will periodically snapshot their in-memory state to storage media. These snapshots can be loaded directly into memory, and all WAL entries that preceded the snapshot may be discarded.
Since ZooKeeper keeps the data in memory with an in-built recovery mechanism, we don’t need to configure Portworx volumes for replication.
We also defined a separate group for ZooKeeper and Kafka. This is helpful if we take 3DSnaps that are consistent across the whole cluster.
$ cat > px-ha-sc.yaml << EOF
kind: StorageClass
apiVersion: storage.k8s.io/v1
metadata:
  name: portworx-sc
provisioner: kubernetes.io/portworx-volume
parameters:
  repl: "1"
  priority_io: "high"
  group: "zk_vg"
---
kind: StorageClass
apiVersion: storage.k8s.io/v1
metadata:
  name: portworx-sc-rep3
provisioner: kubernetes.io/portworx-volume
parameters:
  repl: "3"
  priority_io: "high"
  group: "kafka_vg"
EOF
Create the storage classes and verify their availability in the default namespace.
$ oc create -f px-ha-sc.yaml
storageclass.storage.k8s.io/portworx-sc created
storageclass.storage.k8s.io/portworx-sc-rep3 created

$ oc get sc
NAME                 PROVISIONER                     AGE
portworx-sc         kubernetes.io/portworx-volume   3s
portworx-sc-rep3    kubernetes.io/portworx-volume   3s
stork-snapshot-sc   stork-snapshot                  1d
Deploying ZooKeeper StatefulSet on OKD
As of v0.8, Kafka uses ZooKeeper for storing a variety of configurations as a key/value pair in the ZooKeeper data tree and uses them across the cluster in a distributed fashion. Our first task will be to deploy a 3 node ZooKeeper cluster using a StatefulSet backed by a Portworx volume.
We will then deploy a Kafka StatefulSet which uses our ZooKeeper cluster and also has Portworx volumes with 3 replicas. Using these replicas, we can have fast failover of the Kafka nodes and eliminate the I/O load during the rebuild. Additionally, because Portworx provides HA for Kafka, a typical customer can run fewer Kafka brokers for the same level of reliability, significantly reducing compute costs. Running 3 brokers instead of 5 is a 40% cost savings.
We will start by creating three objects:
- A ConfigMap to inject configuration data into our ZooKeeper containers
- A PodDisruptionBudget to limit the number of concurrent disruptions that ZooKeeper application experiences when we do maintenance operations on Kubernetes nodes
- and finally, a Service for ZooKeeper so that Kafka can connect to the ZooKeeper cluster.
$ cat > zk-config.yaml << EOF
apiVersion: v1
kind: ConfigMap
metadata:
  name: zk-config
data:
  ensemble: "zk-0;zk-1;zk-2"
  jvm.heap: "512M"
  tick: "2000"
  init: "10"
  sync: "5"
  client.cnxns: "60"
  snap.retain: "3"
  purge.interval: "1"
---
apiVersion: policy/v1beta1
kind: PodDisruptionBudget
metadata:
  name: zk-budget
spec:
  selector:
    matchLabels:
      app: zk
  minAvailable: 2
---
apiVersion: v1
kind: Service
metadata:
  name: zk-headless
  labels:
    app: zk-headless
spec:
  ports:
  - port: 2888
    name: server
  - port: 3888
    name: leader-election
  clusterIP: None
  selector:
    app: zk
EOF
$ oc create -f zk-config.yaml
configmap/zk-config created
poddisruptionbudget.policy/zk-budget created
service/zk-headless created
Now, deploy the ZooKeeper StatefulSet.
$ cat > zk-ss.yaml << EOF
apiVersion: apps/v1
kind: StatefulSet
metadata:
  name: zk
spec:
  selector:
    matchLabels:
      app: zk
  serviceName: zk-headless
  replicas: 3
  template:
    metadata:
      labels:
        app: zk
      annotations:
        pod.alpha.kubernetes.io/initialized: "true"
    spec:
      # Use the stork scheduler to enable more efficient placement of the pods
      schedulerName: stork
      affinity:
        nodeAffinity:
          requiredDuringSchedulingIgnoredDuringExecution:
            nodeSelectorTerms:
            - matchExpressions:
              - key: px/running
                operator: NotIn
                values:
                - "false"
              - key: px/enabled
                operator: NotIn
                values:
                - "false"
        podAntiAffinity:
          requiredDuringSchedulingIgnoredDuringExecution:
            - labelSelector:
                matchExpressions:
                  - key: "app"
                    operator: In
                    values:
                    - zk-headless
              topologyKey: "kubernetes.io/hostname"
      containers:
      - name: k8szk
        imagePullPolicy: Always
        image: gcr.io/google_samples/k8szk:v1
        ports:
        - containerPort: 2181
          name: client
        - containerPort: 2888
          name: server
        - containerPort: 3888
          name: leader-election
        env:
        - name : ZK_ENSEMBLE
          valueFrom:
            configMapKeyRef:
              name: zk-config
              key: ensemble
        - name : ZK_HEAP_SIZE
          valueFrom:
            configMapKeyRef:
                name: zk-config
                key: jvm.heap
        - name : ZK_TICK_TIME
          valueFrom:
            configMapKeyRef:
                name: zk-config
                key: tick
        - name : ZK_INIT_LIMIT
          valueFrom:
            configMapKeyRef:
                name: zk-config
                key: init
        - name : ZK_SYNC_LIMIT
          valueFrom:
            configMapKeyRef:
                name: zk-config
                key: tick
        - name : ZK_MAX_CLIENT_CNXNS
          valueFrom:
            configMapKeyRef:
                name: zk-config
                key: client.cnxns
        - name: ZK_SNAP_RETAIN_COUNT
          valueFrom:
            configMapKeyRef:
                name: zk-config
                key: snap.retain
        - name: ZK_PURGE_INTERVAL
          valueFrom:
            configMapKeyRef:
                name: zk-config
                key: purge.interval
        - name: ZK_CLIENT_PORT
          value: "2181"
        - name: ZK_SERVER_PORT
          value: "2888"
        - name: ZK_ELECTION_PORT
          value: "3888"
        command:
        - sh
        - -c
        - zkGenConfig.sh && zkServer.sh start-foreground
        readinessProbe:
          exec:
            command:
            - "zkOk.sh"
          initialDelaySeconds: 15
          timeoutSeconds: 5
        livenessProbe:
          exec:
            command:
            - "zkOk.sh"
          initialDelaySeconds: 15
          timeoutSeconds: 5
        volumeMounts:
        - name: datadir
          mountPath: /var/lib/zookeeper
      securityContext:
        runAsUser: 1000
        fsGroup: 1000
  volumeClaimTemplates:
  - metadata:
      name: datadir
    spec:
      storageClassName: portworx-sc
      accessModes: [ "ReadWriteOnce" ]
      resources:
        requests:
          storage: 2Gi
EOF
$ oc create -f zk-ss.yaml
statefulset.apps/zk created
Verify that all the pods are in the Running state before proceeding further.
$ oc get pods -l app=zk
NAME   READY   STATUS    RESTARTS   AGE
zk-0   1/1     Running   0          5m
zk-1   1/1     Running   0          4m
zk-2   1/1     Running   0          3m

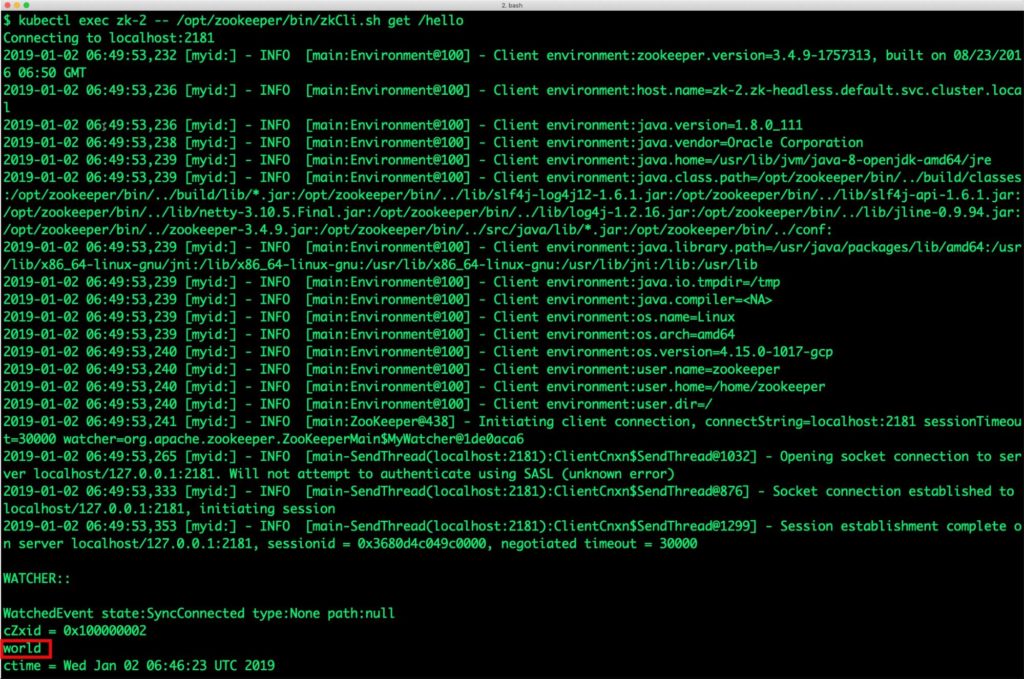
Let’s ensure that the ZooKeeper cluster is fully functional by creating and retrieving values from different nodes.
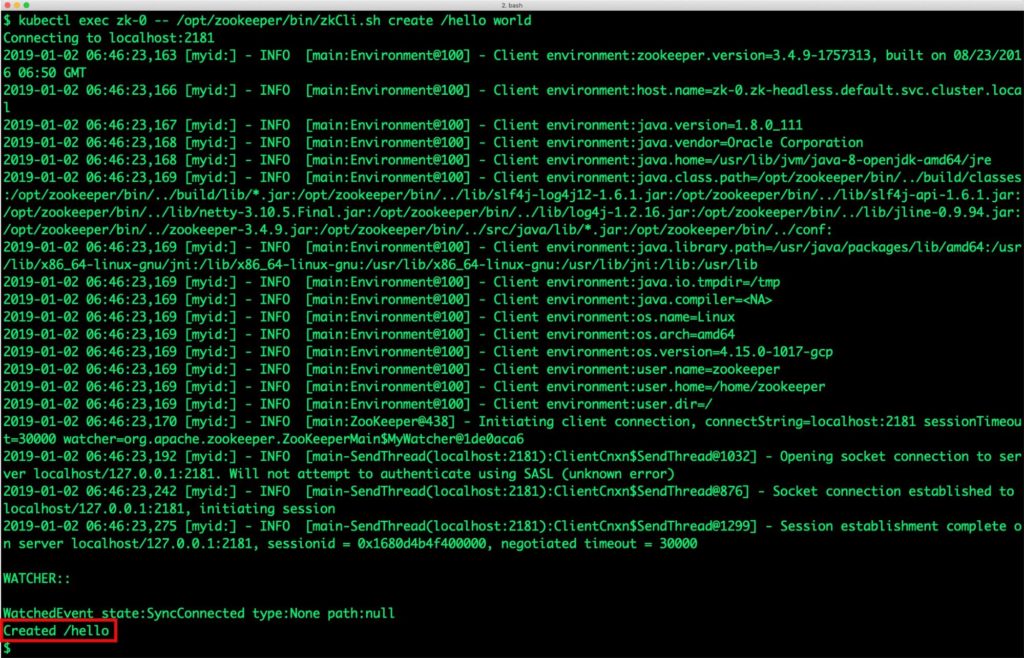
We create a key/value pair in node zk-0.
$ oc exec zk-0 -- /opt/zookeeper/bin/zkCli.sh create /hello world
Connecting to localhost:2181
2019-01-02 06:46:23,163 [myid:] - INFO  [main:Environment@100] - Client environment:zookeeper.version=3.4.9-1757313, built on 08/23/2016 06:50 GMT
2019-01-02 06:46:23,166 [myid:] - INFO  [main:Environment@100] - Client environment:host.name=zk-0.zk-headless.default.svc.cluster.local
2019-01-02 06:46:23,167 [myid:] - INFO  [main:Environment@100] - Client environment:java.version=1.8.0_111
2019-01-02 06:46:23,168 [myid:] - INFO  [main:Environment@100] - Client environment:java.vendor=Oracle Corporation
2019-01-02 06:46:23,168 [myid:] - INFO  [main:Environment@100] - Client environment:java.home=/usr/lib/jvm/java-8-openjdk-amd64/jre
2019-01-02 06:46:23,169 [myid:] - INFO  [main:Environment@100] - Client environment:java.class.path=/opt/zookeeper/bin/../build/classes:/opt/zookeeper/bin/../build/lib/*.jar:/opt/zookeeper/bin/../lib/slf4j-log4j12-1.6.1.jar:/opt/zookeeper/bin/../lib/slf4j-api-1.6.1.jar:/opt/zookeeper/bin/../lib/netty-3.10.5.Final.jar:/opt/zookeeper/bin/../lib/log4j-1.2.16.jar:/opt/zookeeper/bin/../lib/jline-0.9.94.jar:/opt/zookeeper/bin/../zookeeper-3.4.9.jar:/opt/zookeeper/bin/../src/java/lib/*.jar:/opt/zookeeper/bin/../conf:
2019-01-02 06:46:23,169 [myid:] - INFO  [main:Environment@100] - Client environment:java.library.path=/usr/java/packages/lib/amd64:/usr/lib/x86_64-linux-gnu/jni:/lib/x86_64-linux-gnu:/usr/lib/x86_64-linux-gnu:/usr/lib/jni:/lib:/usr/lib
2019-01-02 06:46:23,169 [myid:] - INFO  [main:Environment@100] - Client environment:java.io.tmpdir=/tmp
2019-01-02 06:46:23,169 [myid:] - INFO  [main:Environment@100] - Client environment:java.compiler=
2019-01-02 06:46:23,169 [myid:] - INFO  [main:Environment@100] - Client environment:os.name=Linux
2019-01-02 06:46:23,169 [myid:] - INFO  [main:Environment@100] - Client environment:os.arch=amd64
2019-01-02 06:46:23,169 [myid:] - INFO  [main:Environment@100] - Client environment:os.version=4.15.0-1017-gcp
2019-01-02 06:46:23,169 [myid:] - INFO  [main:Environment@100] - Client environment:user.name=zookeeper
2019-01-02 06:46:23,169 [myid:] - INFO  [main:Environment@100] - Client environment:user.home=/home/zookeeper
2019-01-02 06:46:23,169 [myid:] - INFO  [main:Environment@100] - Client environment:user.dir=/
2019-01-02 06:46:23,170 [myid:] - INFO  [main:ZooKeeper@438] - Initiating client connection, connectString=localhost:2181 sessionTimeout=30000 watcher=org.apache.zookeeper.ZooKeeperMain$MyWatcher@1de0aca6
2019-01-02 06:46:23,192 [myid:] - INFO  [main-SendThread(localhost:2181):ClientCnxn$SendThread@1032] - Opening socket connection to server localhost/127.0.0.1:2181. Will not attempt to authenticate using SASL (unknown error)
2019-01-02 06:46:23,242 [myid:] - INFO  [main-SendThread(localhost:2181):ClientCnxn$SendThread@876] - Socket connection established to localhost/127.0.0.1:2181, initiating session
2019-01-02 06:46:23,275 [myid:] - INFO  [main-SendThread(localhost:2181):ClientCnxn$SendThread@1299] - Session establishment complete on server localhost/127.0.0.1:2181, sessionid = 0x1680d4b4f400000, negotiated timeout = 30000

WATCHER::

WatchedEvent state:SyncConnected type:None path:null
Created /hello
Let’s now retrieve the value from node zk-2.
$ oc exec zk-2 -- /opt/zookeeper/bin/zkCli.sh get /hello
Connecting to localhost:2181
2019-01-02 06:49:53,232 [myid:] - INFO  [main:Environment@100] - Client environment:zookeeper.version=3.4.9-1757313, built on 08/23/2016 06:50 GMT
2019-01-02 06:49:53,236 [myid:] - INFO  [main:Environment@100] - Client environment:host.name=zk-2.zk-headless.default.svc.cluster.local
2019-01-02 06:49:53,236 [myid:] - INFO  [main:Environment@100] - Client environment:java.version=1.8.0_111
2019-01-02 06:49:53,238 [myid:] - INFO  [main:Environment@100] - Client environment:java.vendor=Oracle Corporation
2019-01-02 06:49:53,239 [myid:] - INFO  [main:Environment@100] - Client environment:java.home=/usr/lib/jvm/java-8-openjdk-amd64/jre
2019-01-02 06:49:53,239 [myid:] - INFO  [main:Environment@100] - Client environment:java.class.path=/opt/zookeeper/bin/../build/classes:/opt/zookeeper/bin/../build/lib/*.jar:/opt/zookeeper/bin/../lib/slf4j-log4j12-1.6.1.jar:/opt/zookeeper/bin/../lib/slf4j-api-1.6.1.jar:/opt/zookeeper/bin/../lib/netty-3.10.5.Final.jar:/opt/zookeeper/bin/../lib/log4j-1.2.16.jar:/opt/zookeeper/bin/../lib/jline-0.9.94.jar:/opt/zookeeper/bin/../zookeeper-3.4.9.jar:/opt/zookeeper/bin/../src/java/lib/*.jar:/opt/zookeeper/bin/../conf:
2019-01-02 06:49:53,239 [myid:] - INFO  [main:Environment@100] - Client environment:java.library.path=/usr/java/packages/lib/amd64:/usr/lib/x86_64-linux-gnu/jni:/lib/x86_64-linux-gnu:/usr/lib/x86_64-linux-gnu:/usr/lib/jni:/lib:/usr/lib
2019-01-02 06:49:53,239 [myid:] - INFO  [main:Environment@100] - Client environment:java.io.tmpdir=/tmp
2019-01-02 06:49:53,239 [myid:] - INFO  [main:Environment@100] - Client environment:java.compiler=
2019-01-02 06:49:53,239 [myid:] - INFO  [main:Environment@100] - Client environment:os.name=Linux
2019-01-02 06:49:53,239 [myid:] - INFO  [main:Environment@100] - Client environment:os.arch=amd64
2019-01-02 06:49:53,240 [myid:] - INFO  [main:Environment@100] - Client environment:os.version=4.15.0-1017-gcp
2019-01-02 06:49:53,240 [myid:] - INFO  [main:Environment@100] - Client environment:user.name=zookeeper
2019-01-02 06:49:53,240 [myid:] - INFO  [main:Environment@100] - Client environment:user.home=/home/zookeeper
2019-01-02 06:49:53,240 [myid:] - INFO  [main:Environment@100] - Client environment:user.dir=/
2019-01-02 06:49:53,241 [myid:] - INFO  [main:ZooKeeper@438] - Initiating client connection, connectString=localhost:2181 sessionTimeout=30000 watcher=org.apache.zookeeper.ZooKeeperMain$MyWatcher@1de0aca6
2019-01-02 06:49:53,265 [myid:] - INFO  [main-SendThread(localhost:2181):ClientCnxn$SendThread@1032] - Opening socket connection to server localhost/127.0.0.1:2181. Will not attempt to authenticate using SASL (unknown error)
2019-01-02 06:49:53,333 [myid:] - INFO  [main-SendThread(localhost:2181):ClientCnxn$SendThread@876] - Socket connection established to localhost/127.0.0.1:2181, initiating session
2019-01-02 06:49:53,353 [myid:] - INFO  [main-SendThread(localhost:2181):ClientCnxn$SendThread@1299] - Session establishment complete on server localhost/127.0.0.1:2181, sessionid = 0x3680d4c049c0000, negotiated timeout = 30000

WATCHER::

WatchedEvent state:SyncConnected type:None path:null
cZxid = 0x100000002
world
ctime = Wed Jan 02 06:46:23 UTC 2019
mZxid = 0x100000002
mtime = Wed Jan 02 06:46:23 UTC 2019
pZxid = 0x100000002
cversion = 0
dataVersion = 0
aclVersion = 0
ephemeralOwner = 0x0
dataLength = 5
numChildren = 0
Deploying Kafka StatefulSet on OpenShift
With the ZooKeeper cluster in place, it’s time for us to deploy our Kafka cluster. Let’s start by creating the ConfigMap and a headless service required by Kafka.
$ cat > kafka-config.yaml << EOF kind: ConfigMap metadata: name: broker-config namespace: default apiVersion: v1 data: init.sh: |- #!/bin/bash set -x KAFKA_BROKER_ID=${HOSTNAME##*-} cp -Lur /etc/kafka-configmap/* /etc/kafka/ sed -i "s/#init#broker.id=#init#/broker.id=$KAFKA_BROKER_ID/" /etc/kafka/server.properties hash kubectl 2>/dev/null || {
      sed -i "s/#init#broker.rack=#init#/#init#broker.rack=# kubectl not found in path/" /etc/kafka/server.properties
    } && {
      ZONE=$(kubectl get node "$NODE_NAME" -o=go-template='{{index .metadata.labels "failure-domain.beta.kubernetes.io/zone"}}')
      if [ $? -ne 0 ]; then
        sed -i "s/#init#broker.rack=#init#/#init#broker.rack=# zone lookup failed, see -c init-config logs/" /etc/kafka/server.properties
      elif [ "x$ZONE" == "x" ]; then
        sed -i "s/#init#broker.rack=#init#/#init#broker.rack=# zone label not found for node $NODE_NAME/" /etc/kafka/server.properties
      else
        sed -i "s/#init#broker.rack=#init#/broker.rack=$ZONE/" /etc/kafka/server.properties
      fi
    }

  server.properties: |-
    delete.topic.enable=true
    num.network.threads=3
    num.io.threads=8
    socket.send.buffer.bytes=102400
    socket.receive.buffer.bytes=102400
    socket.request.max.bytes=104857600
    log.dirs=/tmp/kafka-logs
    num.partitions=1
    num.recovery.threads.per.data.dir=1
    offsets.topic.replication.factor=1
    transaction.state.log.replication.factor=1
    transaction.state.log.min.isr=1
    log.retention.hours=168
    log.segment.bytes=1073741824
    log.retention.check.interval.ms=300000
    zookeeper.connect=zk-0.zk-headless.default.svc.cluster.local:2181,zk-1.zk-headless.default.svc.cluster.local:2181,zk-2.zk-headless.default.svc.cluster.local:2181
    zookeeper.connection.timeout.ms=6000
    group.initial.rebalance.delay.ms=0

  log4j.properties: |-
    log4j.rootLogger=INFO, stdout

    log4j.appender.stdout=org.apache.log4j.ConsoleAppender
    log4j.appender.stdout.layout=org.apache.log4j.PatternLayout
    log4j.appender.stdout.layout.ConversionPattern=[%d] %p %m (%c)%n

    log4j.appender.kafkaAppender=org.apache.log4j.DailyRollingFileAppender
    log4j.appender.kafkaAppender.DatePattern='.'yyyy-MM-dd-HH
    log4j.appender.kafkaAppender.File=${kafka.logs.dir}/server.log
    log4j.appender.kafkaAppender.layout=org.apache.log4j.PatternLayout
    log4j.appender.kafkaAppender.layout.ConversionPattern=[%d] %p %m (%c)%n

    log4j.appender.stateChangeAppender=org.apache.log4j.DailyRollingFileAppender
    log4j.appender.stateChangeAppender.DatePattern='.'yyyy-MM-dd-HH
    log4j.appender.stateChangeAppender.File=${kafka.logs.dir}/state-change.log
    log4j.appender.stateChangeAppender.layout=org.apache.log4j.PatternLayout
    log4j.appender.stateChangeAppender.layout.ConversionPattern=[%d] %p %m (%c)%n

    log4j.appender.requestAppender=org.apache.log4j.DailyRollingFileAppender
    log4j.appender.requestAppender.DatePattern='.'yyyy-MM-dd-HH
    log4j.appender.requestAppender.File=${kafka.logs.dir}/kafka-request.log
    log4j.appender.requestAppender.layout=org.apache.log4j.PatternLayout
    log4j.appender.requestAppender.layout.ConversionPattern=[%d] %p %m (%c)%n

    log4j.appender.cleanerAppender=org.apache.log4j.DailyRollingFileAppender
    log4j.appender.cleanerAppender.DatePattern='.'yyyy-MM-dd-HH
    log4j.appender.cleanerAppender.File=${kafka.logs.dir}/log-cleaner.log
    log4j.appender.cleanerAppender.layout=org.apache.log4j.PatternLayout
    log4j.appender.cleanerAppender.layout.ConversionPattern=[%d] %p %m (%c)%n

    log4j.appender.controllerAppender=org.apache.log4j.DailyRollingFileAppender
    log4j.appender.controllerAppender.DatePattern='.'yyyy-MM-dd-HH
    log4j.appender.controllerAppender.File=${kafka.logs.dir}/controller.log
    log4j.appender.controllerAppender.layout=org.apache.log4j.PatternLayout
    log4j.appender.controllerAppender.layout.ConversionPattern=[%d] %p %m (%c)%n

    log4j.appender.authorizerAppender=org.apache.log4j.DailyRollingFileAppender
    log4j.appender.authorizerAppender.DatePattern='.'yyyy-MM-dd-HH
    log4j.appender.authorizerAppender.File=${kafka.logs.dir}/kafka-authorizer.log
    log4j.appender.authorizerAppender.layout=org.apache.log4j.PatternLayout
    log4j.appender.authorizerAppender.layout.ConversionPattern=[%d] %p %m (%c)%n

    # Change the two lines below to adjust ZK client logging
    log4j.logger.org.I0Itec.zkclient.ZkClient=INFO
    log4j.logger.org.apache.zookeeper=INFO

    # Change the two lines below to adjust the general broker logging level (output to server.log and stdout)
    log4j.logger.kafka=INFO
    log4j.logger.org.apache.kafka=INFO

    # Change to DEBUG or TRACE to enable request logging
    log4j.logger.kafka.request.logger=WARN, requestAppender
    log4j.additivity.kafka.request.logger=false

    log4j.logger.kafka.network.RequestChannel$=WARN, requestAppender
    log4j.additivity.kafka.network.RequestChannel$=false

    log4j.logger.kafka.controller=TRACE, controllerAppender
    log4j.additivity.kafka.controller=false

    log4j.logger.kafka.log.LogCleaner=INFO, cleanerAppender
    log4j.additivity.kafka.log.LogCleaner=false

    log4j.logger.state.change.logger=TRACE, stateChangeAppender
    log4j.additivity.state.change.logger=false

    log4j.logger.kafka.authorizer.logger=WARN, authorizerAppender
    log4j.additivity.kafka.authorizer.logger=false

---
apiVersion: v1
kind: Service
metadata:
  name: kafka-broker
  namespace: default
spec:
  ports:
  - port: 9092
  # [podname].broker.kafka.svc.cluster.local
  clusterIP: None
  selector:
    app: kafka
---
EOF
$ oc create -f kafka-config.yaml
configmap/broker-config created
service/kafka-broker created
Deploy Kafka cluster with a single node with the below manifest:
$ cat > kafka-ss.yaml << EOF
apiVersion: apps/v1
kind: StatefulSet
metadata:
  name: kafka
  namespace: default
spec:
  selector:
    matchLabels:
      app: kafka
  serviceName: "kafka-broker"
  replicas: 1
  template:
    metadata:
      labels:
        app: kafka
      annotations:
    spec:
      # Use the stork scheduler to enable more efficient placement of the pods
      schedulerName: stork
      terminationGracePeriodSeconds: 30
      affinity:
        nodeAffinity:
          requiredDuringSchedulingIgnoredDuringExecution:
            nodeSelectorTerms:
            - matchExpressions:
              - key: px/running
                operator: NotIn
                values:
                - "false"
              - key: px/enabled
                operator: NotIn
                values:
                - "false"
      initContainers:
      - name: init-config
        image: solsson/kafka-initutils@sha256:c275d681019a0d8f01295dbd4a5bae3cfa945c8d0f7f685ae1f00f2579f08c7d
        env:
        - name: NODE_NAME
          valueFrom:
            fieldRef:
              fieldPath: spec.nodeName
        command: ['/bin/bash', '/etc/kafka-configmap/init.sh']
        volumeMounts:
        - name: configmap
          mountPath: /etc/kafka-configmap
        - name: config
          mountPath: /etc/kafka
      containers:
      - name: broker
        image: solsson/kafka:0.11.0.0@sha256:b27560de08d30ebf96d12e74f80afcaca503ad4ca3103e63b1fd43a2e4c976ce
        env:
        - name: KAFKA_LOG4J_OPTS
          value: -Dlog4j.configuration=file:/etc/kafka/log4j.properties
        ports:
        - containerPort: 9092
        command:
        - ./bin/kafka-server-start.sh
        - /etc/kafka/server.properties
        - --override
        -   zookeeper.connect=zk-0.zk-headless.default.svc.cluster.local:2181,zk-1.zk-headless.default.svc.cluster.local:2181,zk-2.zk-headless.default.svc.cluster.local:2181
        - --override
        -   log.retention.hours=-1
        - --override
        -   log.dirs=/var/lib/kafka/data/topics
        - --override
        -   auto.create.topics.enable=false
        resources:
          requests:
            cpu: 100m
            memory: 512Mi
        readinessProbe:
          exec:
            command:
            - /bin/sh
            - -c
            - 'echo "" | nc -w 1 127.0.0.1 9092'
        volumeMounts:
        - name: config
          mountPath: /etc/kafka
        - name: data
          mountPath: /var/lib/kafka/data
      volumes:
      - name: configmap
        configMap:
          name: broker-config
      - name: config
        emptyDir: {}
  volumeClaimTemplates:
  - metadata:
      name: data
    spec:
      storageClassName: portworx-sc-rep3
      accessModes: [ "ReadWriteOnce" ]
      resources:
        requests:
          storage: 3Gi
EOF
$ oc create -f kafka-ss.yaml
statefulset.apps/kafka created
To make it easy to communicate with the Kafka cluster, let’s create a Pod with the Kafka CLI.
$ cat > kafka-cli.yaml << EOF
apiVersion: v1
kind: Pod
metadata:
  name: kafka-cli
spec:
  containers:
  - name: kafka
    image: solsson/kafka:0.11.0.0
    command:
      - sh
      - -c
      - "exec tail -f /dev/null"
EOF
$ oc create -f kafka-cli.yaml
pod/kafka-cli created
Verify that the Kafka StatefulSet is up and running.
$ oc get pods -l app=kafka
NAME      READY   STATUS    RESTARTS   AGE
kafka-0   1/1     Running   0          3m
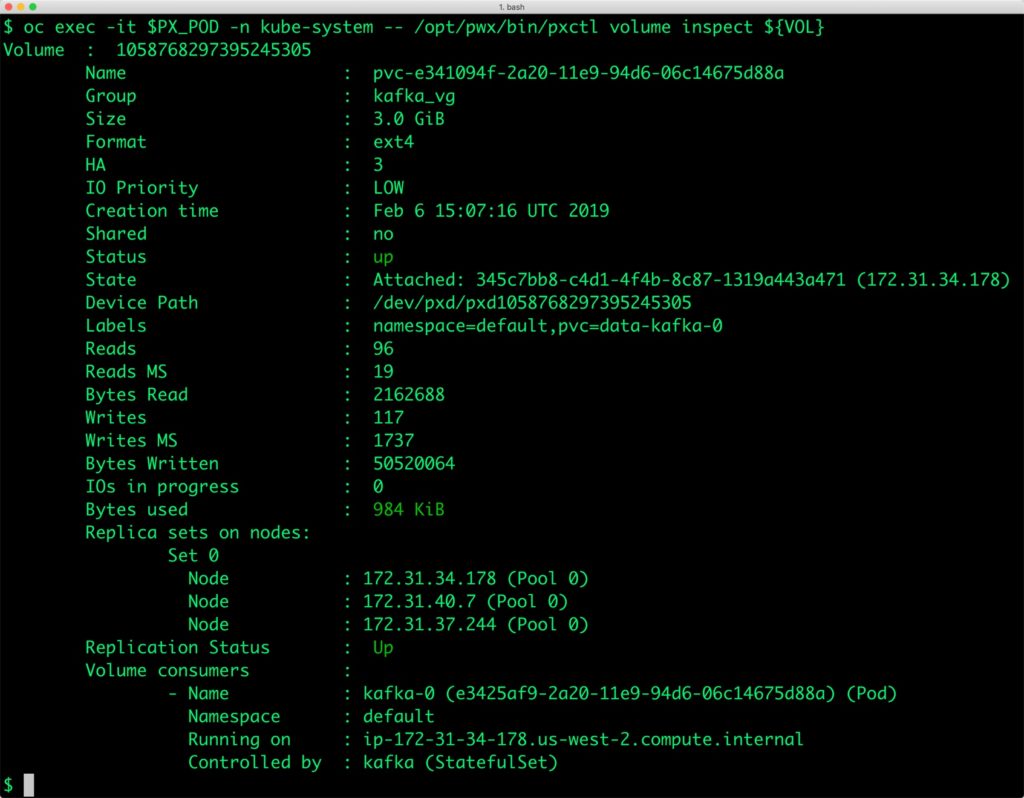
We can now inspect the Portworx volume associated with the Kafka pod by accessing the pxctl tool.
$ VOL=`oc get pvc | grep kafka | awk '{print $3}'`
$ PX_POD=$(oc get pods -l name=portworx -n kube-system -o jsonpath='{.items[0].metadata.name}')
$ oc exec -it $PX_POD -n kube-system -- /opt/pwx/bin/pxctl volume inspect ${VOL}
Volume	:  1058768297395245305
	Name            	 :  pvc-e341094f-2a20-11e9-94d6-06c14675d88a
	Group            	 :  kafka_vg
	Size            	 :  3.0 GiB
	Format          	 :  ext4
	HA              	 :  3
	IO Priority     	 :  LOW
	Creation time   	 :  Feb 6 15:07:16 UTC 2019
	Shared          	 :  no
	Status          	 :  up
	State           	 :  Attached: 345c7bb8-c4d1-4f4b-8c87-1319a443a471 (172.31.34.178)
	Device Path     	 :  /dev/pxd/pxd1058768297395245305
	Labels          	 :  namespace=default,pvc=data-kafka-0
	Reads           	 :  96
	Reads MS        	 :  19
	Bytes Read      	 :  2162688
	Writes          	 :  117
	Writes MS       	 :  1737
	Bytes Written   	 :  50520064
	IOs in progress 	 :  0
	Bytes used      	 :  984 KiB
	Replica sets on nodes:
		Set 0
		  Node 		 : 172.31.34.178 (Pool 0)
		  Node 		 : 172.31.40.7 (Pool 0)
		  Node 		 : 172.31.37.244 (Pool 0)
	Replication Status	 :  Up
	Volume consumers	 :
		- Name           : kafka-0 (e3425af9-2a20-11e9-94d6-06c14675d88a) (Pod)
		  Namespace      : default
		  Running on     : ip-172-31-34-178.us-west-2.compute.internal
		  Controlled by  : kafka (StatefulSet)
Failing over a Kafka pod on OpenShift
Let’s start by ingesting sample messages into a topic through the CLI pod. Hit CTRL+C after entering the last message.
$ oc exec -it kafka-cli bash
# ./bin/kafka-topics.sh --create --zookeeper zk-headless:2181 --replication-factor 1 --partitions 1 --topic test
# ./bin/kafka-console-producer.sh --broker-list kafka-broker:9092 --topic test

>message 1
>message 2
>message 3

# ./bin/kafka-console-consumer.sh --bootstrap-server kafka-broker:9092 --topic test --partition 0 --from-beginning
message 1
message 2
message 3
Processed a total of 3 messages
# exit
We will now simulate the failover by cordoning off one of the nodes and deleting the Kafka Pod deployed on it. When the new Pod is created it has the same data as the original Pod.
$ NODE=`oc get pods -o wide | grep kafka-0 | awk '{print $7}'`
$ oc adm cordon ${NODE}
node/ip-172-31-34-178.us-west-2.compute.internal cordoned

$ oc delete pod kafka-0
pod "kafka-0" deleted
Kubernetes controller now tries to create the Pod on a different node. Wait for the Kafka Pod to be in Running state on the node. Don’t forget to uncordon the node before proceeding further.
$ oc get pods -l app=kafka -o wide
NAME      READY     STATUS    RESTARTS   AGE       IP            NODE                                        NOMINATED NODE
kafka-0   1/1       Running   0          4m        10.129.0.26   ip-172-31-40-7.us-west-2.compute.internal
$ oc adm uncordon ${NODE}
node/ip-172-31-34-178.us-west-2.compute.internal uncordoned
Finally, let’s verify that the messages are still available under the test topic.
$ oc exec -it kafka-cli bash
# ./bin/kafka-console-consumer.sh --bootstrap-server kafka-broker:9092 --topic test --partition 0 --from-beginning
message 1
message 2
message 3
Processed a total of 3 messages
Backing up and restoring a Kafka node through snapshots
Portworx supports creating Snapshots for Kubernetes PVCs. Since there is only one Kafka node, we can use regular, local snapshots to backup and restore.
For production scenarios where there is more than one Kafka node in the cluster, it is highly recommended that customers use 3DSnap for application consistent backup and recovery.
Let’s create a snapshot for the Kubernetes PVC we created for Kafka.
cat >  kafka-snap.yaml << EOF
apiVersion: volumesnapshot.external-storage.k8s.io/v1
kind: VolumeSnapshot
metadata:
  name: px-kafka-snapshot
  namespace: default
spec:
  persistentVolumeClaimName: data-kafka-0
EOF
$ oc create -f kafka-snap.yaml
volumesnapshot.volumesnapshot.external-storage.k8s.io "px-kafka-snapshot" created
Verify the creation of the volume snapshot.
$ oc get volumesnapshot
NAME                AGE
px-kafka-snapshot   30s
$ oc get volumesnapshotdatas
NAME                                                       AGE
k8s-volume-snapshot-b1c06e67-1feb-11e9-8f35-0a580a30020a   34s
With the snapshot in place, let’s go ahead and delete the Kafka StatefulSet and the associated PVC.
$ oc delete sts/kafka
statefulset.apps "kafka" deleted
$ oc delete sts/kafka
persistentvolumeclaim "data-kafka-0" deleted
Since snapshots are just like volumes, we can use it to create a new PVC. Since we follow the standard naming convention used by OpenShift StatefulSets, the Kafka node will be automatically associated with this PVC.
Create a new PVC definition from the snapshot. Notice how the new PVC is named. It’s the same as the original PVC that we deleted after taking the snapshot.
cat >  kafka-snap.yaml << EOF
apiVersion: v1
kind: PersistentVolumeClaim
metadata:
  name: data-kafka-0
  annotations:
    snapshot.alpha.kubernetes.io/snapshot: px-kafka-snapshot
spec:
  accessModes:
     - ReadWriteOnce
  storageClassName: stork-snapshot-sc
  resources:
    requests:
      storage: 5Gi
EOF
$ oc create -f kafka-snap-pvc.yaml
persistentvolumeclaim/data-kafka-0 created
Launch a new StatefulSet backed by the restored PVC.
$ oc create -f kafka-ss.yaml
statefulset.apps/kafka created
Once the Pod is ready, let’s access it through the CLI Pod to check the availability of messages sent by the producer.
$ oc exec -it kafka-cli bash
root@kafka-cli:/opt/kafka# ./bin/kafka-console-consumer.sh --bootstrap-server kafka-broker:9092 --topic test --partition 0 --from-beginning
msg 1
msg 2
msg 3
Processed a total of 3 messages
root@kafka-cli:/opt/kafka#
Congratulations! You have successfully restored a snapshot for Kafka.
Summary
Portworx can easily be deployed on Red Hat OpenShift to run stateful workloads in production. It integrates well with Kubernetes StatefulSets by providing dynamic provisioning. Additional operations such as expanding the volumes and performing backups stored as snapshots on object storage can be performed while managing production workloads.
Share
Subscribe for Updates
About Us
Portworx is the leader in cloud native storage for containers.
Thanks for subscribing!

Janakiram MSV
Contributor | Certified Kubernetes Administrator (CKA) and Developer (CKAD)Explore Related Content:
- databases
- kafka
- kubernetes
- openshift


