Welcome to this tutorial, where we’ll walk through the process of setting up a Kubernetes cluster on AWS by leveraging the Kubernetes upstream sub-project called Cluster API. As part of this tutorial, we will leverage Docker Desktop to bootstrap our management cluster on our local laptop before deploying a workload cluster in Amazon Web Services.
Cluster API Primer
Cluster API is a Kubernetes sub-project that was started by the Cluster Lifecycle Special Interest Group (SIG). The goals around Cluster API are to simplify the lifecycle management of clusters and reduce the amount of toil that Platform Operators have to deal with when deleting, updating, and setting up their Kubernetes clusters.
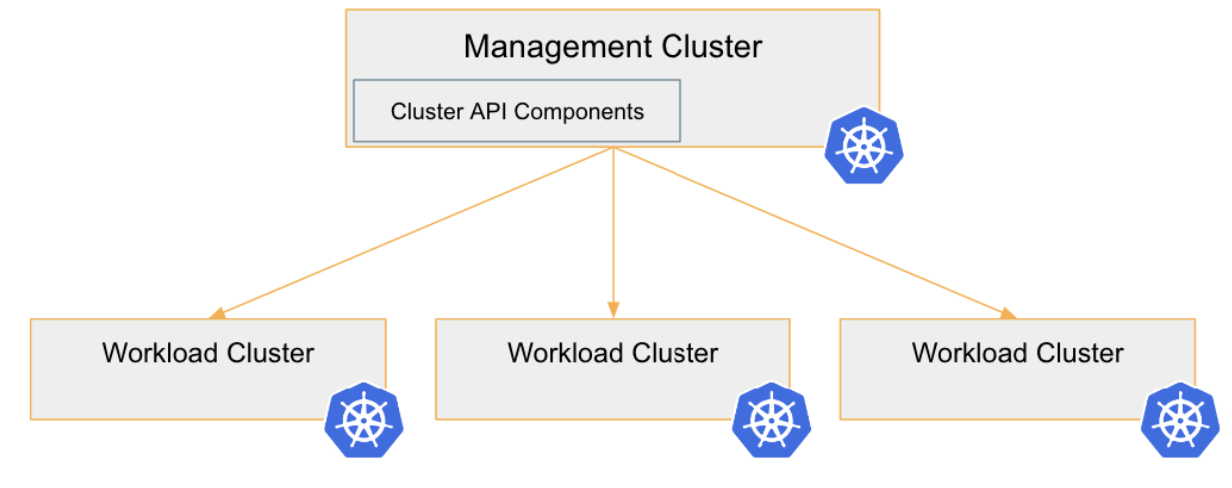
Cluster API makes setting up Kubernetes clusters simpler by using the declarative nature of Kubernetes clusters as the engine. As you’ll see in this Kubernetes tutorial, we’ll use a special cluster—called a management cluster—to set up one-to-many workload clusters where our applications would typically reside. We can then manage all of our workload clusters by interacting with our management cluster through desired state manifests, just like we do with our Kubernetes pods and services.
Prerequisites
Before we get too far into this Kubernetes tutorial, we will need to have a few things in place before we start to build our clusters. I will be demonstrating these concepts on a Macintosh laptop, but there are downloads for other operating systems, such as Windows and Linux. Here are the prerequisites:
- Kubectl: You’ll need to have the kubectl command line utility downloaded and installed on your local workstation. This tool will be used to interact with the bootstrap clusters, management clusters, and finally our workload clusters.
- Docker Desktop: We will use Docker Desktop to spin up some containers on our local workstation with KIND as part of the bootstrap process. NOTE: Docker desktop is free for small businesses and personal use. It requires a paid subscription for professional use.
- KIND: KIND stands for “Kubernetes IN Docker.” KIND allows us to spin up Kubernetes nodes inside of Docker containers.
- Clusterctl: Clusterctl is a command line tool used to handle lifecycle operations of the Cluster API management cluster.
- AWS account: For this Kubernetes tutorial, you’ll need to have an AWS account to work with, but you can use Cluster API with other providers, including Azure, Openshift, vSphere, Google, and others. You will need administrator permissions on the account because you will be creating IAM policies, load balancers, storage, VPCs, and cloudformation stacks.
- Clusterawsadm: Clusterawsadm is a command line utility used to configure a Cluster API management cluster with the infrastructure provider information. If you were deploying to a different infrastructure provider than AWS, you would use a different method here.
Deploy a Kubernetes Management Cluster with Cluster API
In order for us to use Kubernetes to manage our Kubernetes clusters, we have to get that first cluster deployed. If you already have a Kubernetes cluster available, then you can make that cluster a Cluster API management cluster. For many, however, we’ll need to come up with another way to build that first cluster. This leaves us with a challenge that is handled by using KIND with Docker Desktop on our local workstation.
After KIND and Docker Desktop have been installed on your workstation, you can run:
kind create cluster
This will deploy a Kubernetes cluster inside of Docker containers on our workstation to satisfy the requirement to build our first management cluster.
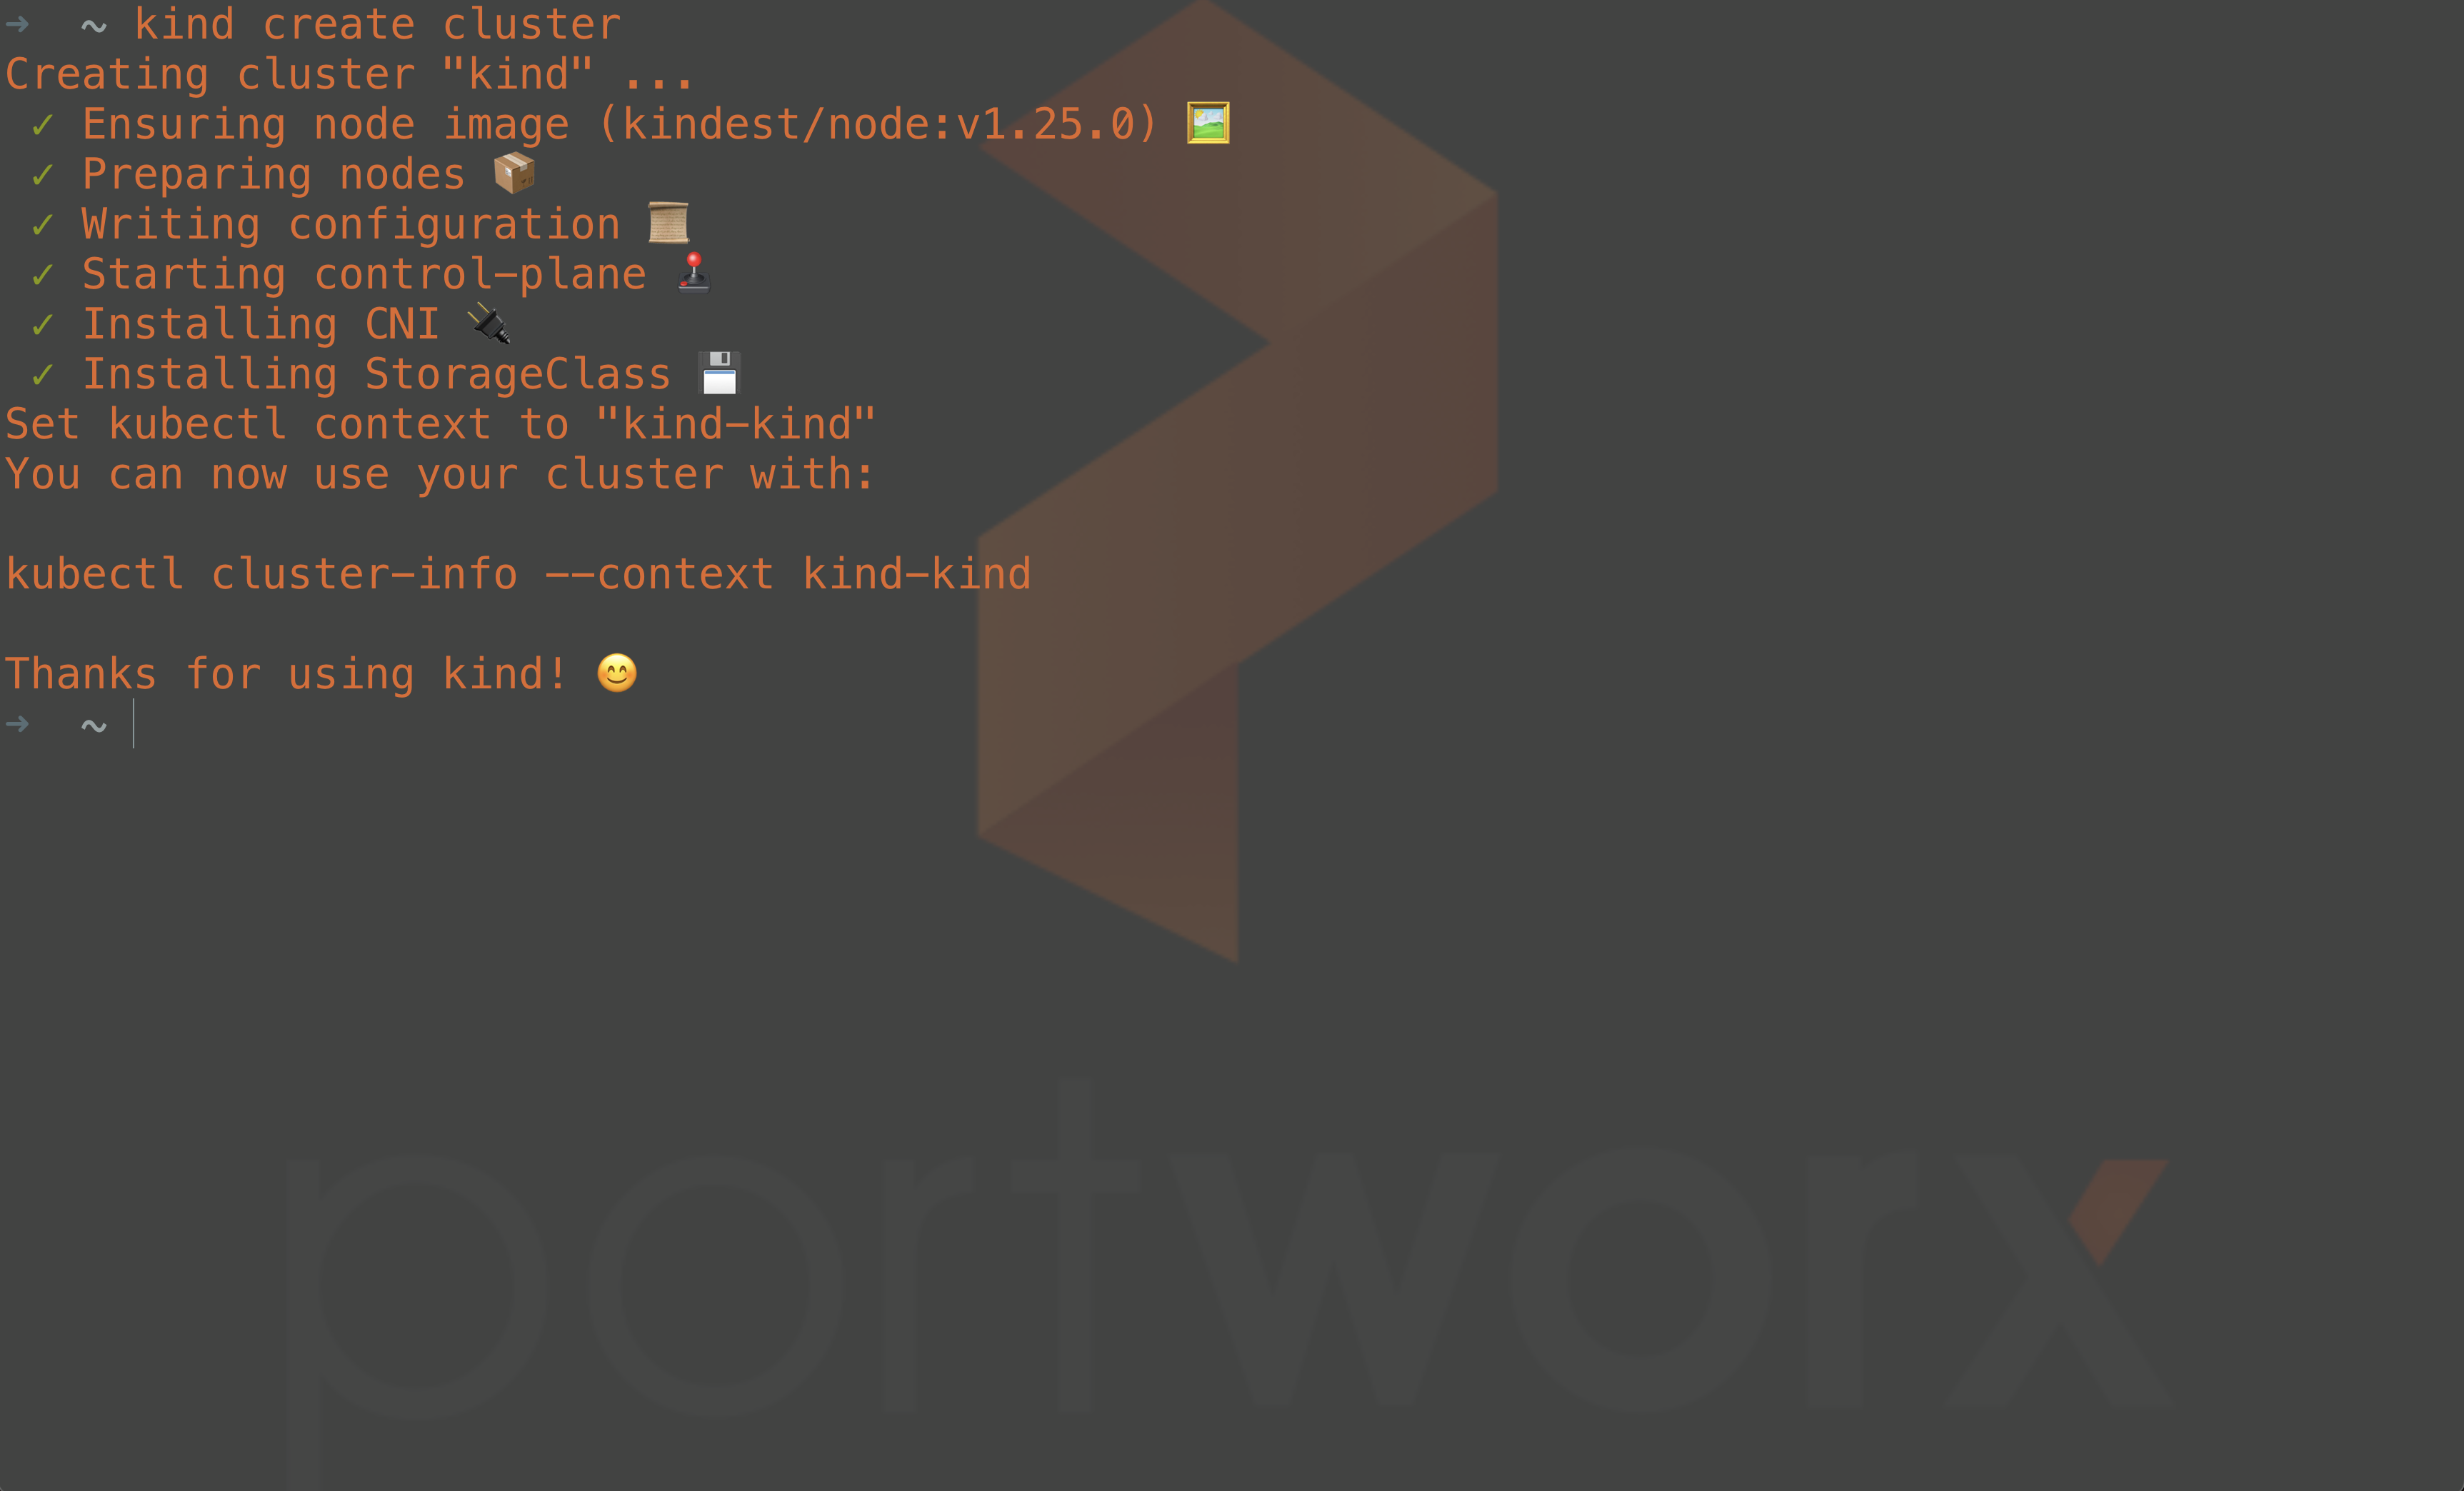
After the KIND cluster has been deployed, your cluster context should be automatically set so you can start issuing kubectl commands against that cluster without further configuration.
Our next step is to install the Cluster API management components into this management cluster. This includes things like controllers that will do the work of deploying new clusters to our infrastructure provider, which, in this case, is AWS. To do this we will use clusterctl to deploy these components.
clusterctl init
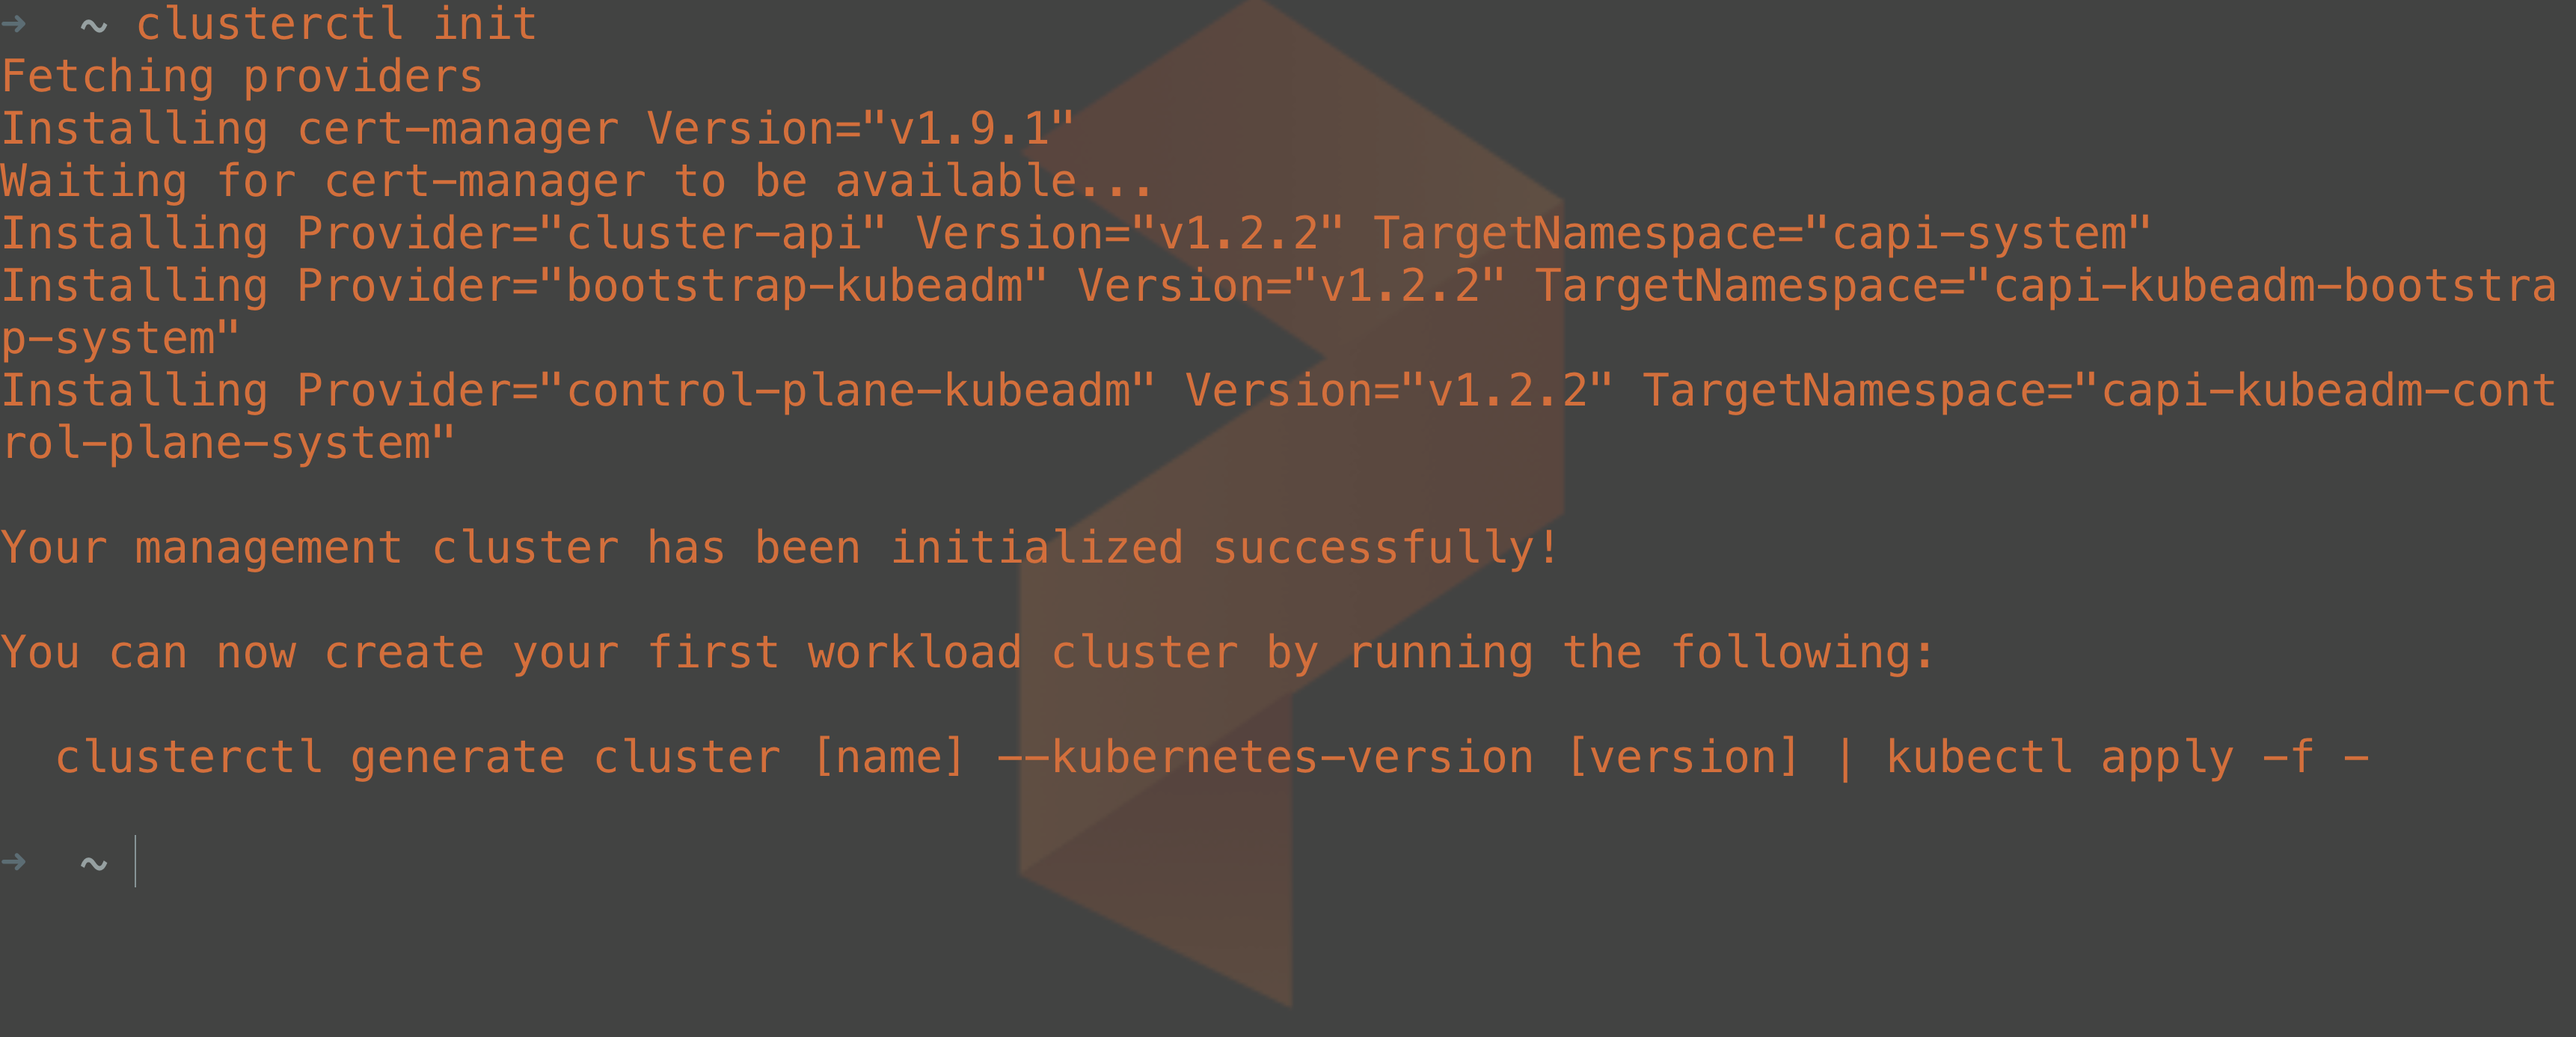
Clusterctl init will deploy the management components into our cluster, using our current Kubernetes context, and this is what makes the regular Kubernetes cluster a Cluster API management cluster.
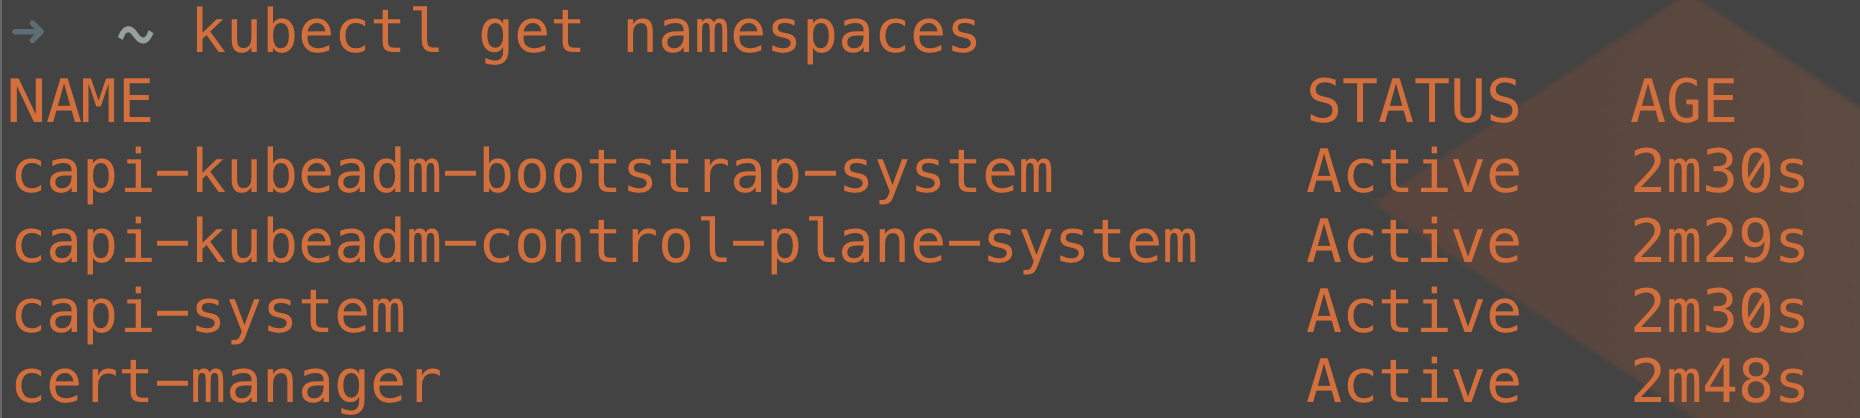
If we want to investigate what was deployed we can run:
kubectl get namespaces
This will show us several of the cluster API namespaces created where the management components will live.
Now that our Kubernetes cluster has the Cluster API (CAPI) components installed, we need to deploy the infrastructure provider components. The infrastructure provider components are different based on which type of infrastructure you will be deploying clusters on. For our scenario, we are deploying the Cluster API provider for AWS (CAPA). CAPA will let us customize our Kubernetes cluster configurations so these clusters can deploy AWS-based load balancers or AWS-based storage, such as EBS. Cluster API provider for AWS has the ability to interact with the rest of the AWS cloud solutions needed to operate a Kubernetes cluster.
We will use the clusterawsadm command line tool to deploy our CAPA components, but we need to provide some information about our AWS environment—namely, access permissions.
export AWS_REGION=us-east-2
export AWS_ACCESS_KEY_ID=<your-access-key>
export AWS_SECRET_ACCESS_KEY=<your-secret-access-key>
export AWS_SESSION_TOKEN=<session-token> # If you are using Multi-Factor Auth.
Once you have set your AWS credentials, we can run:
clusterawsadm bootstrap iam create-cloudformation-stack
This command creates a CloudFormation Stack with resources we will use to deploy our Kubernetes clusters.
Once the Cloudformation stack has been deployed through the bootstrap command, the next step is to initialize the management cluster with the CAPA components. First, we are going to create a set of Base64 credentials from our access keys. This Base64 credential will be used in a Kubernetes Secret, which will be stored in the management cluster for use when we need to make further changes to the AWS infrastructure—like when we need to spin up EC2 instances for our cluster nodes.
export AWS_B64ENCODED_CREDENTIALS=$(clusterawsadm bootstrap credentials encode-as-profile)
Once our credentials have been set, we can run the clusterctl init command and specify AWS as our infrastructure provider.
Clusterctl init --infrastructure aws

At this point, the management cluster is ready to go, and we can start deploying the clusters where our application containers will run. These clusters are called workload clusters.
NOTE: It’s not recommended to leave your management cluster as a KIND cluster running on a local workstation. Once you have set up a management cluster in KIND, you can use the clusterctl move command to perform a “pivot.” A pivot takes all the components in an existing management cluster and moves them to another Kubernetes cluster, presumably one deployed on more highly available infrastructure than a user’s laptop or build server.
Deploy a Workload Cluster on AWS Using Cluster API
We are ready to use our new management cluster to deploy our workload clusters. As mentioned previously, we can use the declarative nature of Kubernetes to build our workload clusters. This means building YAML manifests that you might consider placing in a version control repository such as a Git.
YAML manifests aren’t difficult to interact with, but it is really useful to have a base template to start from, instead of having to build a Kubenetes cluster manifest by hand. The clusterctl CLI can help us generate a template to start from, and if you wish, can customize the YAML before applying your desired state.
Here, we will set some environment variables, which clusterctl will use to help create our first workload cluster manifest. You will need to provide the AWS Region, an SSH Key to use when creating your EC2 instances that will act as the Kubernetes nodes, and the instance types you would prefer to use for both the control plane nodes and the worker nodes in your cluster.
export AWS_REGION=us-east-2
export AWS_SSH_KEY_NAME=shanks-capi
export AWS_CONTROL_PLANE_MACHINE_TYPE=m4.xlarge
export AWS_NODE_MACHINE_TYPE=m4.xlarge
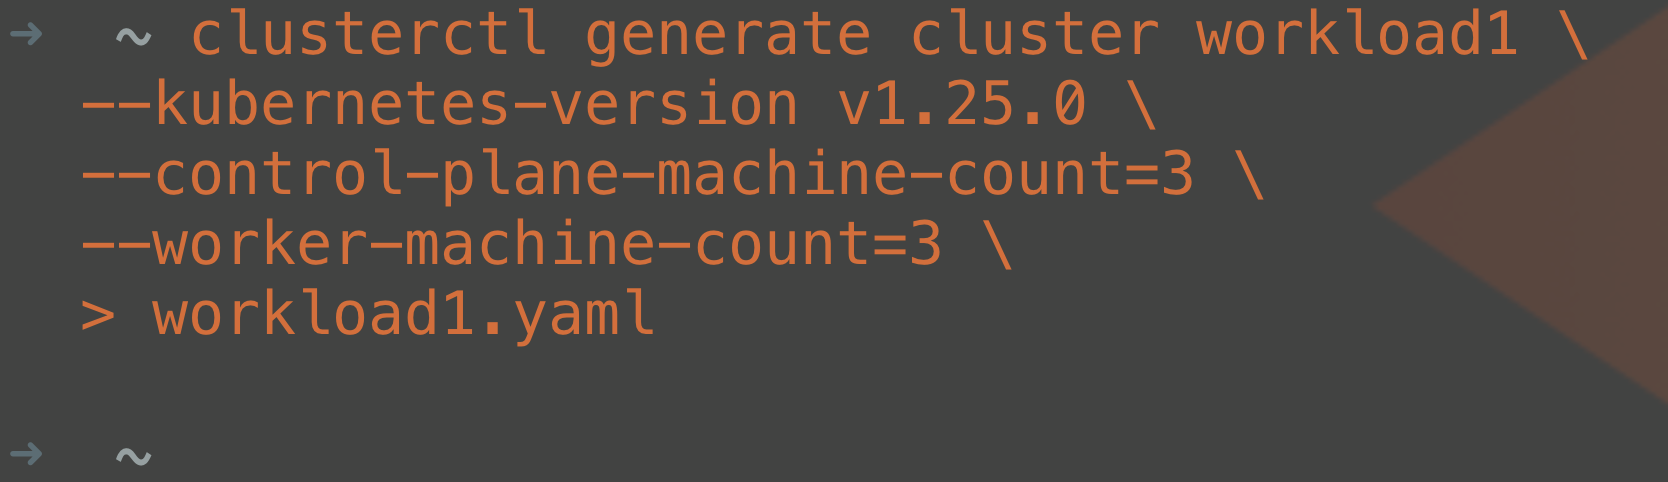
Once you have set your environment variables, you can run the clusterctl command line tool again with the generate cluster command. You will need to provide some information—like the name of your cluster, the version, and how many control plane nodes and worker nodes—for your workload cluster.
clusterctl generate cluster workload1 \
  --kubernetes-version v1.25.0 \
  --control-plane-machine-count=3 \
  --worker-machine-count=3 \
  > workload1.yaml
The command from above will create a new YAML manifest called “workload1.yaml,” which we can then edit with a text editor. In the workload1.yaml file, edit the AWSMachineTemplate for workload1-md-0 to include a root volume of size 80GB. The default deployment uses a disk size too small to deploy many components so this has been increased to 80GB for the worker nodes so that you can install Portworx Enterprise after cluster deployment is complete.
apiVersion: infrastructure.cluster.x-k8s.io/v1beta1
kind: AWSMachineTemplate
metadata:
  name: workload1-md-0
  namespace: default
spec:
  template:
    spec:
      iamInstanceProfile: nodes.cluster-api-provider-aws.sigs.k8s.io
      instanceType: m4.xlarge
      sshKeyName: shanks-capi
      rootVolume:  #Add This
        size: 80  #Add This
Now we just have to send our YAML manifest to the management cluster and let the CAPI/CAPA components do their magic to make our desired state a reality. Just like we do with other Kubernetes manifests, we just apply it through the kubectl utility.
kubectl apply -f workload1.yaml
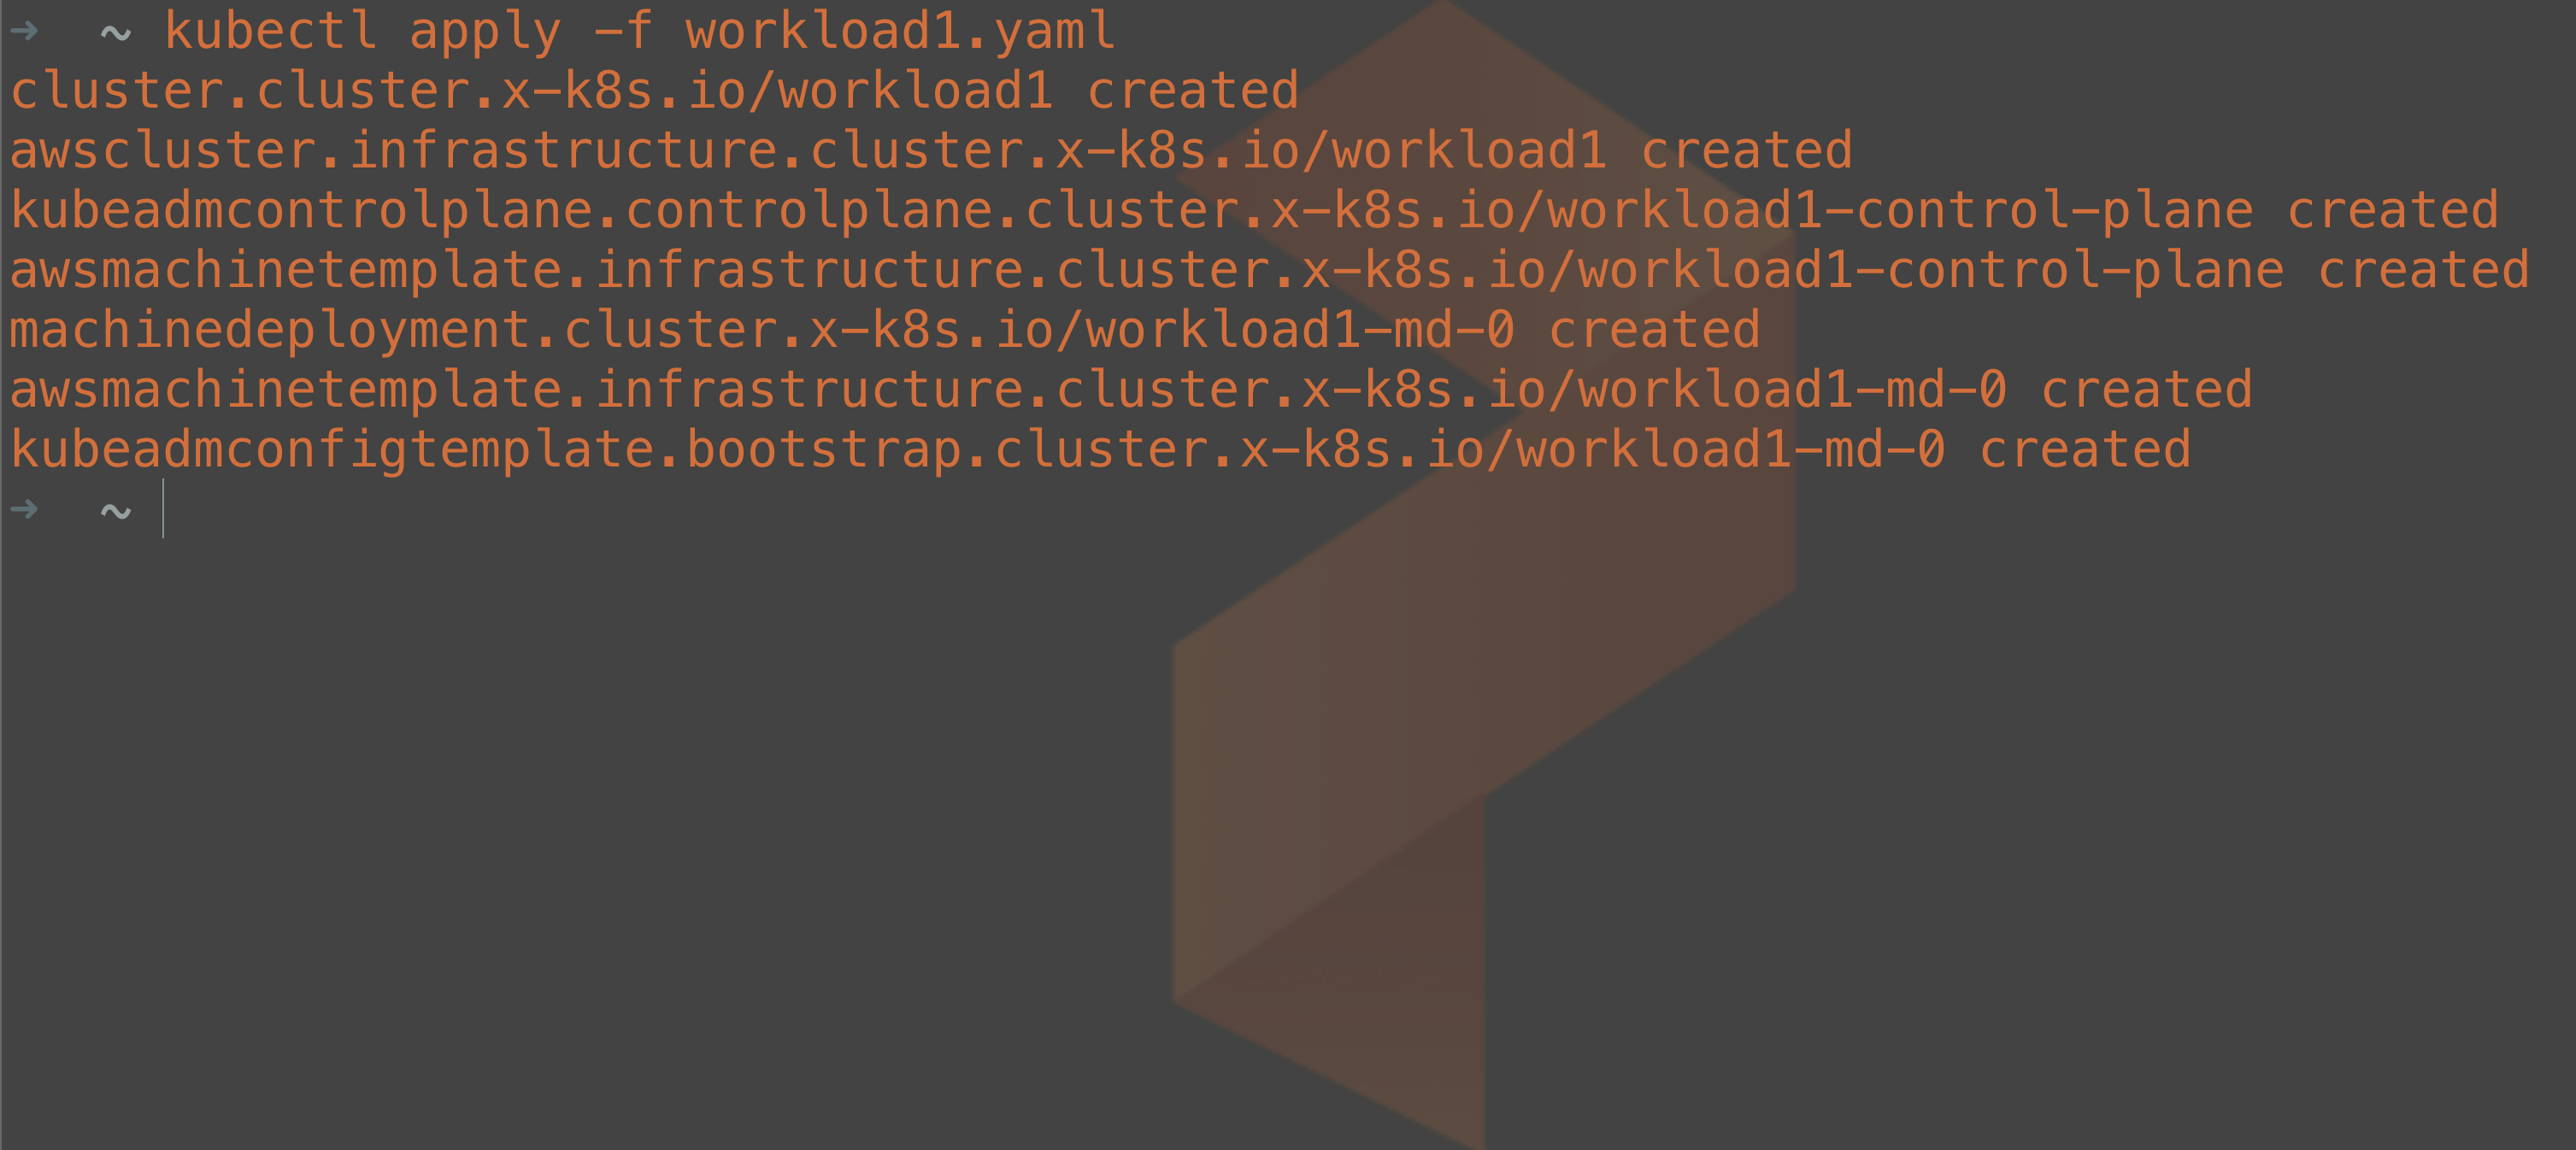
From the output, we can tell that we are deploying a cluster object as well as machine objects and some configurations for kubeadm customization of our Kubernetes clusters. If you would like to know more about the specific objects that are stored in the management cluster, you can find them in the cluster-api documentation.
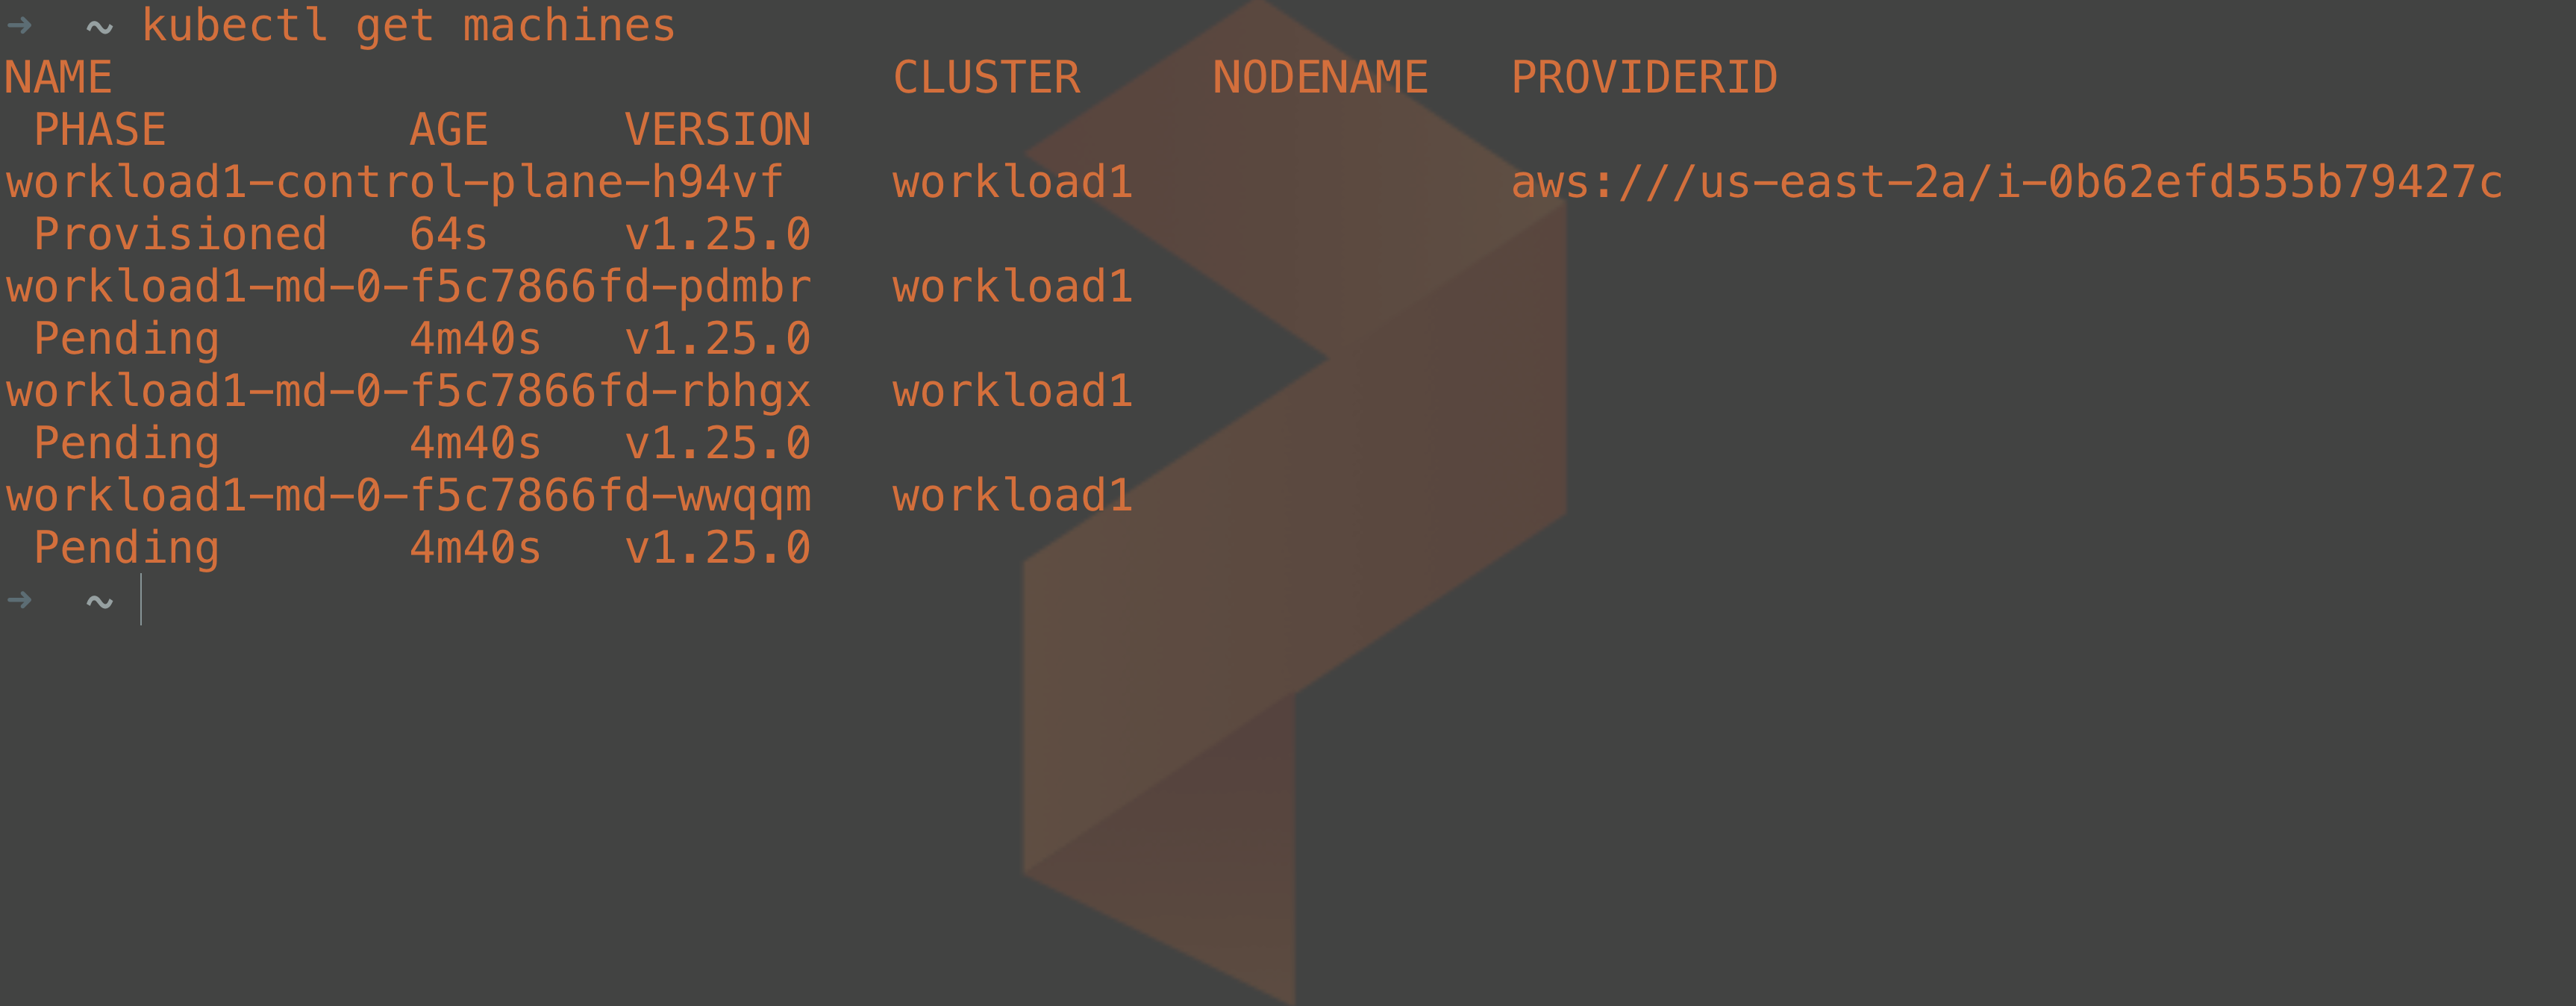
Just like other Kubernetes objects, you can query these objects through the API server. For example, you can inspect how the provisioning of your machines is coming by running:
kubectl get machines
As part of the deployment, kubeadm is called by the Cluster API controllers to create the Kubernetes control plane once the nodes have been deployed. Kubeadm has its own objects created when you deploy a workload cluster, so we can check on the status of the workload cluster control plane setup by running:
kubectl get kubeadmcontrolplane

Configure the Container Network Interface
When the control plane has been initialized, you can grab the kubeconfig details to log into your workload cluster from the command line. To do this, you can run another clusterctl command to export the kubeconfig to your workstation:
clusterctl get kubeconfig workload1 > workload1
After the kubeconfig file for the workload cluster has been exported to your local machine, you can use that config file to authenticate with your workload cluster. As a test, we can run something like this:
kubectl --kubeconfig=./workload1 get nodes
Notice that we provided which kubeconfig file was being used with the kubectl call here. If you do not want to specify which kubeconfig file to use, you can use the environment variable $KUBECONFIG to specify the location of your config file so that it does not have to be specified every time you run a kubectl command.

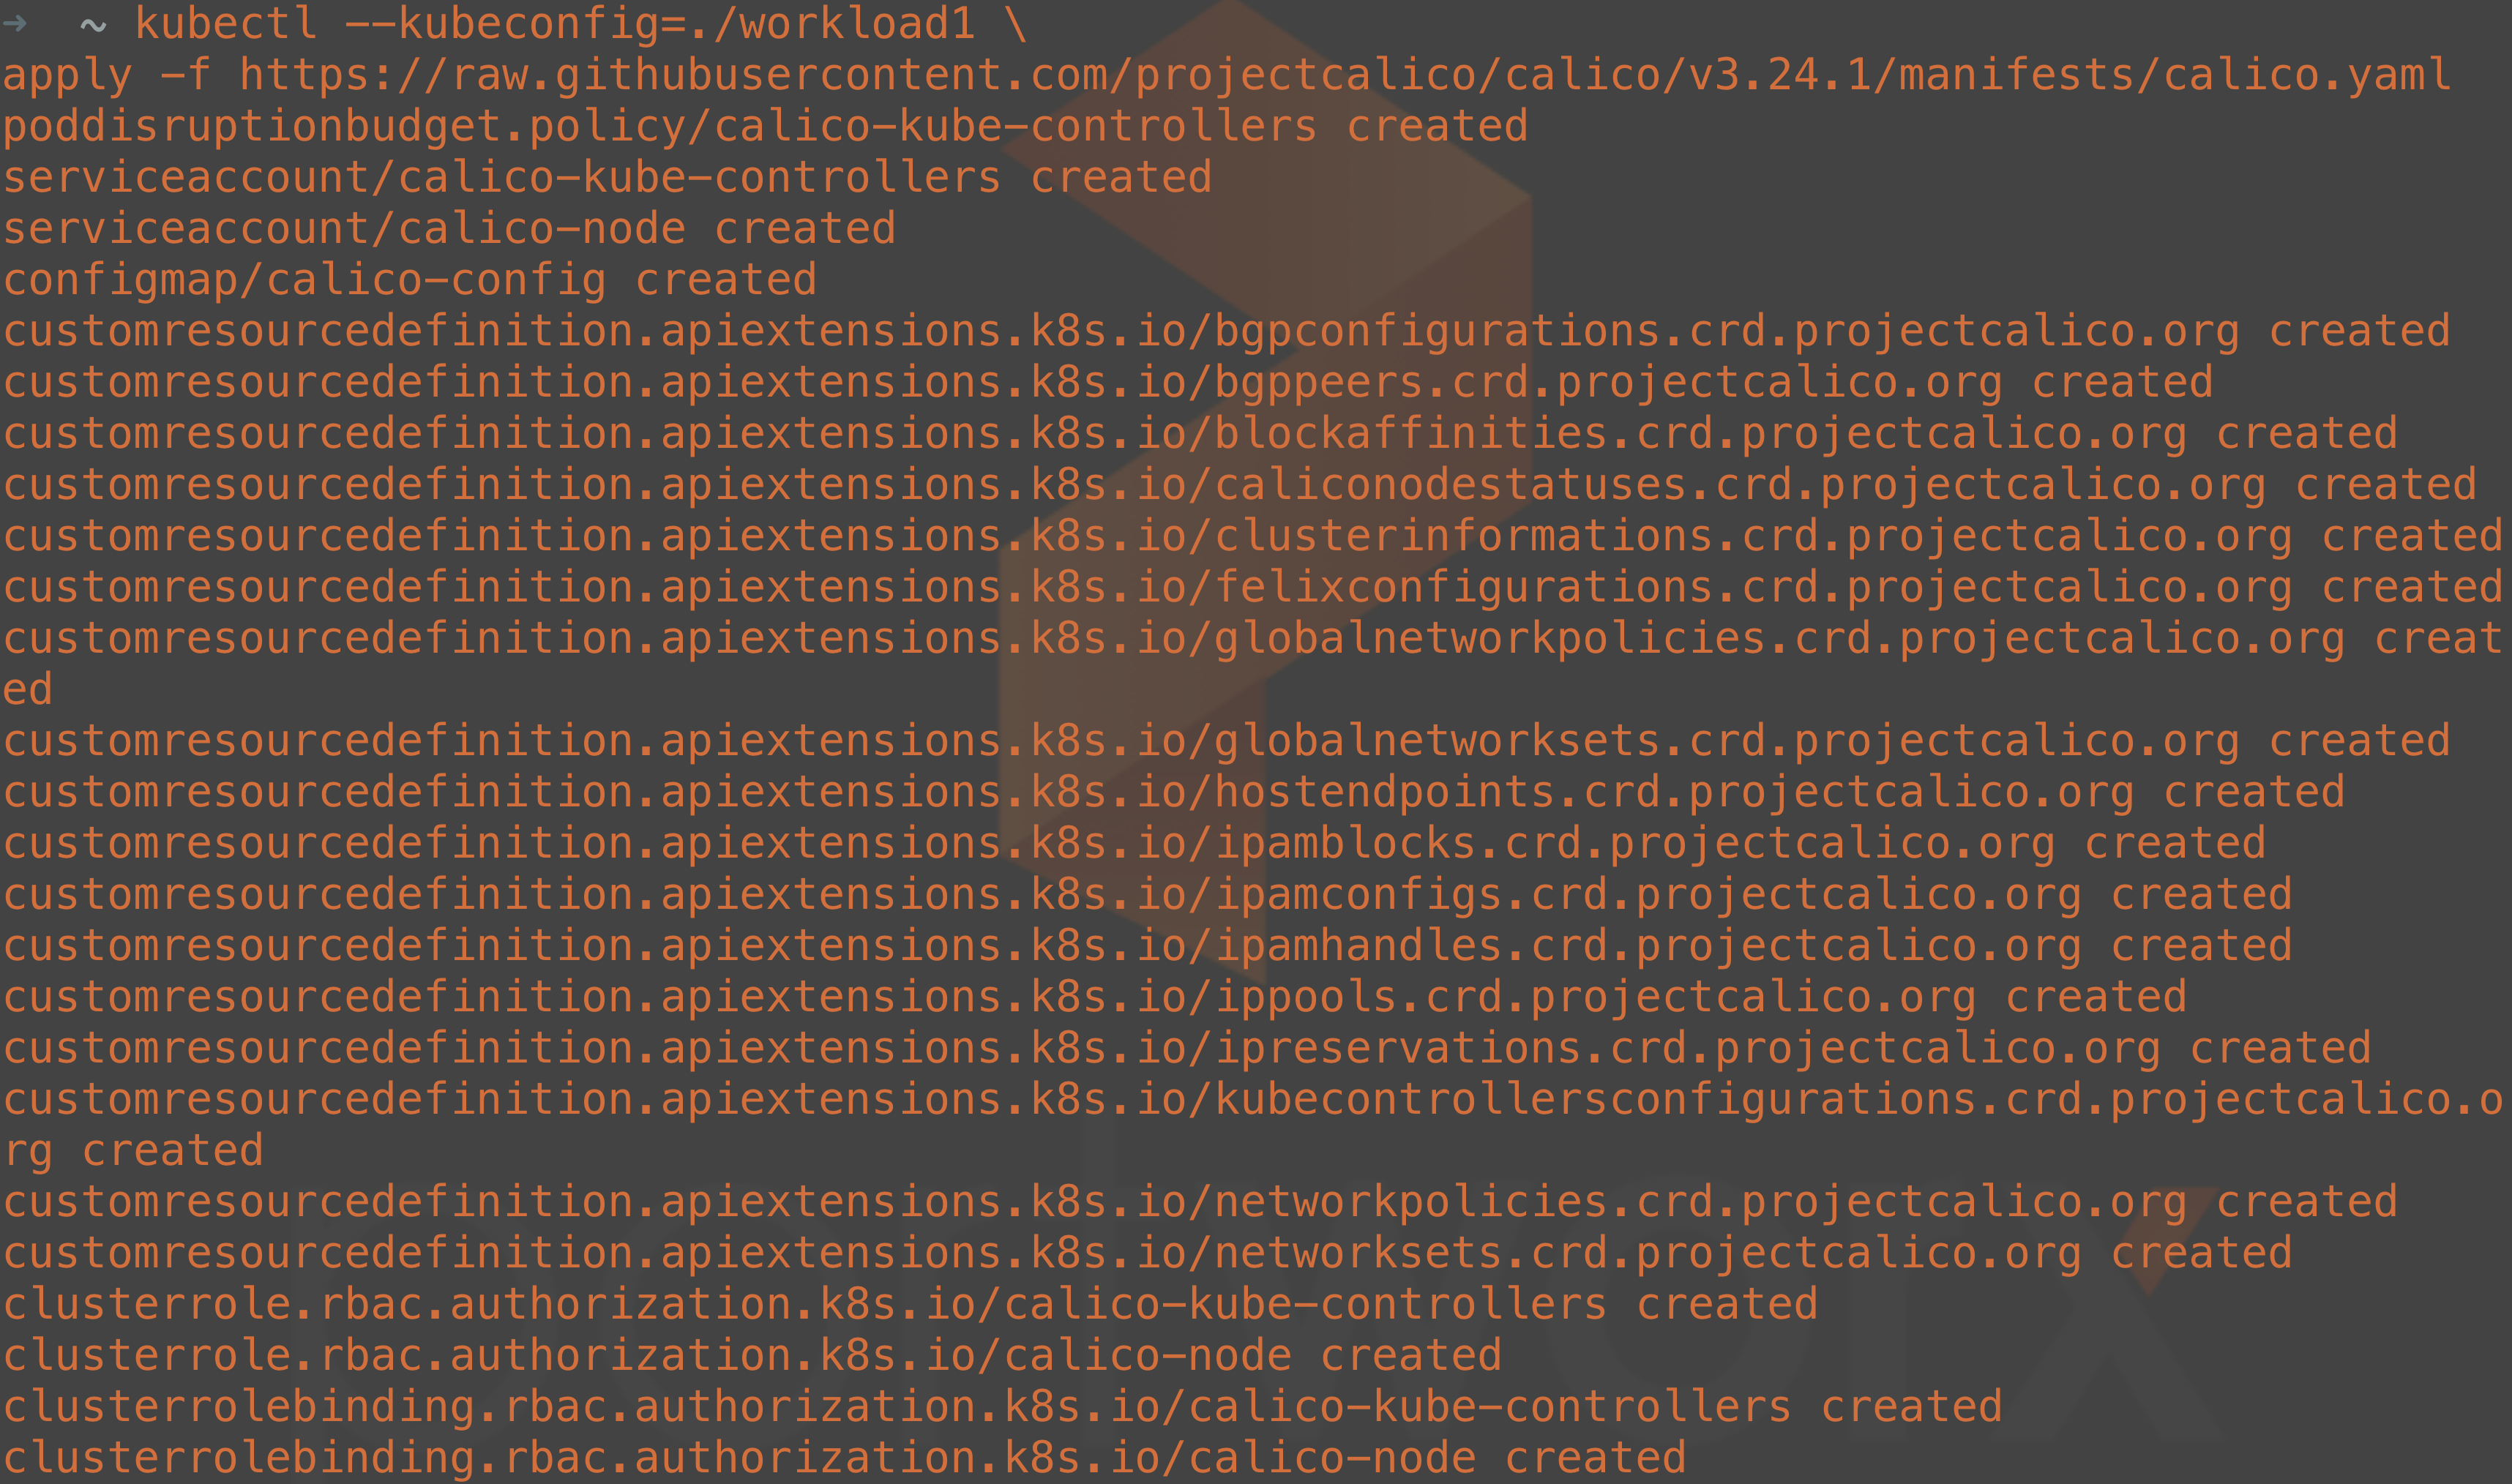
Notice in the return data that the nodes are sitting in NotReady status. This is because even though the cluster is running, there is no Container Network Interface (CNI) plugin installed yet. There are plenty of CNI plugins to choose from, so pick one that suits your requirements. I have chosen Calico and can deploy it with the following command:
kubectl --kubeconfig=./workload1 \
apply -f
https://raw.githubusercontent.com/projectcalico/calico/v3.24.1/manifests/calico.yaml
Install Portworx Container Native Storage
You have a running cluster now, but before you start deploying your containerized applications, you might want to update your cluster to include Container Native Storage (CNS) with Portworx. You will have storage functionality with your default cluster installation, but many components will be missing from the base install, and that is where Portworx can help. By using Portworx as the cluster’s CNS, you can get several important features, including:
- The ability to have data replicated on multiple nodes to protect from failure
- Migration capabilities for moving stateful data between clusters
- Optimization of your stateful applications’ performance characteristics by setting IO_Profiles
- The ability to take snapshots of your persistent data to store locally or in object storage buckets like AmazonS3 or Pure FlashBlade
- Scaling storage resources automatically through cloud drive provisioning
- Data encryption within persistent volumes or the entire cluster
Before we install Portworx Enterprise, we need to make sure that the storage cluster can properly communicate in our Amazon Virtual Private Cloud (VPC). This means we need to create a new security group and attach it to the worker nodes of our Kubernetes cluster. The commands below use the AWS command line utility to create the security groups and attach them to our worker nodes.
Get the VPC ID where the workload cluster has been deployed.
VPCID=$(aws ec2 describe-vpcs --filter Name=tag:Name,Values=workload1-vpc | jq '.Vpcs[].VpcId' | tr -d '"')
Create a new Security group within your VPC.
SGID=$(aws ec2 create-security-group --description portworxSG --group-name portworxSG --vpc-id $VPCID | jq '.GroupId' | tr -d '"')
Add the inbound rules for TCP ports 9001-9021 to the security group created in the previous step.
result=$(aws ec2 authorize-security-group-ingress \
   --group-id $SGID \
   --protocol tcp \
   --port 9001-9021 \
   --source-group $SGID)
Get the list of Kubernetes worker nodes that are part of the cluster. Note: if running this from a ZSH shell, you may need to run setopt shwordsplit first.
capiNodes=$(aws ec2 describe-instances --filter "Name=tag:Name,Values=workload1-md*" "Name=instance-state-name,Values=running" --query 'Reservations[*].Instances[*].InstanceId' --output text | tr -d '"')
Finally, loop through the existing worker nodes found in the previous step and apply the security group to the nodes.
for instance in $capiNodes; do aws ec2 modify-instance-attribute --instance-id $instance --groups $(aws ec2 describe-instances --instance-ids $instance --query 'Reservations[*].Instances[*].SecurityGroups[*].GroupId' --output text) $SGID; done
Once the security groups have been created, its time to install Portworx Enterprise. To install Portworx Enterprise, go to the central.portworx.com link and select the Portworx Enterprise link.
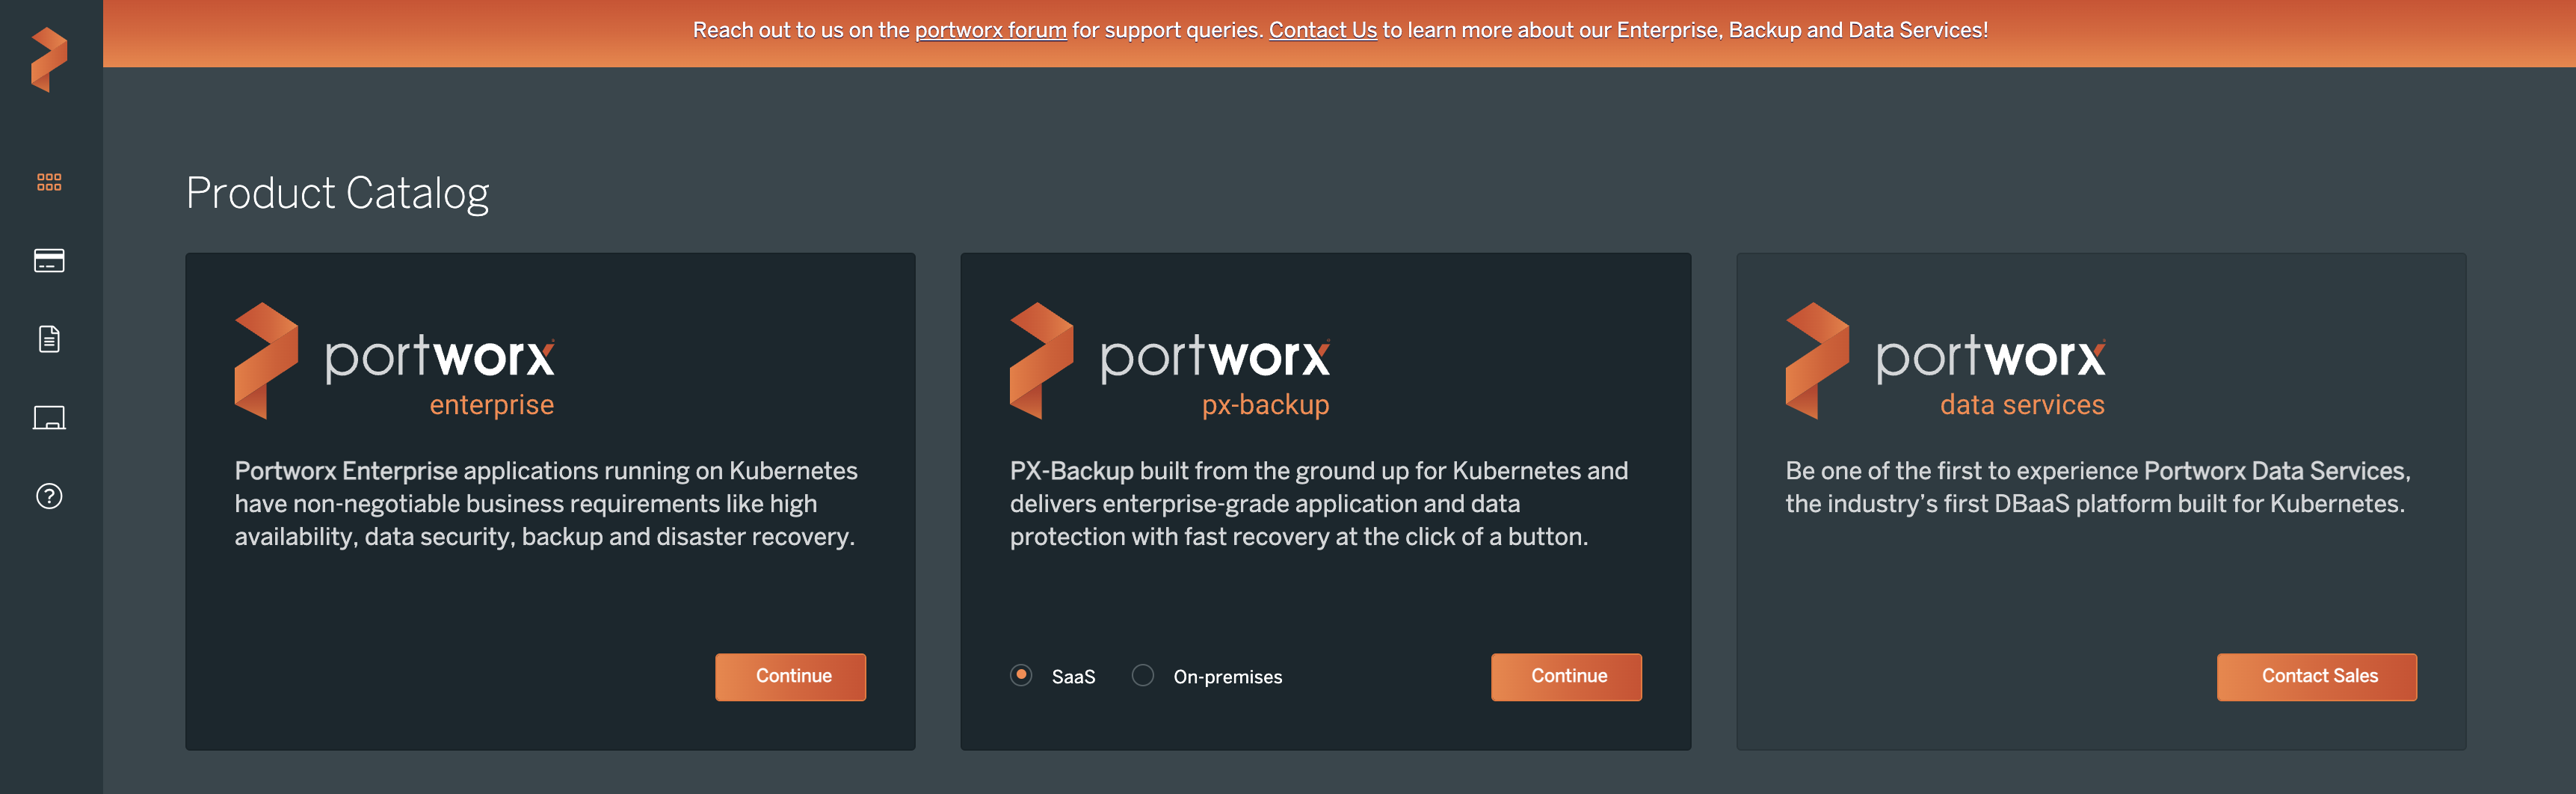
Review the free trial options and click Continue. Portworx offers an Essentials license, which is free, but it has some restrictions. The full Portworx Enterprise option is full-featured and free for a limited time.
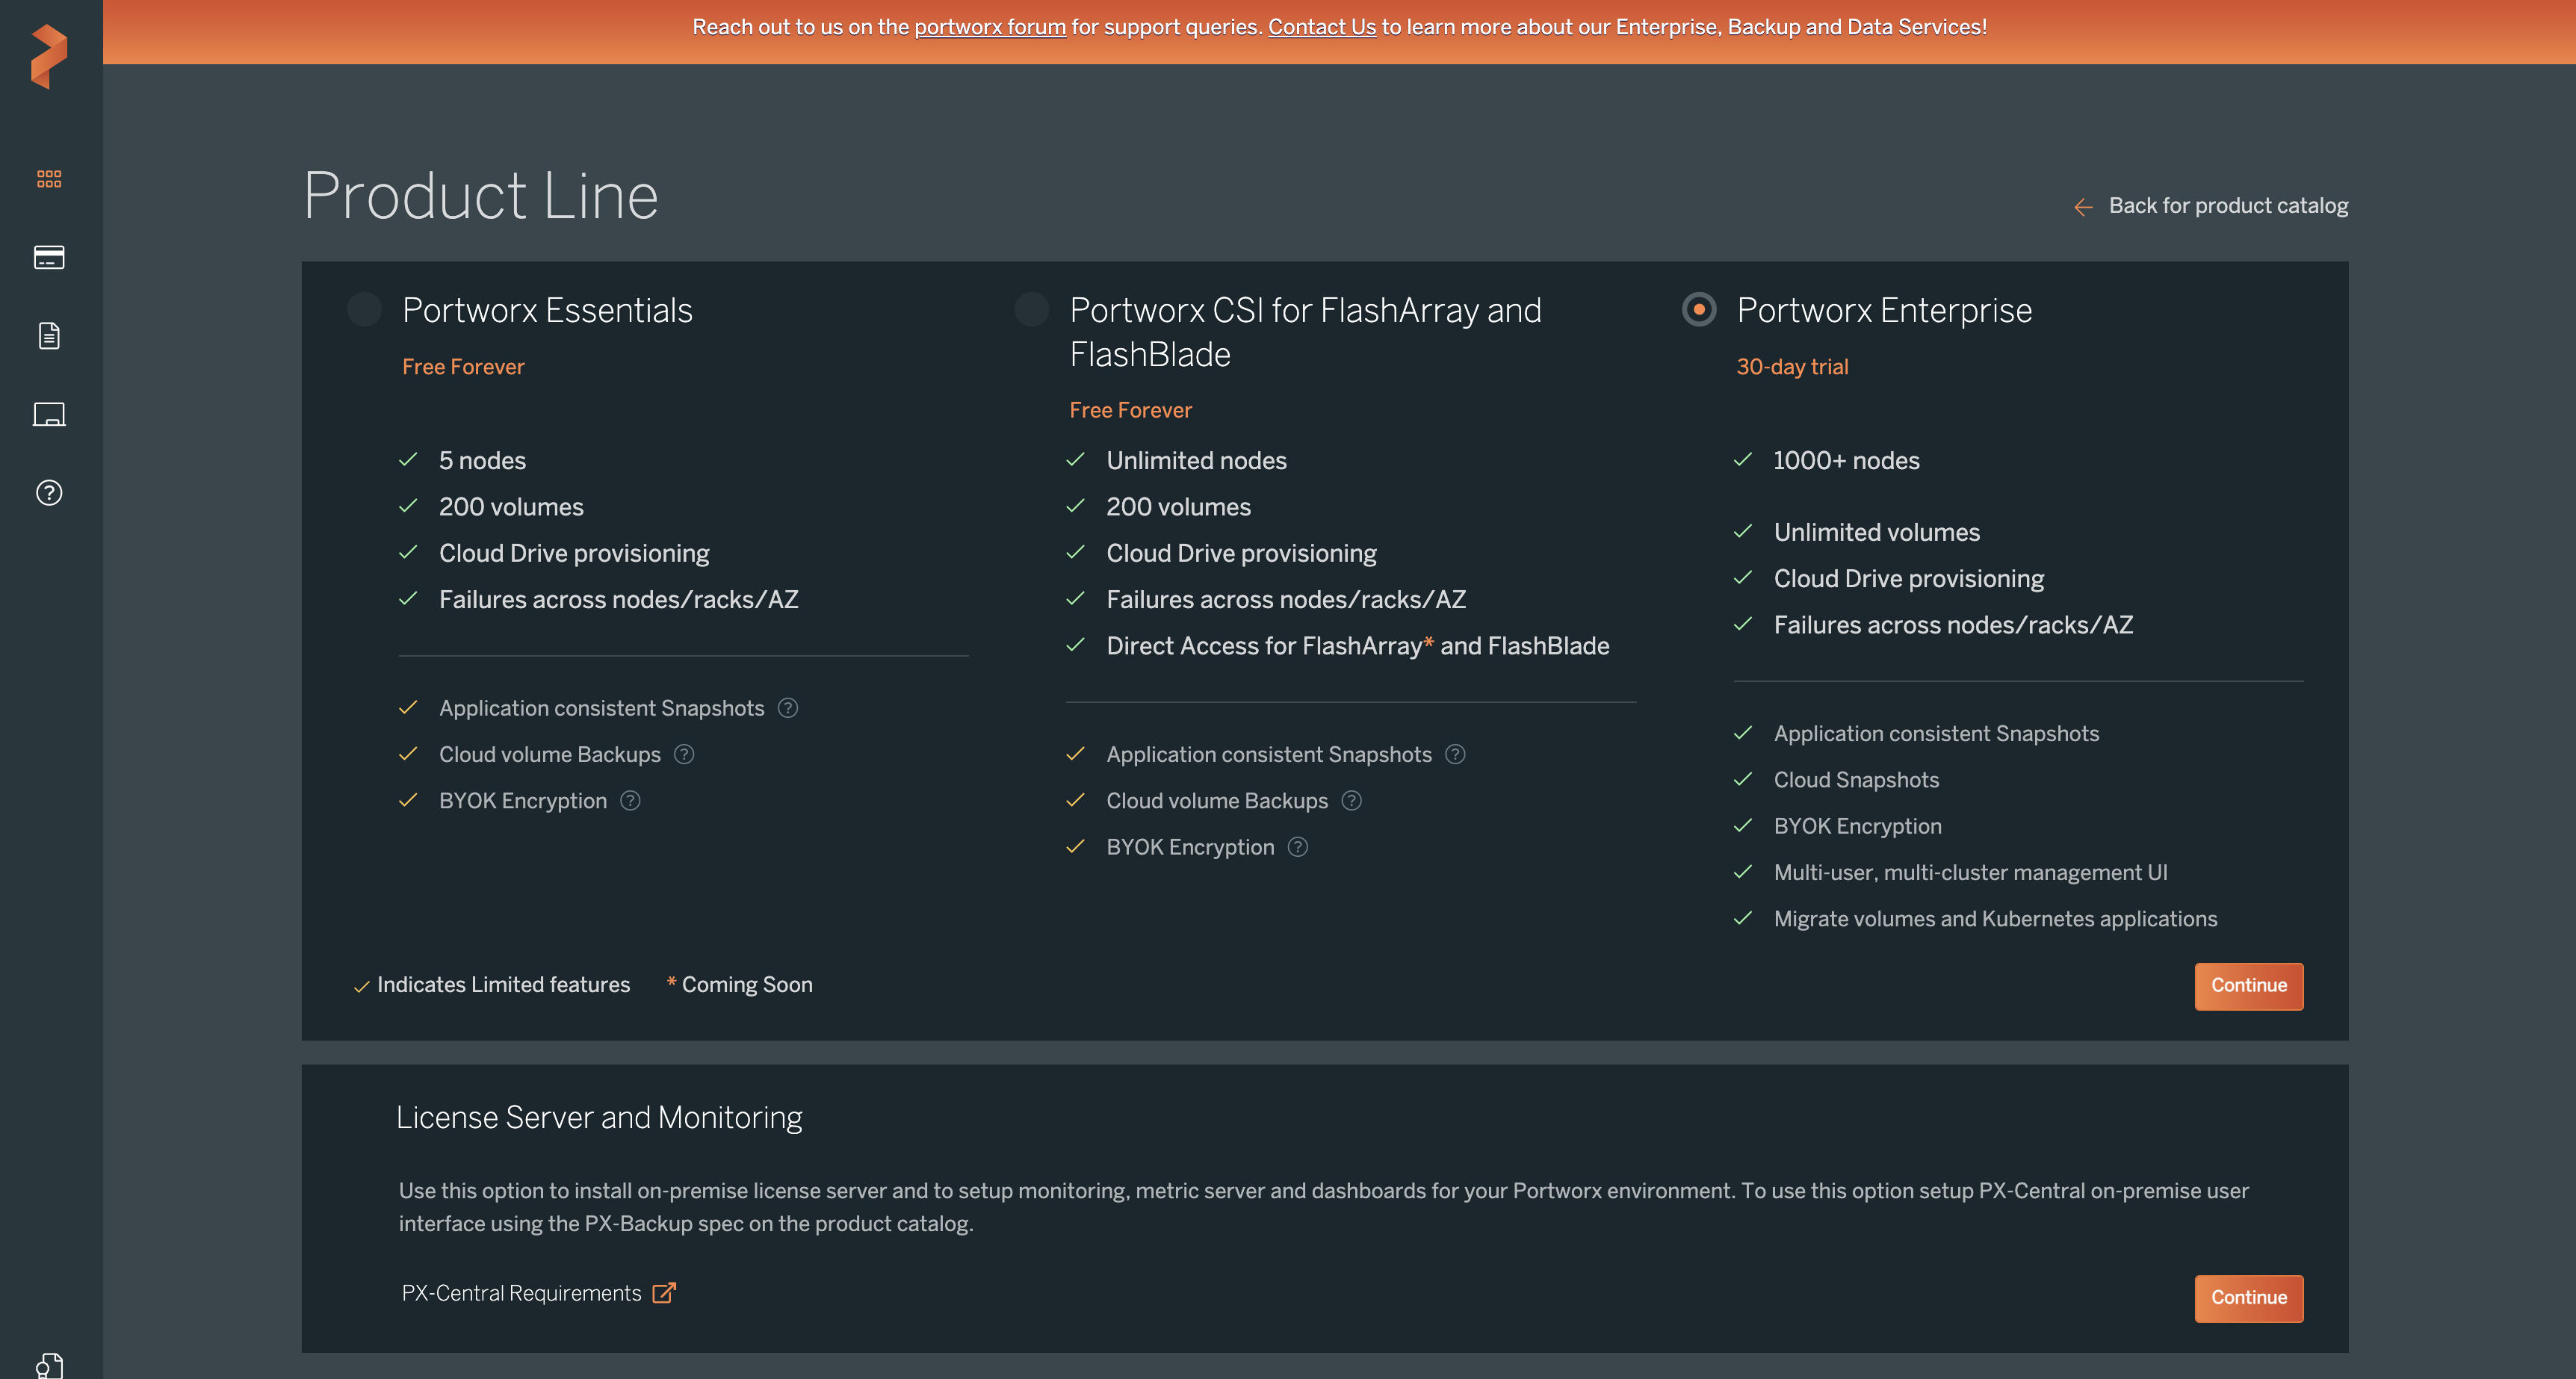
Then you will use the Portworx Central portal to configure the container native storage layer on your Kubernetes cluster. In this Kubernetes tutorial, the Portworx version is set to 2.10. We will use the built-in ETCD option for simplicity. Click Next.

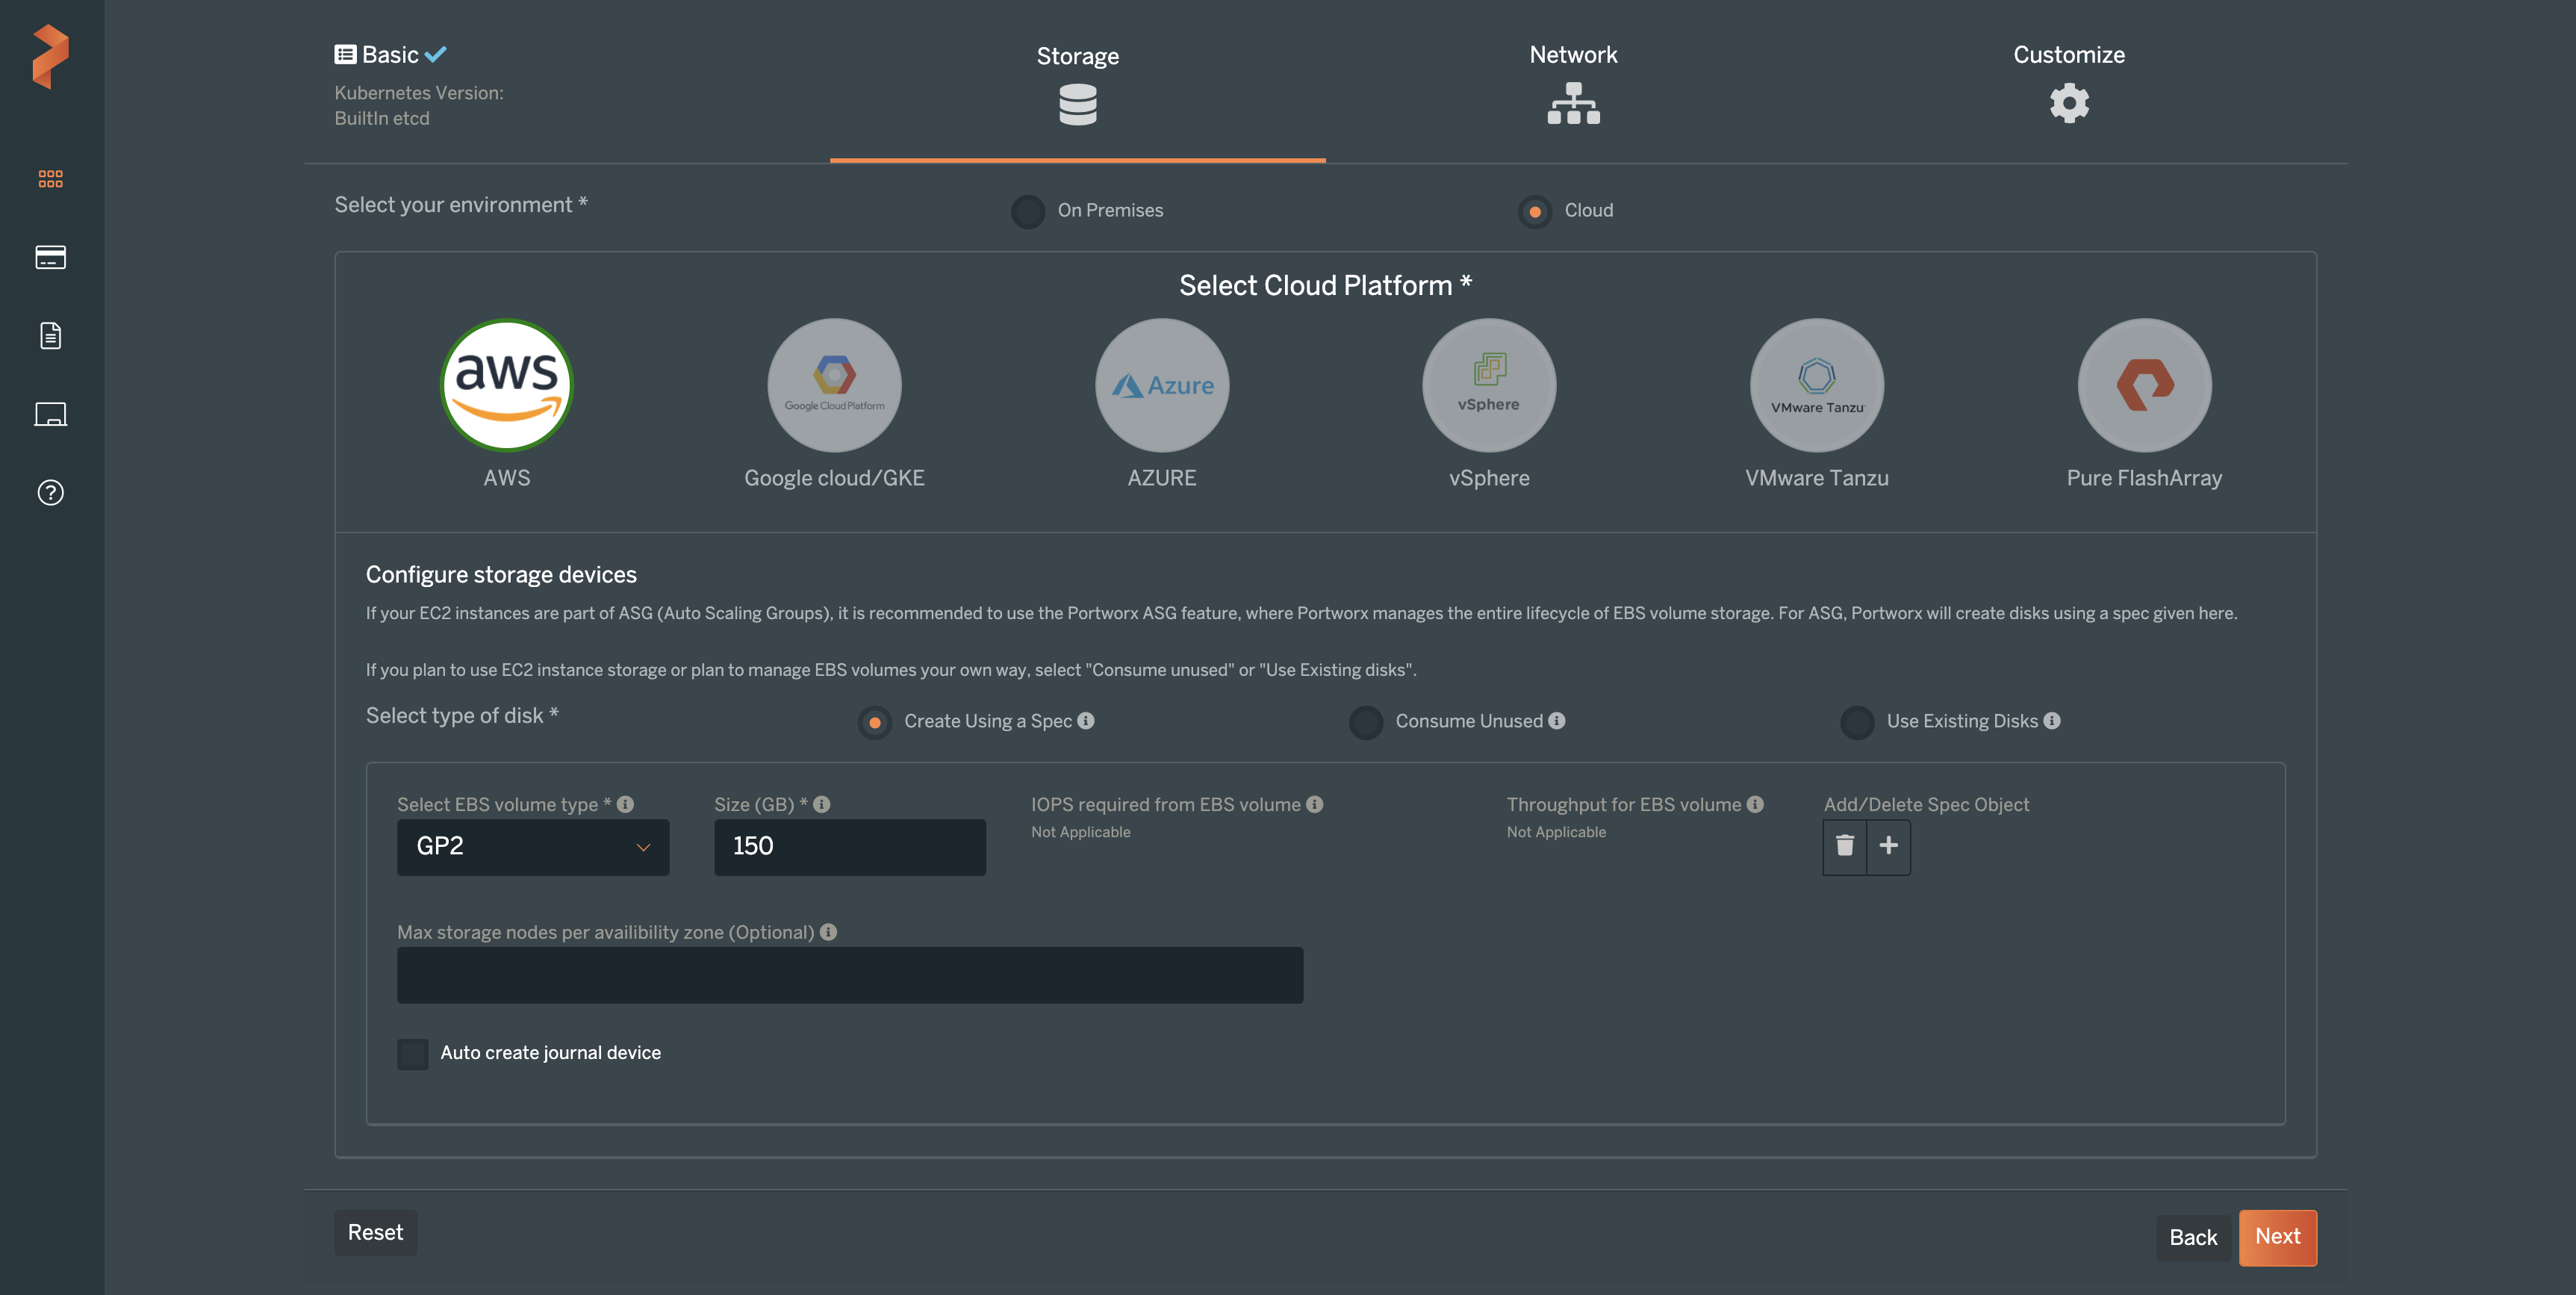
On the next screens of the setup, specify the type of cluster that you will be deploying Portworx Enterprise on. In this example, “Cloud” was chosen for the environment. The cloud platform, of course, is AWS. Next, you can select what type of disk you would like to use for Portworx. In the screenshot below, we are using the Portworx Cloud Drive feature, which allows Portworx to provision cloud storage as needed for our Kubernetes clusters. Cloud Drive makes Kubernetes cluster storage capacity very simple to manage.
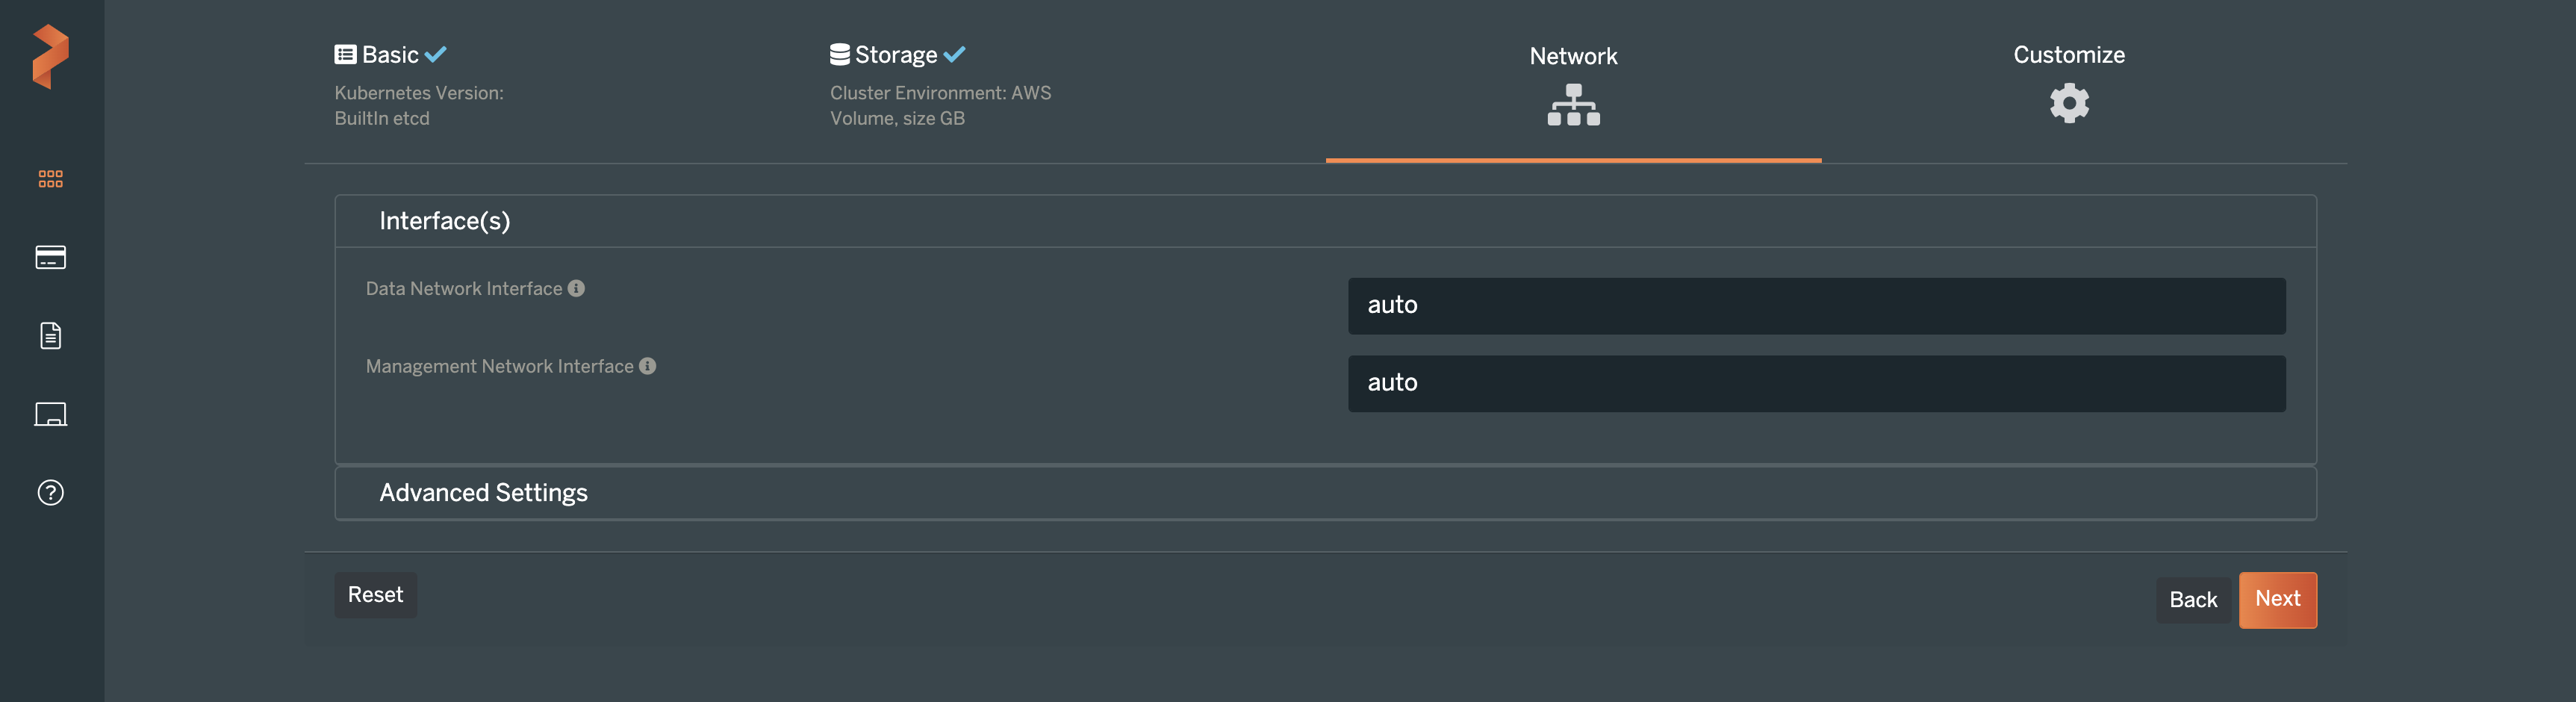
On the next screen, you can make changes to the way Portworx uses the internal Kubernetes networks, if you so choose. Otherwise, leave these as “Auto” and click Next.
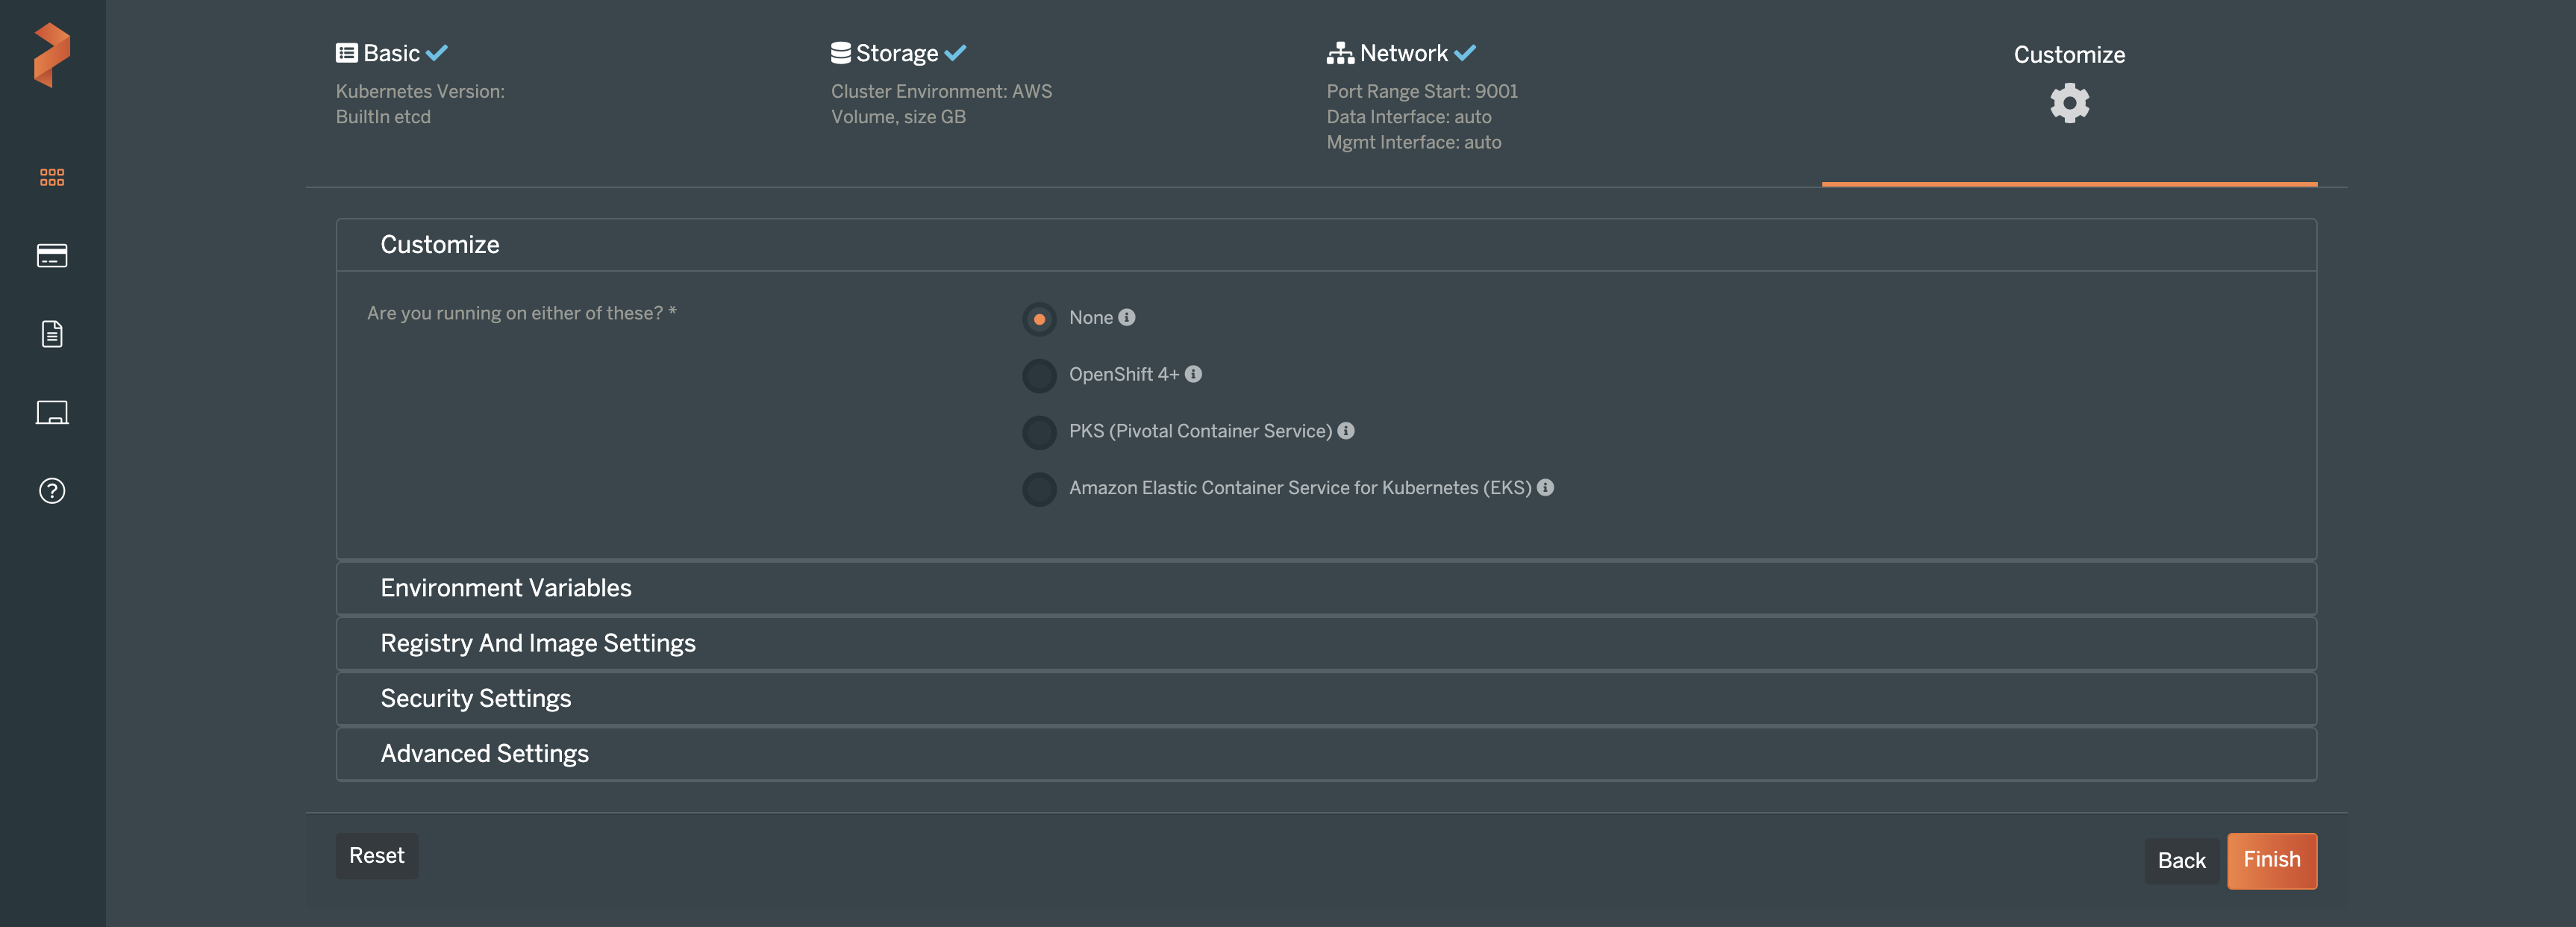
The following screen allows you to set your own customized settings for Portworx. For this example, we can leave these settings alone and click Finish.
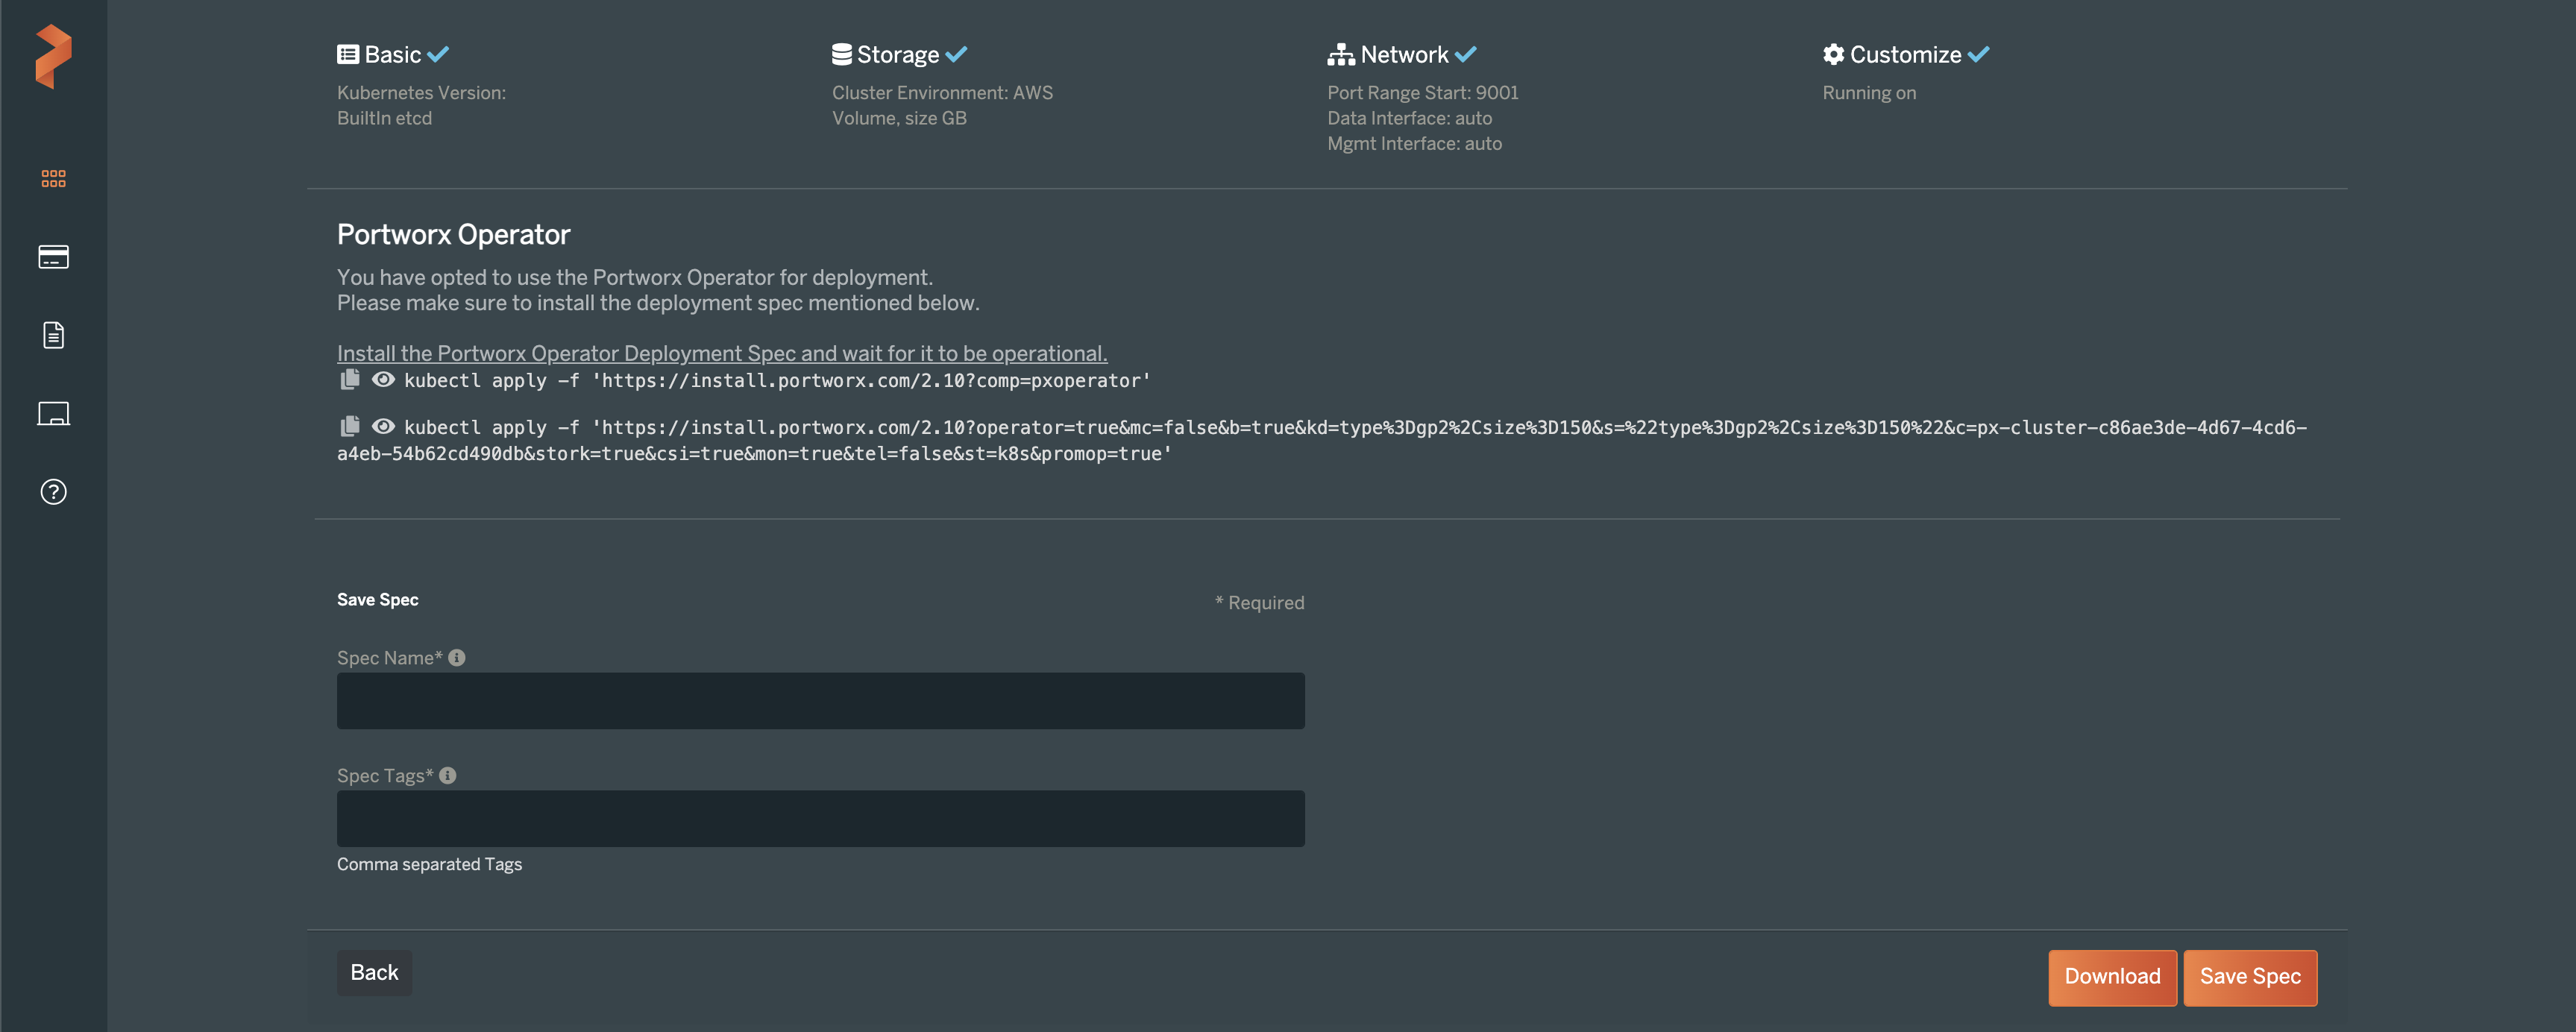
The Portworx Central site will then provide you with a pair of Kubernetes manifests that should be applied to your cluster. The first command will deploy the Portworx operator for managing the cluster’s storage components. The second command will set up the storage cluster and make some default storage classes available to be used right away after setup.
Run the two kubectl commands listed in the site and optionally save the configuration for future use. Be sure to specify the –kubeconfig file for your workload cluster so you don’t apply it to the KIND management cluster.
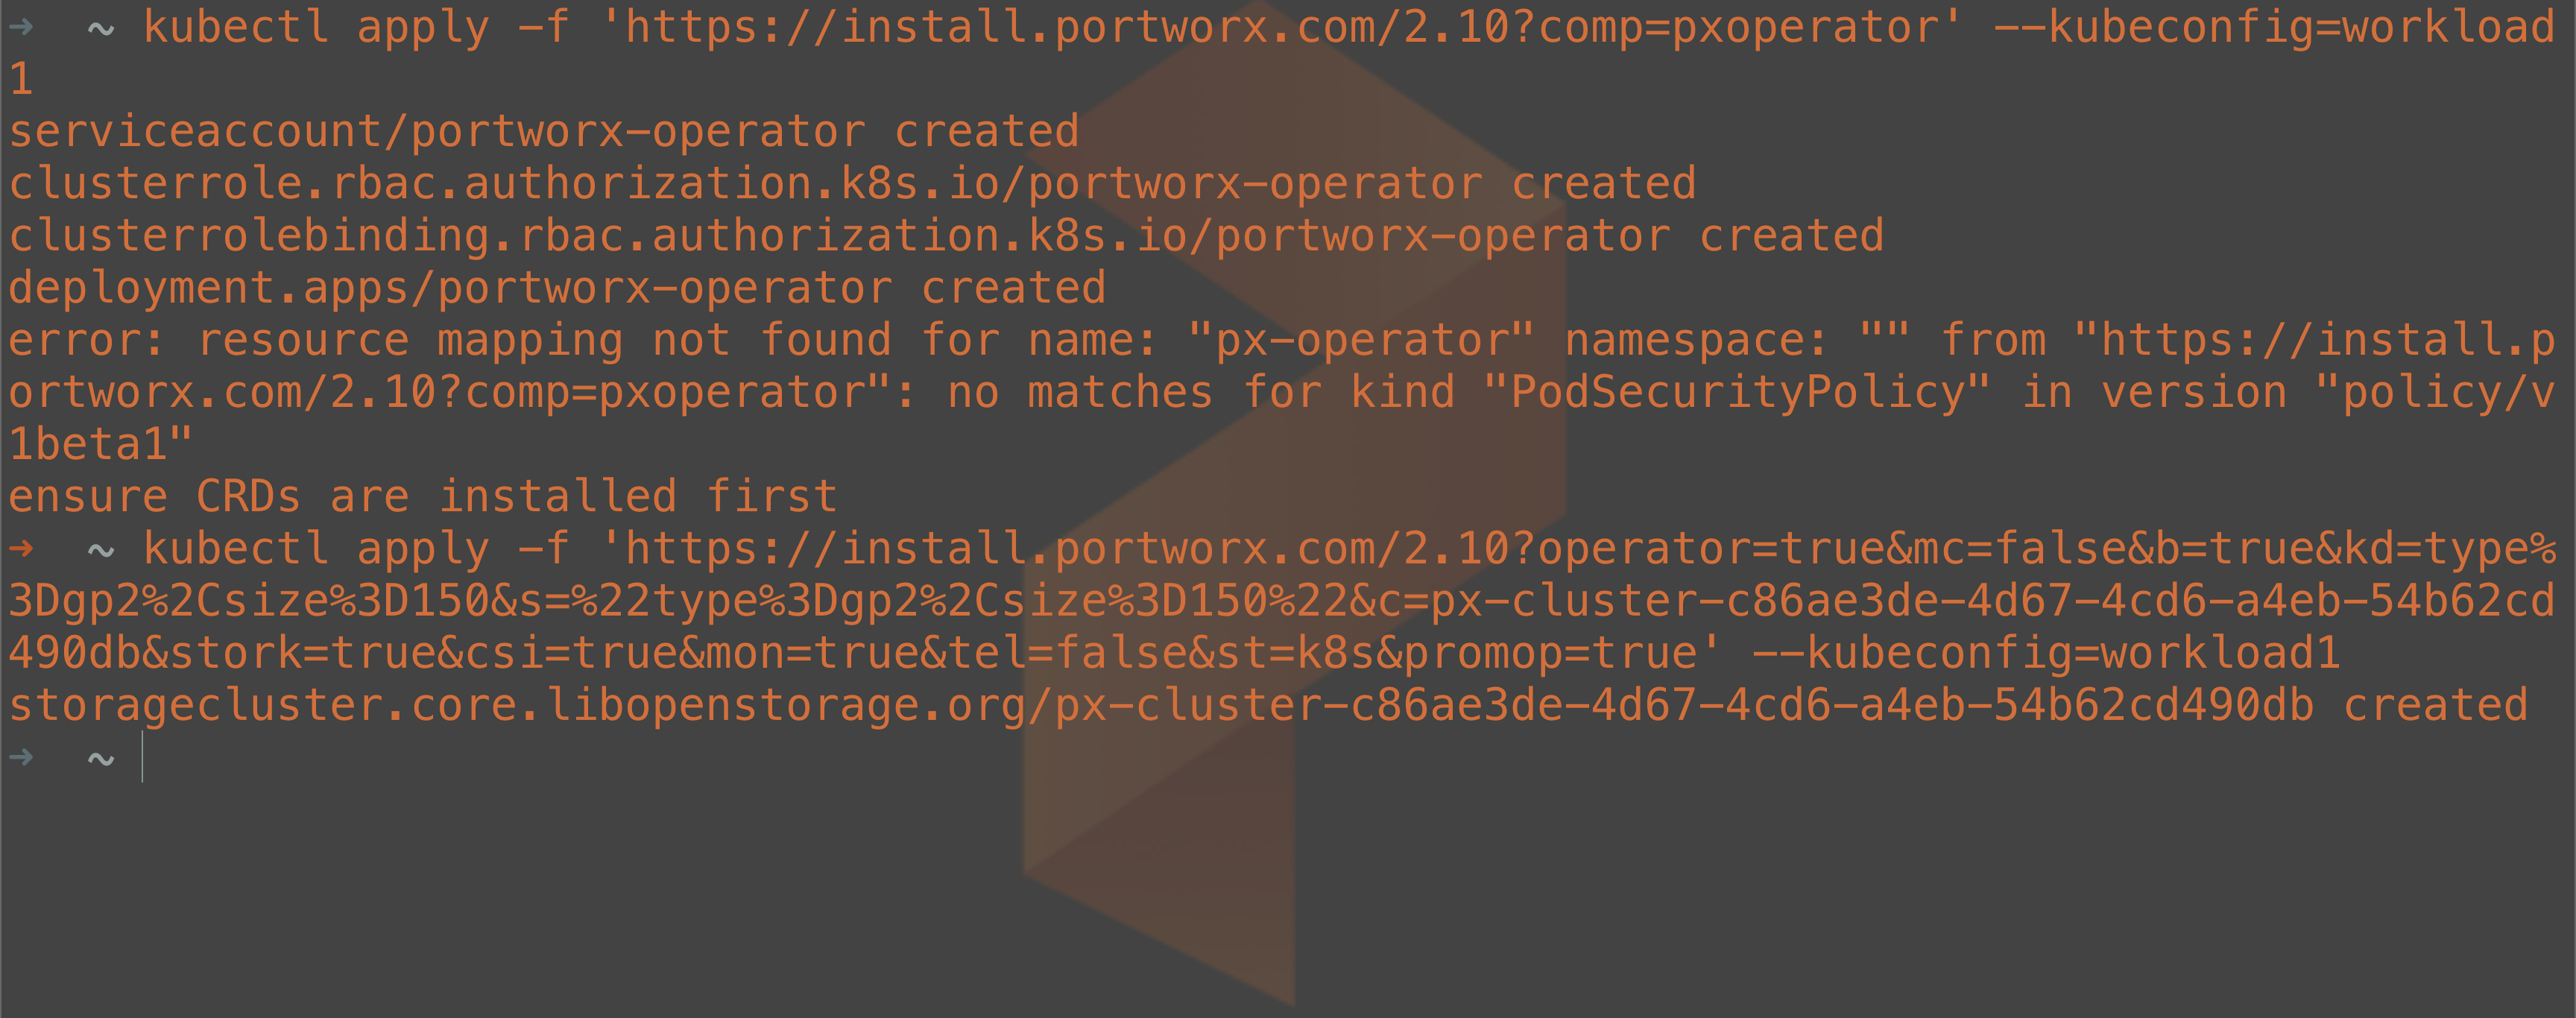
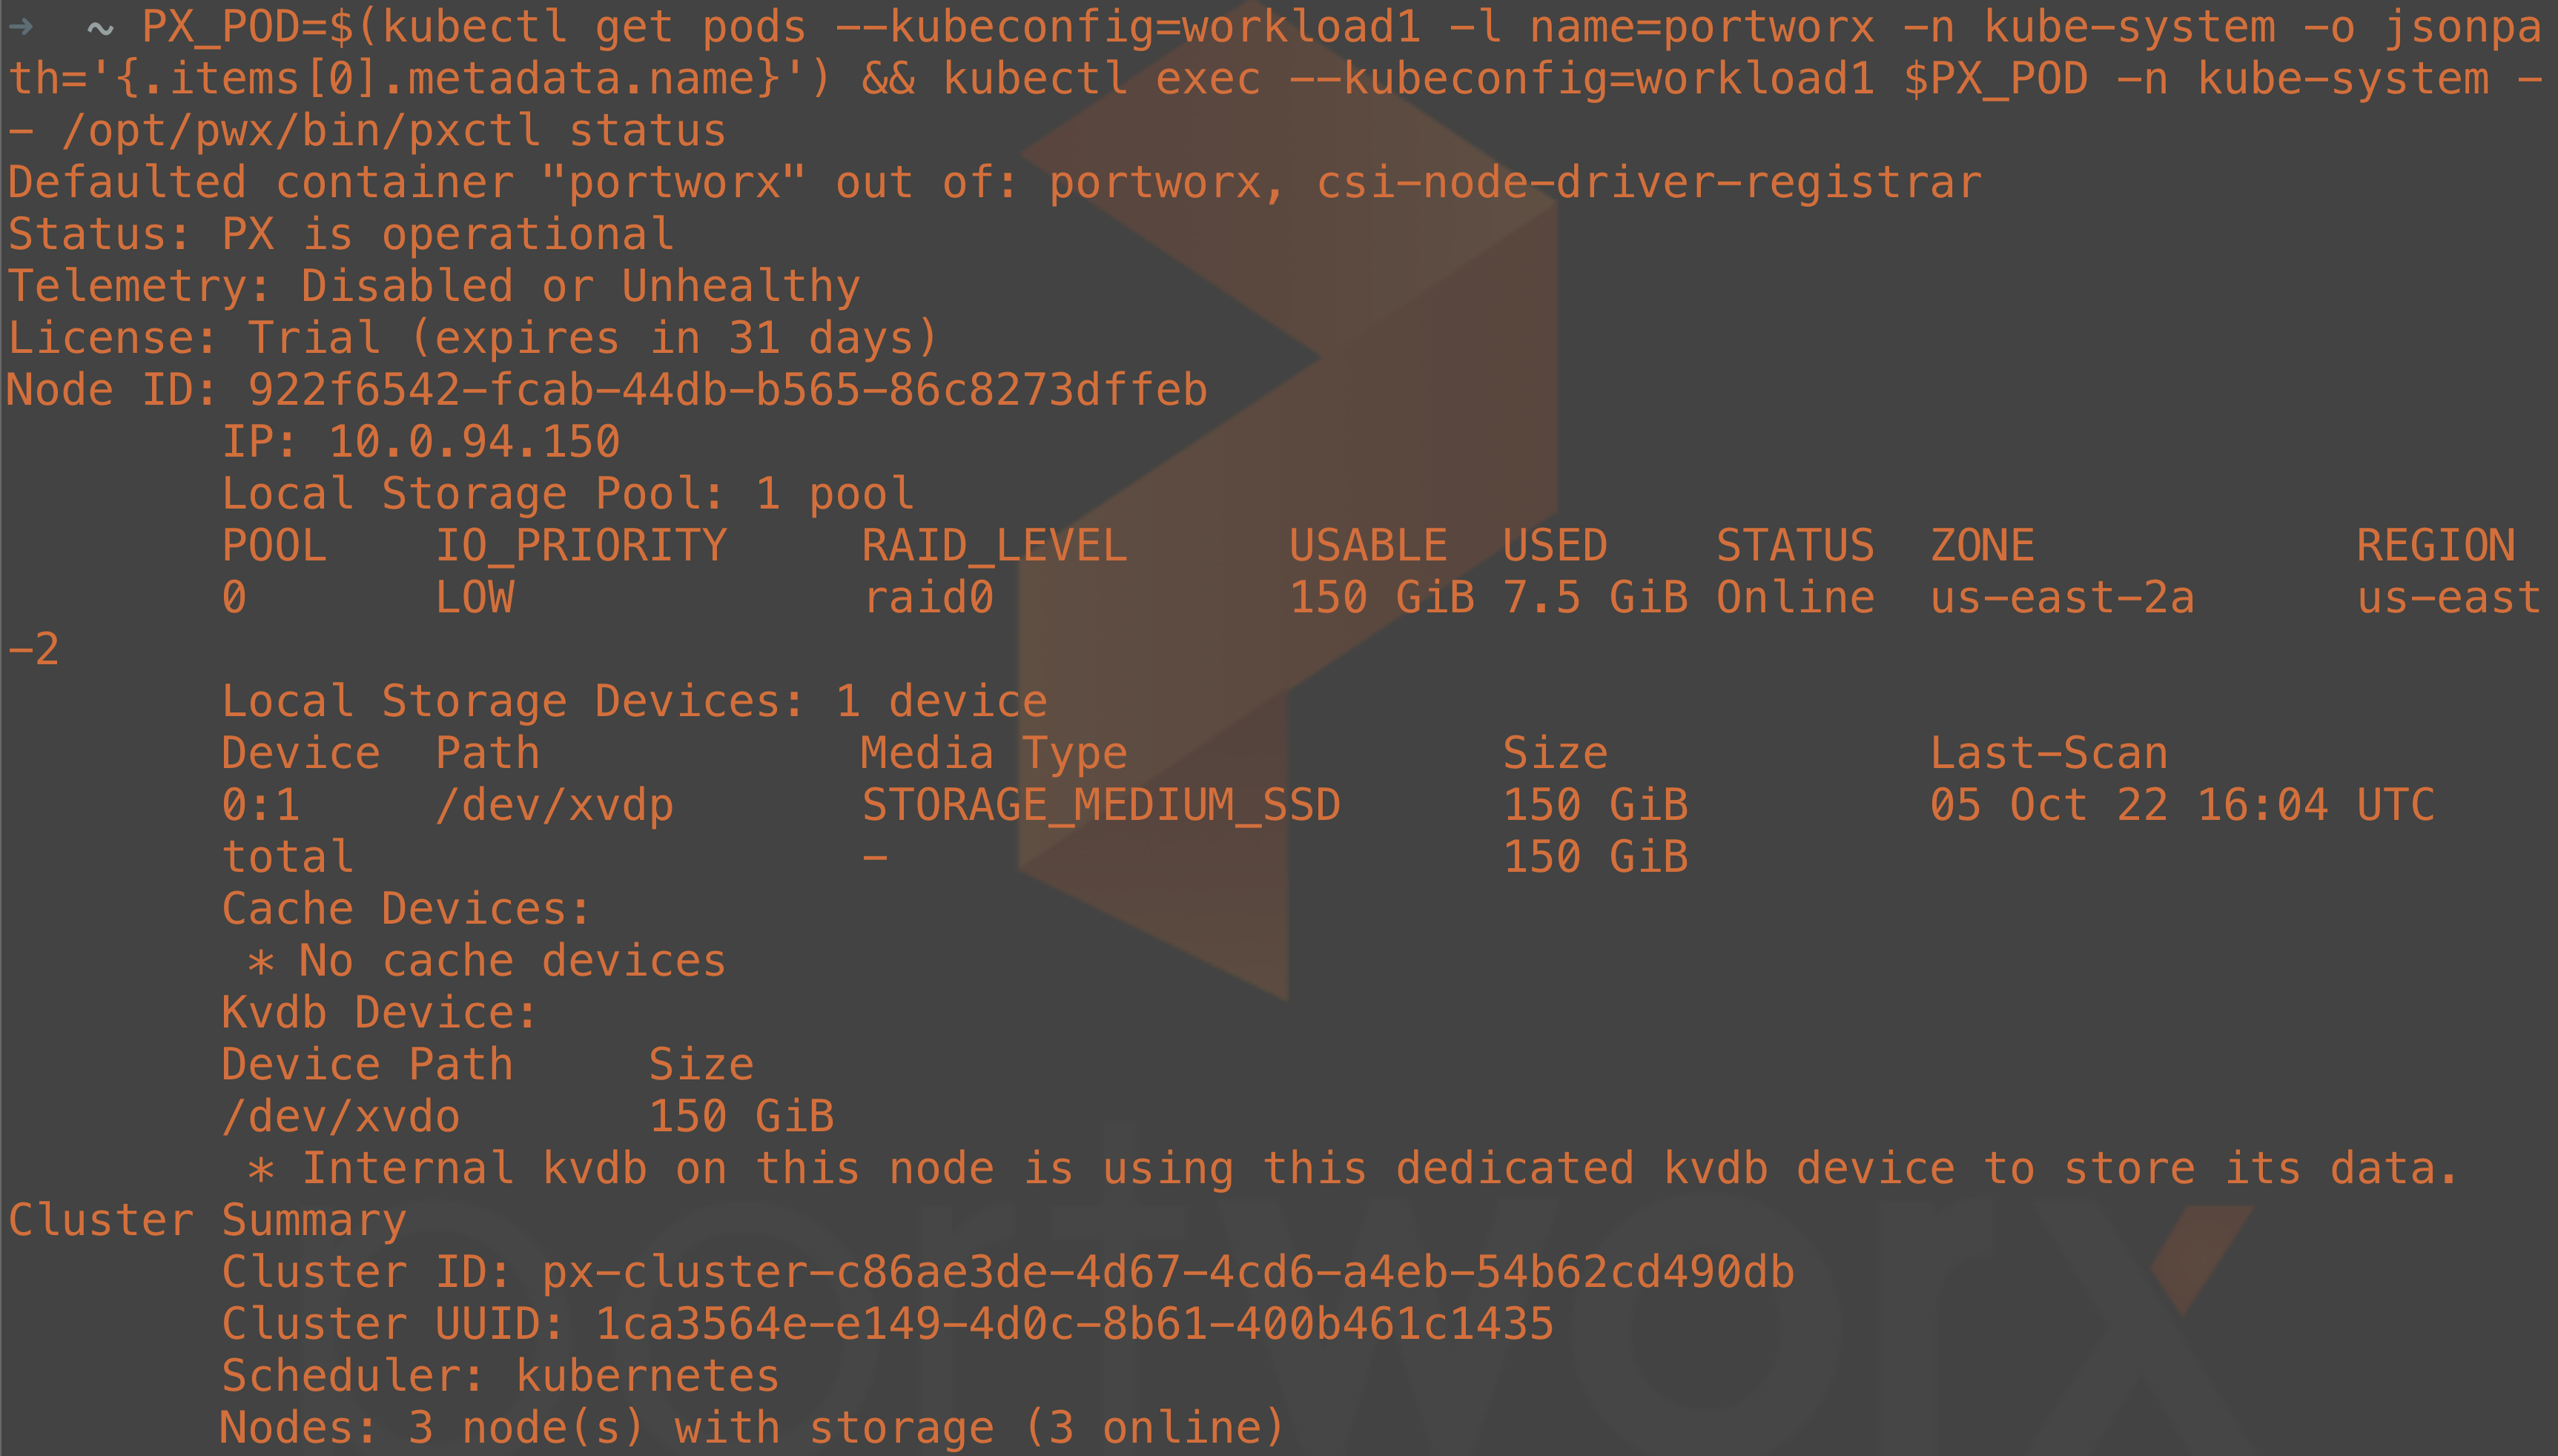
To verify that the storage cluster has been created correctly, you can run the following command to check the status of the cluster:
PX_POD=$(kubectl get pods --kubeconfig=workload1 -l name=portworx -n kube-system -o jsonpath='{.items[0].metadata.name}') && kubectl exec --kubeconfig=workload1 $PX_POD -c portworx -n kube-system -- /opt/pwx/bin/pxctl status
Note: It may take a few minutes for the storage cluster to be ready.
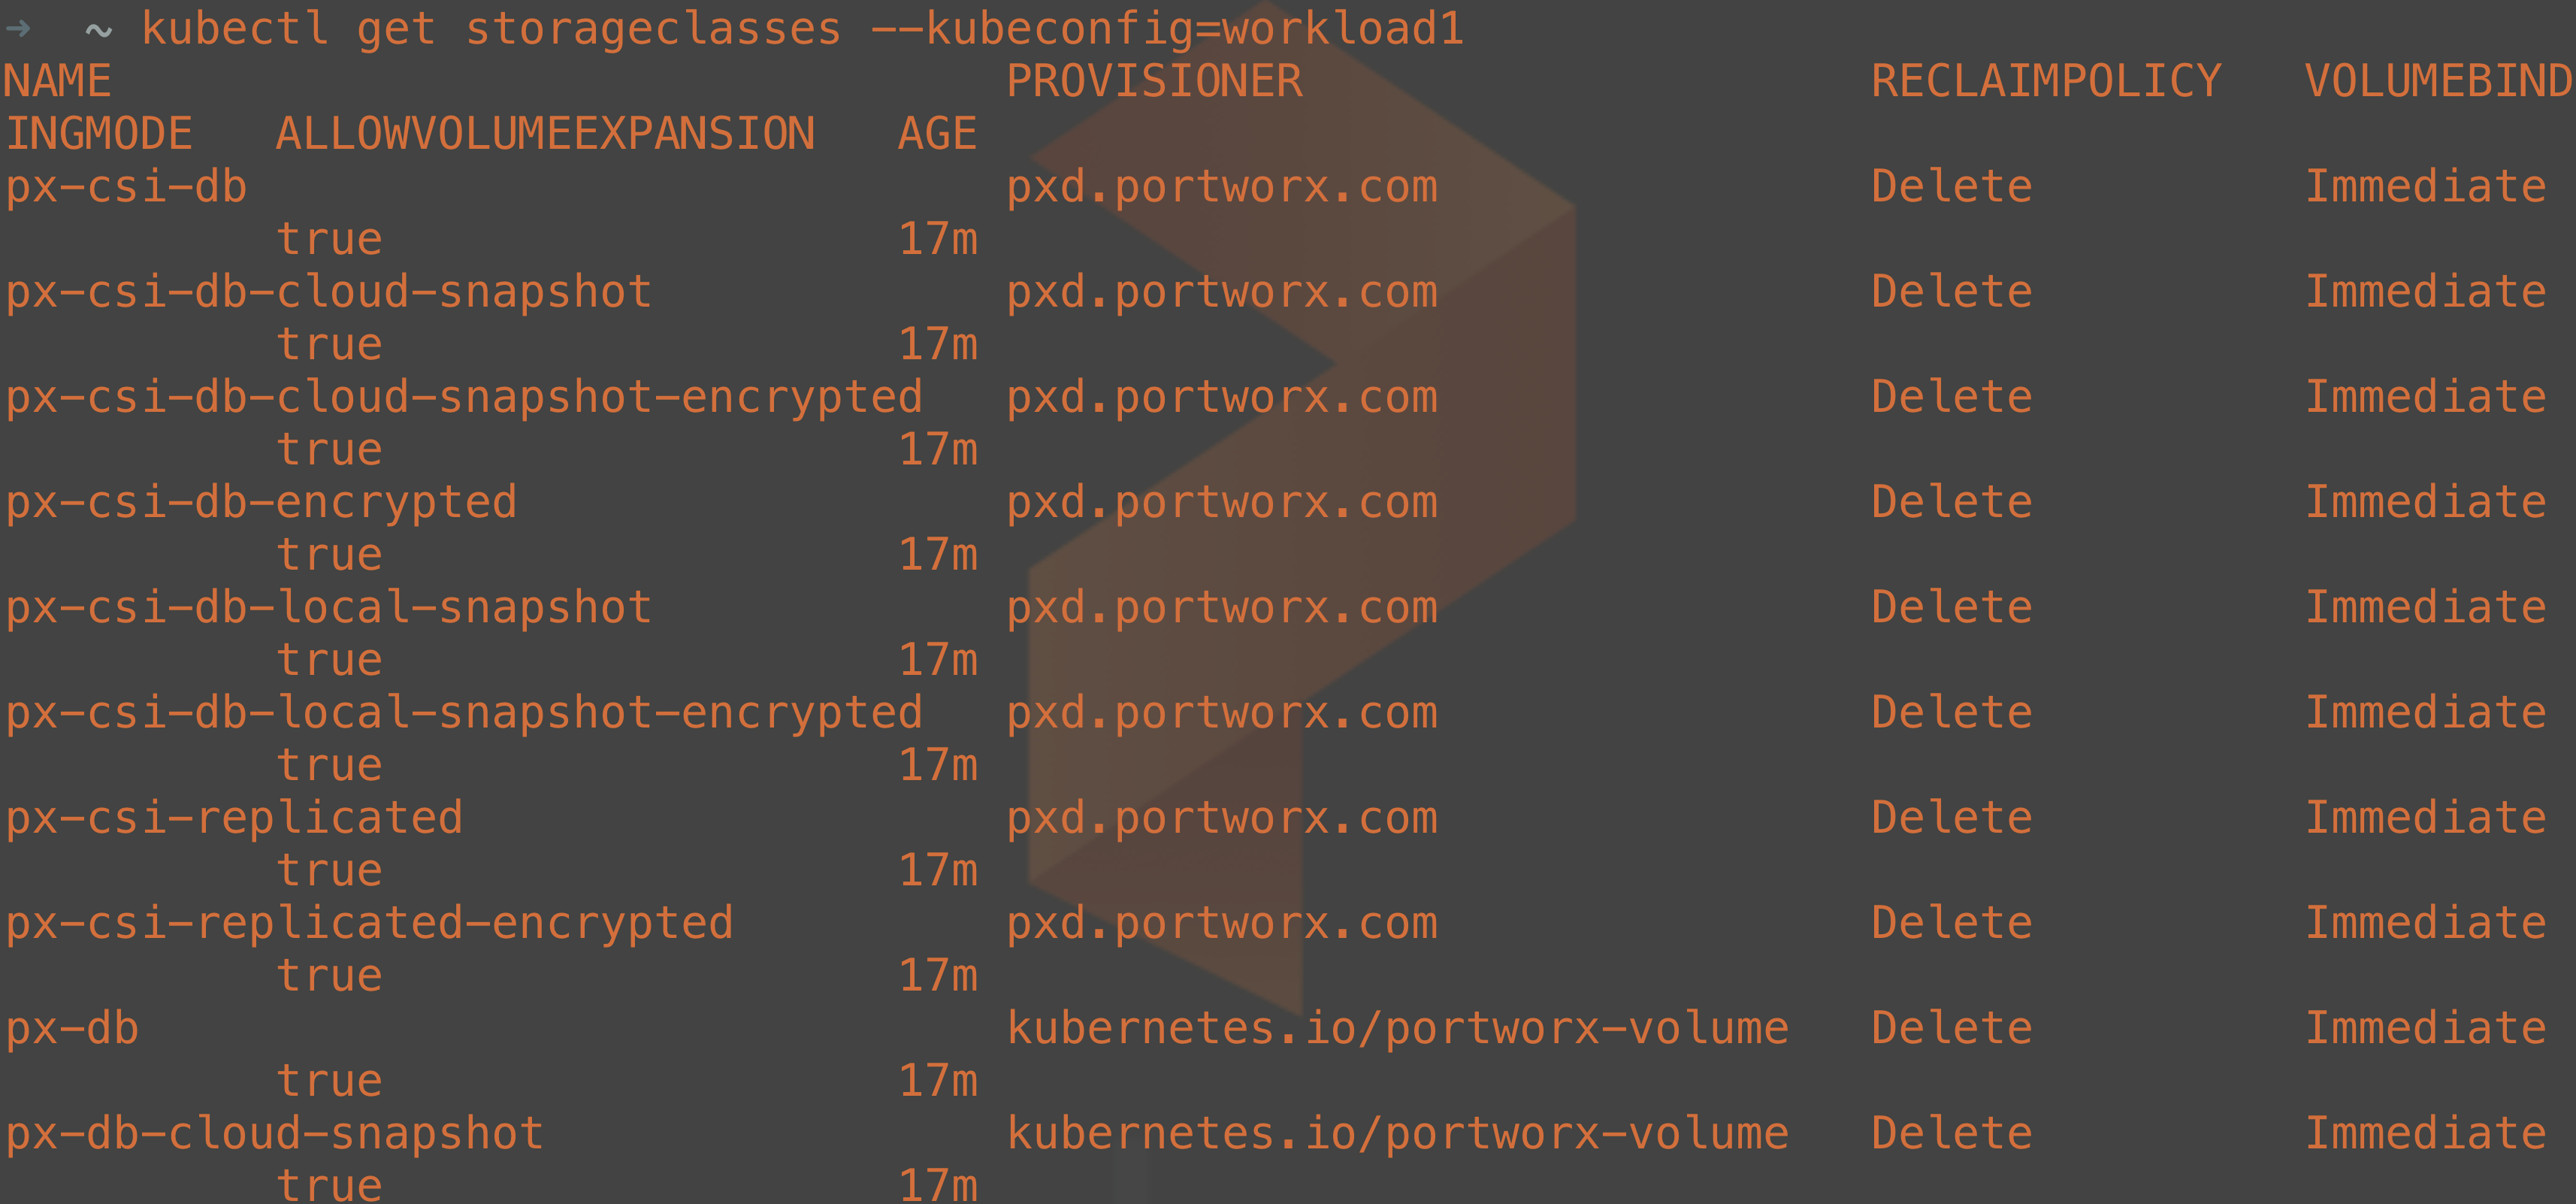
Once the Portworx manifests have been deployed to your cluster, you can then list the storage classes that are available to be consumed for dynamic persistent volume claims.
Delete Your Workload Cluster
When you’re done with your Kubernetes cluster, you can delete it and its resources by deleting the cluster object from the management cluster. The command below would delete our workload1 cluster:
kubectl delete cluster workload1

And, of course, you can remove the management cluster from your local laptop as well by using KIND.
kind delete cluster
Summary
In this Kubernetes tutorial, we used Docker Desktop, KIND, and the Cluster API components to simplify our process of setting up Kubernetes clusters on AWS. After building a management cluster in containers running on our laptop, we deployed a workload cluster on AWS, configured a Container Networking Interface, and, finally, deployed our Container Native Storage, which was Portworx Enterprise. Finally, we showed how easy it is to clean up our deployment and delete our cloud resources.
Share
Subscribe for Updates
About Us
Portworx is the leader in cloud native storage for containers.
Thanks for subscribing!

Eric Shanks
Principal Technical Marketing Manager | Cloud Native BU, Pure StorageExplore Related Content:
- AWS
- kubernetes
- portworx