Getting started with Kubeflow pipelines

Machine learning (ML) is transforming industries by enhancing decision-making processes and enabling more adaptive applications. For example, healthcare uses ML to diagnose diseases, finance uses it to detect fraud, and retail uses it to personalize recommendations. Despite its benefits, deploying ML workflows at scale is complex. It requires managing data, compute, and machine learning models while ensuring scalability, reproducibility, and reliability.
Kubernetes is widely used for ML workflows due to its ability to automate resource management, scale workloads dynamically, and integrate with modern ML tools like Kubeflow. However, one thing Kubernetes lacks is built-in support for persistent, scalable storage that ML models need to store datasets, logs, and artifacts across multiple nodes.
Without a proper storage layer, workflows can’t store data properly leading to unpredictable performance and scaling issues. Portworx extends Kubernetes storage with features like dynamic provisioning, replication, and snapshots, ensuring stable and scalable ML operations. To understand which type of storage is suitable for your ML workload, you can refer to the guide to Kubernetes storage solutions.
This guide covers:
- How to build a Machine Learning pipeline using Kubeflow for ML automation
- Understanding Kubernetes storage for ML workflows
- Building ML pipelines for real-world problems like Iris classification
An example using Iris Classification
Iris classification is a common ML task that predicts flower species based on sepal and petal dimensions. It is a good example for demonstrating ML pipelines because:
- It is structured data, making preprocessing simple.
- The classification model is lightweight yet highlights key ML steps.
- The workflow includes data preparation, model training, evaluation, and storage—all needed in real ML use cases.
By the end, you’ll understand how to run scalable ML pipelines while planning for storage reliability, resource scaling, and model reproducibility on Kubernetes
How to Deploy Kubeflow
Kubeflow is an open-source machine learning (ML) toolkit built for Kubernetes. It simplifies ML model development, orchestration, and deployment by leveraging Kubernetes’ scalability and resource management. If you’re new to Kubeflow, refer to this guide on Kubeflow to understand its architecture and components.
In this guide, we will deploy Kubeflow on Google Kubernetes Engine (GKE) using Kubeflow Manifests, which provide a declarative way to install and manage Kubeflow components.
Prerequisites
Before proceeding, ensure the following:
- Kubernetes Cluster (v1.23+): We are using a GKE cluster for this deployment
- Install the required CLI Tools: kubectl, kustomize
- Install Portworx and configure for persistent ML storage
- Install Python to run the ML pipeline locally
Now, let’s set up our GKE project and deploy Kubeflow.
Steps to Deploy Kubeflow on Kubernetes
Let’s configure our GCP project and deploy Kubeflow.
1. Setting Up GCP Project
Select or create a project on the Google Cloud Console
```bash

gcloud projects create <YOUR_PROJECT_ID> --set-as-default

gcloud config set project <YOUR_PROJECT_ID>

```
Ensure billing is enabled for the project and you are authenticated using gcloud auth login or using Cloud Shell:
2. Enable Required APIs
Kubeflow needs these Google Cloud APIs for Kubernetes management, authentication, and ML services:
```bash

gcloud services enable \

serviceusage.googleapis.com \ # Service usage tracking

compute.googleapis.com \ # Compute Engine API

container.googleapis.com \ # Kubernetes cluster management

iam.googleapis.com \ # Identity & Access Management

servicemanagement.googleapis.com \ # Service Management API

cloudresourcemanager.googleapis.com \ # Resource management

ml.googleapis.com \ # AI/ML services

iap.googleapis.com \ # Secure IAP access

sqladmin.googleapis.com \ # Cloud SQL management

meshconfig.googleapis.com \ # Istio service mesh

servicecontrol.googleapis.com # API control

```
If using another Kubernetes platform (EKS, OpenShift), these APIs are not needed.
3. Provision a GKE Cluster:
In this step, we’ll configure the cluster with appropriate settings for machine learning workloads
```bash

gcloud beta container --project "" clusters create "kubeflow-cluster" \

--zone "" --tier "standard" --no-enable-basic-auth \

--cluster-version "" --machine-type "n1-standard-8" \

--disk-type "pd-balanced" --disk-size "100" \

--metadata disable-legacy-endpoints=true --image-type "UBUNTU_CONTAINERD" \

--scopes cloud-platform \

--spot --num-nodes "3" \

--logging=SYSTEM,WORKLOAD --monitoring=SYSTEM,STORAGE,POD,DEPLOYMENT,STATEFULSET,DAEMONSET,HPA,CADVISOR,KUBELET \

--enable-ip-alias

```
What this command does:
- –zone: Deploys the cluster in your specified region (e.g., us-central1-a).
- –tier: Uses the Standard Tier, providing a managed control plane with automatic updates.
- –cluster-version: Sets the Kubernetes version (e.g., 1.30).
- –machine-type: Configures worker nodes with 8 vCPUs and 32GB RAM, suitable for ML tasks.
- –disk-type and –disk-size: Allocates 100GB balanced SSD storage per node for optimal performance.
- –image-type: Uses Ubuntu with Containerd, a lightweight, optimized container runtime.
- –scopes: Grants Google Cloud API access for IAM, Cloud Storage, and AI services.
- –spot: Deploys cost-efficient Spot VMs, reducing compute costs.
- –num-nodes: Creates a 3-node cluster, ensuring redundancy and scalability.
- –logging and –monitoring: Enables detailed monitoring and logging for cluster resources.
- –enable-ip-alias: Uses VPC-native routing, improving network performance and security
Adjust node count and machine type based on your workload needs. When running larger ML models, increase CPU and memory because larger ML models require more memory, while complex data processing needs more CPU. Consider GPUs for training and inference acceleration on deep learning models.
Verifying the Cluster Creation
After running the command, verify that the cluster is created successfully:
```bash

gcloud container clusters list

NAME: kubeflow-cluster

LOCATION: us-central1-c

MASTER_VERSION: 1.30.9-gke.1009000

MASTER_IP: 104.154.58.81

MACHINE_TYPE: n1-standard-8

NODE_VERSION: 1.30.9-gke.1009000

NUM_NODES: 3

STATUS: RUNNING

```
4. Verify Portworx Installation
Ensure following Portworx resources are running on your cluster:
```bash

kubectl get pods -n portworx

NAME                                                    READY   STATUS    RESTARTS       AGE

autopilot-7bc564f786-dhqzc                              1/1     Running   0              21h

portworx-api-m92lk                                      2/2     Running   4 (21h ago)    21h

portworx-api-nrmct                                      2/2     Running   4 (15h ago)    15h

portworx-api-zfjp7                                      2/2     Running   3 (11h ago)    11h

portworx-kvdb-bdvmm                                     1/1     Running   0              21h

portworx-operator-54d9bc6fcf-npq55                      1/1     Running   0              11h

portworx-pvc-controller-5687795cbc-g2zs6                1/1     Running   0              11h

portworx-pvc-controller-5687795cbc-rthb5                1/1     Running   0              15h

portworx-pvc-controller-5687795cbc-tszgl                1/1     Running   0              43h

prometheus-px-prometheus-0                              2/2     Running   0              11h

px-cluster-e3a3fc81-0cf4-4f2b-8418-79d8a259a201-8cd7x   1/1     Running   0              15h

px-cluster-e3a3fc81-0cf4-4f2b-8418-79d8a259a201-k5zqz   1/1     Running   0              21h

px-cluster-e3a3fc81-0cf4-4f2b-8418-79d8a259a201-w9cvm   1/1     Running   0              11h

px-csi-ext-5db9d895df-26qq5                             4/4     Running   12 (21h ago)   43h

px-csi-ext-5db9d895df-tfhcl                             4/4     Running   12 (21h ago)   43h

px-csi-ext-5db9d895df-z7x4s                             4/4     Running   12 (21h ago)   43h

px-prometheus-operator-658b4858bb-879wv                 1/1     Running   0              21h

px-telemetry-phonehome-cssb9                            2/2     Running   0              21h

px-telemetry-phonehome-klfdk                            2/2     Running   0              15h

px-telemetry-phonehome-lr9tm                            2/2     Running   0              11h

px-telemetry-registration-57665c4cc-psh2f               2/2     Running   0              21h

stork-7d96d8dc55-cs6jp                                  1/1     Running   0              11h

stork-7d96d8dc55-ltmmt                                  1/1     Running   0              15h

stork-7d96d8dc55-tvm4m                                  1/1     Running   0              43h

stork-scheduler-5bf694cbdb-d6f5g                        1/1     Running   0              43h

stork-scheduler-5bf694cbdb-l8scd                        1/1     Running   0              11h

stork-scheduler-5bf694cbdb-qlngp                        1/1     Running   0              15h

```
If any pods are not in the Running state, check logs using:
```bash

kubectl logs -n portworx <pod-name>

```
5. Create a Persistent Volume Claim (PVC) to store ML pipeline outputs
A Persistent Volume Claim (PVC) ensures data persistence, high-performance storage, and shared access, which allows Kubeflow components to store and retrieve ML artifacts, datasets, and models across multiple executions.
Follow these steps to create a Portworx-backed PVC to store ML pipeline outputs.
a. Define the PVC in a YAML File
Create a file portworx-pvc.yaml with the following contents:
```yaml
kind: PersistentVolumeClaim
apiVersion: v1
metadata:
   name: iris-ml-pipeline-pvc
spec:
   storageClassName: px-csi-replicated
   accessModes:
       - ReadWriteMany
   resources:
       requests:
           storage: 2Gi
```
Breakdown:
- kind: PersistentVolumeClaim: Specifies that this resource is a PersistentVolumeClaim (PVC), requesting storage from a PersistentVolume (PV).
- apiVersion: v1: Uses the Kubernetes v1 API, ensuring compatibility with standard Kubernetes storage management.
- metadata:
- name: iris-ml-pipeline-pvc: Defines the PVC’s unique identifier within the cluster for reference in workloads.
- spec:
- storageClassName: px-csi-replicated: Uses Portworx CSI driver with replication enabled, ensuring high availability and fault tolerance by replicating data across nodes.
- accessModes: ReadWriteMany (RWX): Allows multiple pods across different nodes to mount and read/write to the same volume simultaneously, which is crucial for distributed ML workloads.
- resources:
- requests: storage: 2Gi: Requests 2Gi of storage, ensuring sufficient space for dataset storage, model artifacts, and logs during the ML pipeline execution.
Note: You can also choose to use dynamic volume provisioning instead of manually creating a PVC.
b. Apply the PVC to Your Cluster
Run the following command to create the PVC:
```bash

kubectl apply -f portworx-pvc.yaml

```
c. Verify the PVC Status
Check if the PVC is successfully created:
```bash

kubectl get pvc

NAME           STATUS   VOLUME                                     CAPACITY   ACCESS MODES   STORAGECLASS   VOLUMEATTRIBUTESCLASS   AGE

iris-ml-pipeline-pvc   Bound    pvc-8d387fd1-885c-41c9-96a8-420dbc7deb72   2Gi        RWX            px-csi-db      <unset>                 46h

```
The PVC is successfully bound to a Portworx volume.
6. Update Default Storage Class:
Since we’re integrating Portworx with Kubeflow Pipelines, we need to ensure that Portworx is the default storage provider
Why Update the Default Storage Class?
Setting Portworx as the default storage class ensures that all ML workloads automatically use high-performance, scalable, and fault-tolerant storage without manual PVC configuration. This eliminates errors and optimizes storage for large datasets and model artifacts.
Steps to Update the Default Storage Class:
- Get the Existing Default Storage Class
Check which storage class is currently set as the default:
```bash

kubectl get storageclass

NAME                                 PROVISIONER                     RECLAIMPOLICY   VOLUMEBINDINGMODE      ALLOWVOLUMEEXPANSION   AGE

px-csi-db                            pxd.portworx.com                Delete          Immediate              true                   39h

.

.

.

standard-rwo (default)               pd.csi.storage.gke.io         Delete          WaitForFirstConsumer   true                   39h

``` - Remove the Default Annotation from the existing Storage Class.
By default, GKE assigns a default storage class (standard-rwo). Since we are using Portworx for ML workloads, we need to ensure all new PVCs use Portworx storage instead.
Run the following command to remove GKE’s default storage class annotation:
```bash

kubectl patch storageclass standard-rwo -p '{"metadata": {"annotations":{"storageclass.kubernetes.io/is-default-class":"false"}}}'

```
What happens if we skip this?
Suppose we only set Portworx as the default storage class without removing the GKE default. In that case, GKE may still use its storage class for PVCs that don’t explicitly specify a StorageClass, leading to unexpected behavior and inconsistent storage usage across ML workloads.
- Set Portworx as the Default Storage Class
Now, make Portworx the default storage class:
```bash

kubectl patch storageclass px-csi-db -p '{"metadata": {"annotations":{"storageclass.kubernetes.io/is-default-class":"true"}}}'

``` - Verify the Changes
Run the following command to confirm that Portworx is now the default:
```bash

kubectl get storageclass

NAME                                 PROVISIONER                     RECLAIMPOLICY   VOLUMEBINDINGMODE      ALLOWVOLUMEEXPANSION   AGE

px-csi-db (default)                  pxd.portworx.com                Delete          Immediate              true                   39h

.

.

.

px-csi-replicated                    pxd.portworx.com                Delete          Immediate              true                   39h

px-csi-replicated-encrypted          pxd.portworx.com                Delete          Immediate              true                   39h

standard                             kubernetes.io/gce-pd            Delete          Immediate              true                   39h

```
What Changed?
- Portworx (px-csi-db) is now the default storage class (marked as default).
- GKE’s standard-rwo storage class is no longer default, preventing unintended PVC bindings
Any new Persistent Volume Claims (PVCs) will automatically use Portworx for storage.
7. Deploy Kubeflow:
To deploy Kubeflow on GKE, we will follow the official Kubeflow Manifests guide.
- Clone the Kubeflow Manifests repository
```bash

git clone https://github.com/kubeflow/manifests.git

cd manifests

```
Ensure you check out at the branch supporting your Kubernetes cluster as per their releases.
- Deploy Kubeflow components
```bash

while ! kustomize build example | kubectl apply -f -; do echo "Retrying to apply resources"; sleep 20; done

```
Kubeflow components generate many filesystem events, especially during pipeline execution. To prevent issues like log loss or stuck pods, increase Linux Kernel limits by updating the inotify limits on the nodes:
```bash

sudo sysctl fs.inotify.max_user_instances=2280

sudo sysctl fs.inotify.max_user_watches=1255360

```
- Check if all pods are running
```bash
kubectl get pods -n kubeflow
NAME                                                     READY   STATUS    RESTARTS      AGE
admission-webhook-deployment-5df559fc94-ndxkl            1/1     Running   0             12m
cache-server-554dd7f7c4-vtkj6                            2/2     Running   0             12m
centraldashboard-9ddb69977-bk478                         2/2     Running   0             12m
jupyter-web-app-deployment-8f4f7d67-s72qd                2/2     Running   0             12m
katib-controller-754877f9f-k5n45                         1/1     Running   0             11m
katib-db-manager-64d9c694dd-ql42w                        1/1     Running   0             11m
katib-mysql-74f9795f8b-kqnzg                             1/1     Running   0             11m
katib-ui-858f447bfb-nrdss                                2/2     Running   0             11m
kserve-controller-manager-6c597f4669-4722m               2/2     Running   0             11m
kserve-models-web-app-5d7d5857df-k6fnk                   2/2     Running   0             11m
kubeflow-pipelines-profile-controller-7795c68cfd-gs656   1/1     Running   0             11m
metacontroller-0                                         1/1     Running   0             11m
metadata-envoy-deployment-5c5f76944d-krgv8               1/1     Running   0             11m
metadata-grpc-deployment-68d6f447cc-6g7f8                2/2     Running   4 (10m ago)   11m
metadata-writer-75d8554df5-tnlzc                         2/2     Running   0             11m
minio-59b68688b5-jzmmp                                   2/2     Running   0             11m
ml-pipeline-d9cff648d-w2b5v                              2/2     Running   0             11m
ml-pipeline-persistenceagent-57d55dc64b-fzl2d            2/2     Running   0             11m
ml-pipeline-scheduledworkflow-6768fb456d-f5f2k           2/2     Running   0             11m
ml-pipeline-ui-57cf97d685-2fbb5                          2/2     Running   0             11m
ml-pipeline-viewer-crd-59c477457c-6zdf5                  2/2     Running   1 (11m ago)   11m
ml-pipeline-visualizationserver-774f799b86-z9b5l         2/2     Running   0             11m
mysql-5f8cbd6df7-hc6cn                                   2/2     Running   0             11m
notebook-controller-deployment-7cdd76cbb5-2jcxj          2/2     Running   1 (11m ago)   11m
profiles-deployment-54d548c6c5-twlwh                     3/3     Running   1 (11m ago)   11m
pvcviewer-controller-manager-7b4485d757-8t5rh            3/3     Running   0             11m
tensorboard-controller-deployment-7d4d74dc6b-qjvdd       3/3     Running   2 (10m ago)   11m
tensorboards-web-app-deployment-795f494bc5-qgs44         2/2     Running   0             11m
training-operator-7dc56b6448-vbq74                       1/1     Running   0             11m
volumes-web-app-deployment-9d468585f-x2qtn               2/2     Running   0             11m
workflow-controller-846d5fb8f4-tc4zd                     2/2     Running   1 (11m ago)   11m
```
Once all components are running, Kubeflow is ready
8. Access Kubeflow UI
To access the Kubeflow Platform dashboard, follow these steps
- Edit the Istio Ingress Gateway service:
kubectl edit svc istio-ingressgateway -n istio-system

```yaml
apiVersion: v1
kind: Service
metadata:
  name: istio-ingressgateway
  namespace: istio-system
  labels:
    app: istio-ingressgateway
    istio: ingressgateway
.
.
.
spec:
  type: LoadBalancer  # Changed from ClusterIP to LoadBalancer
  selector:
    app: istio-ingressgateway
    istio: ingressgateway
  ports:
    - name: status-port
      port: 15021
      targetPort: 15021
      protocol: TCP
    - name: http2
      port: 80
      targetPort: 8080
      protocol: TCP
    - name: https
      port: 443
      targetPort: 8443
      protocol: TCP
    - name: tcp
      port: 31400
      targetPort: 31400
      protocol: TCP
    - name: tls
      port: 15443
      targetPort: 15443
      protocol: TCP
.
.
.
  status:
    - loadBalancer: []
```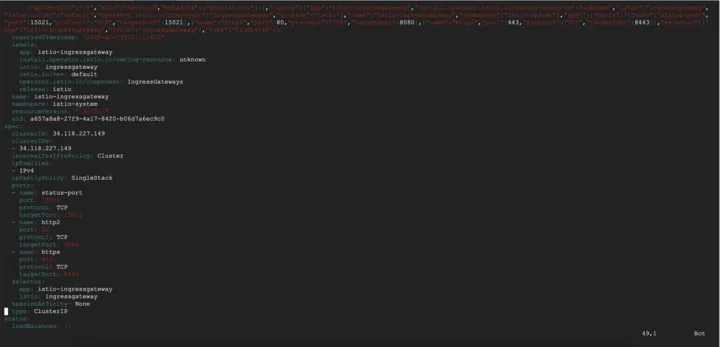
Change ClusterIP to LoadBalancer.
By default, Kubeflow services are set to ClusterIP, meaning they are only accessible within the cluster. Changing this to LoadBalancer provides external access without needing port forwarding.
Run the following command to observe the assigned external IP:
```bash
kubectl get svc -n istio-system -w // watch the External IP changes from ClusterIP to LadBalancer
NAME                    TYPE           CLUSTER-IP       EXTERNAL-IP   PORT(S)                                      AGE
cluster-local-gateway   ClusterIP      34.118.227.156   <none>        15020/TCP,80/TCP                             14h
istio-ingressgateway    LoadBalancer   34.118.227.149   <pending>     15021:31703/TCP,80:32455/TCP,443:31556/TCP   14h
istiod                  ClusterIP      34.118.230.108   <none>        15010/TCP,15012/TCP,443/TCP,15014/TCP        14h
knative-local-gateway   ClusterIP      34.118.227.250   <none>        80/TCP                                       14h
istio-ingressgateway    LoadBalancer   34.118.227.149   34.173.135.187   15021:31703/TCP,80:32455/TCP,443:31556/TCP   14h
```
The istio-ingressgateway service is updated to LoadBalancer.
2. Access the UI
Once the external IP is assigned, open the istio-system external IP in your browser:
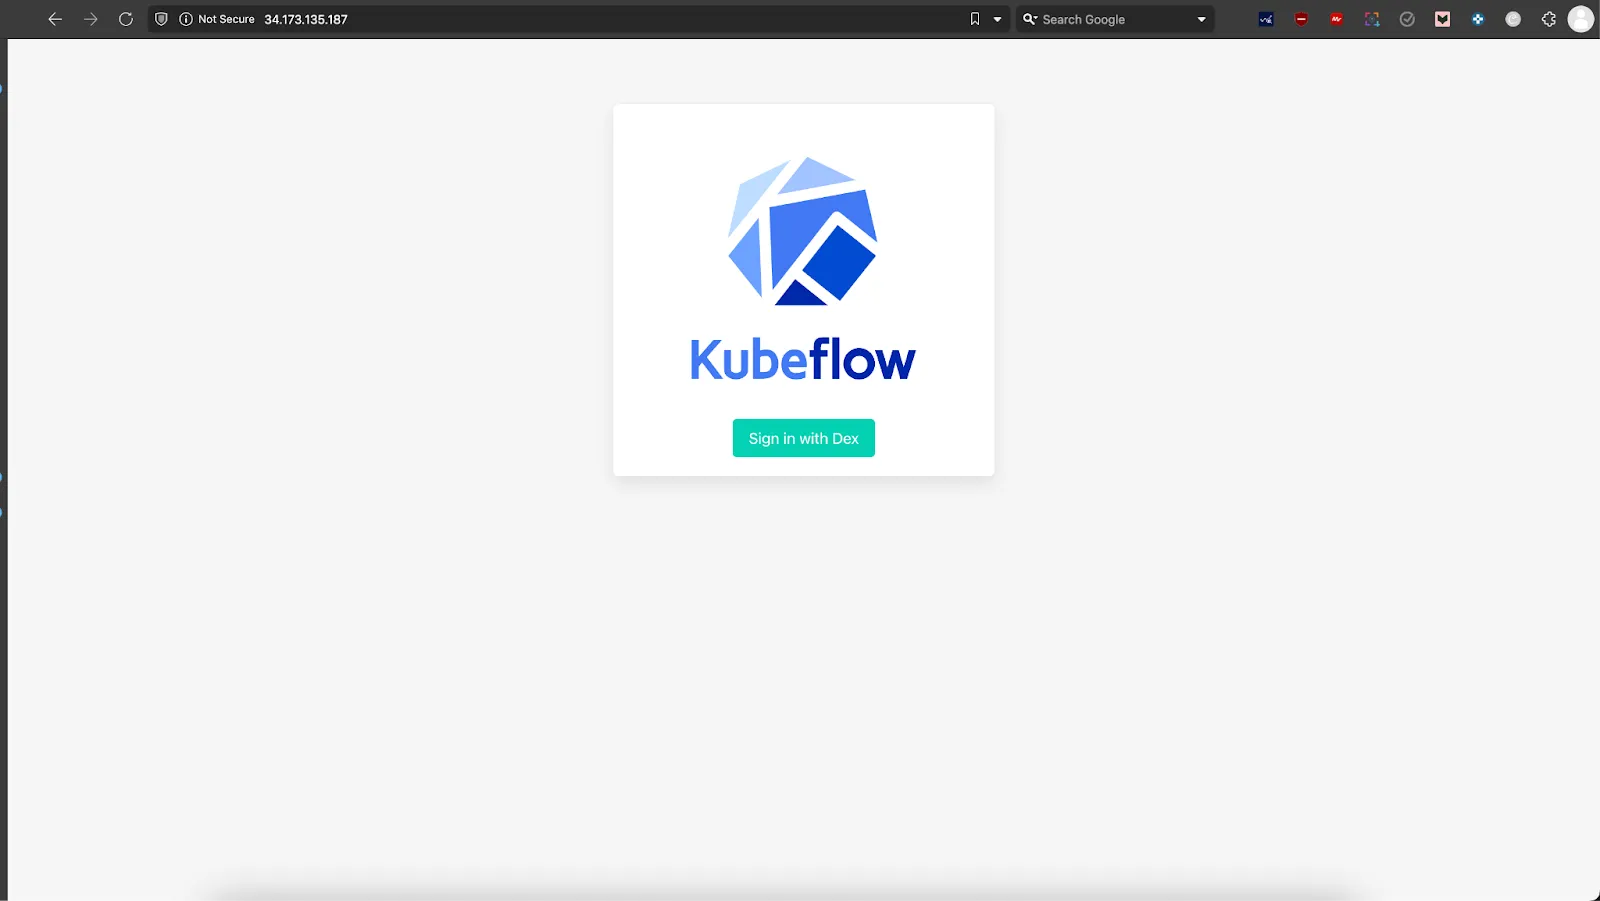
Log in using the default user credentials. Follow this guide to retrieve the correct credentials.
- Email: user@example.com
- Password: 12341234
In this section, you installed Kubeflow on GKE with Portworx. You can also install Kubeflow with Amazon EKS with Portworx. Now, you’re ready to build and run an ML pipeline. This pipeline will preprocess data, train a model, and assess its performance. Portworx will provide persistent storage to keep ML data safe and available in production.
Running Machine Learning Pipelines with Kubeflow and Portworx
Machine learning pipelines involve multiple stages—data preprocessing, model training, evaluation, and deployment. Each stage requires persistent, scalable storage, especially when dealing with large datasets and distributed training. Kubeflow Pipelines simplify ML workflow automation, but Kubernetes lacks built-in persistent storage for handling data across multiple runs. This is where Portworx ensures reliable, container-native storage with high availability and performance.

Why Use Portworx for ML Pipelines?
- Data Persistence: Prevents data loss by ensuring storage continuity between pipeline runs.
- Scalability: Dynamically provisions storage as workloads scale.
- High Availability: Supports fault tolerance, reducing disruptions in training and inference.
- Multi-Cloud Support: Works across GKE, EKS, and AKS, providing a consistent storage layer.
Deploying a Kubeflow Pipeline with Portworx
In this guide, we will deploy an Iris Classification pipeline using Kubeflow Pipelines and Portworx for persistent storage.
What does this Pipeline do?
This pipeline automates the end-to-end ML workflow for classifying iris flowers, including these steps:
- Load Data – Loads the Iris dataset and saves it
- Data Preprocessing – Normalizes the data, and splits it into training and test sets.
- Model Training – Trains a Scikit-learn classification model using the processed dataset.
- Evaluation – Assesses model accuracy and logs performance metrics.
- Model Deployment with Persistent Storage – Saves the trained model to Portworx storage, ensuring durability and accessibility for serving predictions.
Step 1: Organizing the Pipeline Project
To keep the pipeline modular and maintainable, we’ll organize the code into separate files, each handling a specific part of the workflow.
Project Structure
Here’s the project structure of the pipeline:
```yaml
kubeflow-ml-pipeline/
│── components/
│   ├── data_acquisition.py          # Loading data step
│   ├── feature_preparation.py       # Preprocessing step
│   ├── model_development.py         # Model training step
│   ├── performance_assessment.py    # Model evaluation step
│── pipeline.py                      # Assembles the ML pipeline
│── iris_pipeline.yaml               # Compiled pipeline to YAML
│── requirements.txt                 # Python dependencies
│── README.md                        # Documentation
```
Step 2: Define Pipeline Components
Each component is written as a separate Python file inside the components/ directory.
Data Acquisition (components/data_acquisition.py)
This component loads the Iris dataset and saves it as NumPy arrays.
```python
from kfp import dsl
from kfp.dsl import Output, Dataset, component

@dsl.component(base_image="python:3.9")
def acquire_dataset(dataset_output: Output[Dataset]):
    """Acquire and prepare the initial dataset."""
    import subprocess
    subprocess.run(["pip", "install", "pandas", "scikit-learn"], check=True)

    from sklearn.datasets import load_iris
    import pandas as pd

    raw_data = load_iris()
    dataset = pd.DataFrame(
        raw_data.data,
        columns=[name.replace(' ', '_').lower() for name in raw_data.feature_names]
    )
    dataset['species_class'] = raw_data.target

    dataset.to_csv(dataset_output.path, index=False)
```
Feature Preparation (components/feature_preparation.py)
This step normalizes the dataset and splits it into training and testing sets.
```python
from kfp import dsl
from kfp.dsl import Input, Output, Dataset, component

@dsl.component(base_image="python:3.9")
def prepare_features(
    raw_dataset: Input[Dataset],
    training_features: Output[Dataset],
    testing_features: Output[Dataset],
    training_labels: Output[Dataset],
    testing_labels: Output[Dataset]
):
    """Transform and split the dataset for modeling."""
    import subprocess
    subprocess.run(["pip", "install", "pandas", "scikit-learn"], check=True)

    import pandas as pd
    import numpy as np
    from sklearn.preprocessing import RobustScaler
    from sklearn.model_selection import train_test_split

    dataset = pd.read_csv(raw_dataset.path)
    assert dataset.notna().all().all(), "Dataset contains missing values"

    features = dataset.drop(columns=['species_class'])
    target = dataset['species_class']

    feature_transformer = RobustScaler()
    normalized_features = feature_transformer.fit_transform(features)

    X_train, X_test, y_train, y_test = train_test_split(
        normalized_features,
        target,
        test_size=0.25,
        random_state=42,
        stratify=target
    )

    train_df = pd.DataFrame(X_train, columns=features.columns)
    test_df = pd.DataFrame(X_test, columns=features.columns)
    train_labels_df = pd.DataFrame(y_train, columns=['species_class'])
    test_labels_df = pd.DataFrame(y_test, columns=['species_class'])

    train_df.to_csv(training_features.path, index=False)
    test_df.to_csv(testing_features.path, index=False)
    train_labels_df.to_csv(training_labels.path, index=False)
    test_labels_df.to_csv(testing_labels.path, index=False)
```
Model Development (components/model_development.py)
This component trains a machine learning model using Scikit-learn and saves it.
```python
from kfp import dsl
from kfp.dsl import Input, Output, Dataset, Model, component

@dsl.component(base_image="python:3.9")
def develop_model(
    training_features: Input[Dataset],
    training_labels: Input[Dataset],
    model_artifact: Output[Model]
):
    """Build and train the classification model."""
    import subprocess
    subprocess.run(["pip", "install", "pandas", "scikit-learn", "joblib"], check=True)

    import pandas as pd
    from sklearn.linear_model import LogisticRegression
    from joblib import dump

    X = pd.read_csv(training_features.path)
    y = pd.read_csv(training_labels.path)['species_class']

    classifier = LogisticRegression(
        class_weight='balanced',
        max_iter=1000,
        random_state=42,
        multi_class='multinomial'
    )
    classifier.fit(X, y)

    dump(classifier, model_artifact.path)
```
Step 3: Performance Assessment (components/performance_assessment.py)
This step evaluates the trained model and saves the accuracy score.
```python
from kfp import dsl
from kfp.dsl import Input, Output, Dataset, Model, component

@dsl.component(base_image="python:3.9")
def assess_performance(
    testing_features: Input[Dataset],
    testing_labels: Input[Dataset],
    trained_model: Input[Model],
    performance_metrics: Output[Dataset]
):
    """Evaluate model performance and generate visualization."""
    import subprocess
    subprocess.run(["pip", "install", "pandas", "scikit-learn", "seaborn", "joblib"], check=True)

    import pandas as pd
    import seaborn as sns
    import matplotlib.pyplot as plt
    from sklearn.metrics import classification_report, confusion_matrix
    from joblib import load

    X_test = pd.read_csv(testing_features.path)
    y_true = pd.read_csv(testing_labels.path)['species_class']
    classifier = load(trained_model.path)

    y_pred = classifier.predict(X_test)

    metrics = classification_report(y_true, y_pred, output_dict=True)
    conf_matrix = confusion_matrix(y_true, y_pred)

    plt.figure(figsize=(10, 8))
    sns.heatmap(conf_matrix, annot=True, fmt='d', cmap='YlOrRd')
    plt.title('Confusion Matrix Heatmap')
    plt.xlabel('Predicted Class')
    plt.ylabel('Actual Class')

    results = {
        'metrics': metrics,
        'confusion_matrix': conf_matrix.tolist()
    }
    pd.DataFrame([results]).to_json(performance_metrics.path)
```
Step 4: Define the Pipeline (pipeline.py)
This script orchestrates the ML pipeline in Kubeflow.
```python
from kfp import dsl, compiler
from components.data_acquisition import acquire_dataset
from components.feature_preparation import prepare_features
from components.model_development import develop_model
from components.performance_assessment import assess_performance

@dsl.pipeline(name="iris-classification-pipeline")
def classification_pipeline():
    """Orchestrate the end-to-end classification pipeline."""
    # Data acquisition
    data_op = acquire_dataset()

    # Feature preparation
    prep_op = prepare_features(raw_dataset=data_op.outputs["dataset_output"])

    # Model development
    model_op = develop_model(
        training_features=prep_op.outputs["training_features"],
        training_labels=prep_op.outputs["training_labels"]
    )

    # Performance assessment
    assess_op = assess_performance(
        testing_features=prep_op.outputs["testing_features"],
        testing_labels=prep_op.outputs["testing_labels"],
        trained_model=model_op.outputs["model_artifact"]
    )

if __name__ == "__main__":
    compiler.Compiler().compile(
        pipeline_func=classification_pipeline,
        package_path="iris_pipeline.yaml"
    )
```
Step 5: Compile and Upload the Pipeline
- Install Dependencies
Ensure the required packages are installed:```bash pip install -r requirements.txt ``` requirements.txt file: ```yaml kfp scikit-learn numpy joblib ```
- Compile Pipeline (pipeline.py)
This command compiles the pipeline.py into an iris_pipeline.yaml file for execution in Kubeflow.
```bash

python3 pipeline.py

``` - Upload the Pipeline
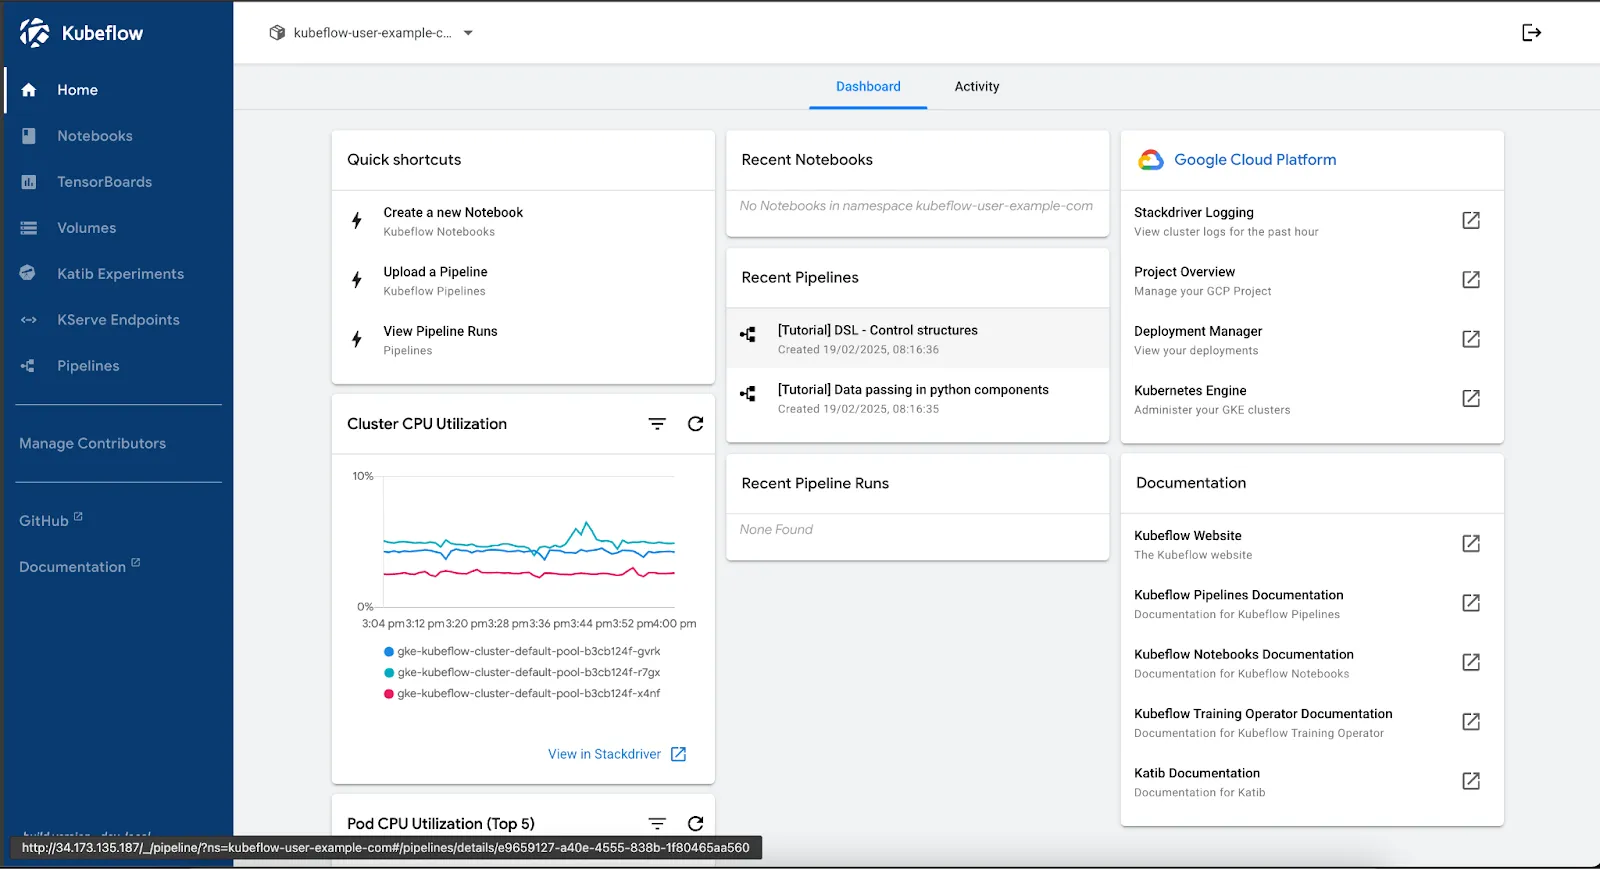
- Navigate to the Kubeflow Pipeline UI dashboard from the left-hand menu bar:
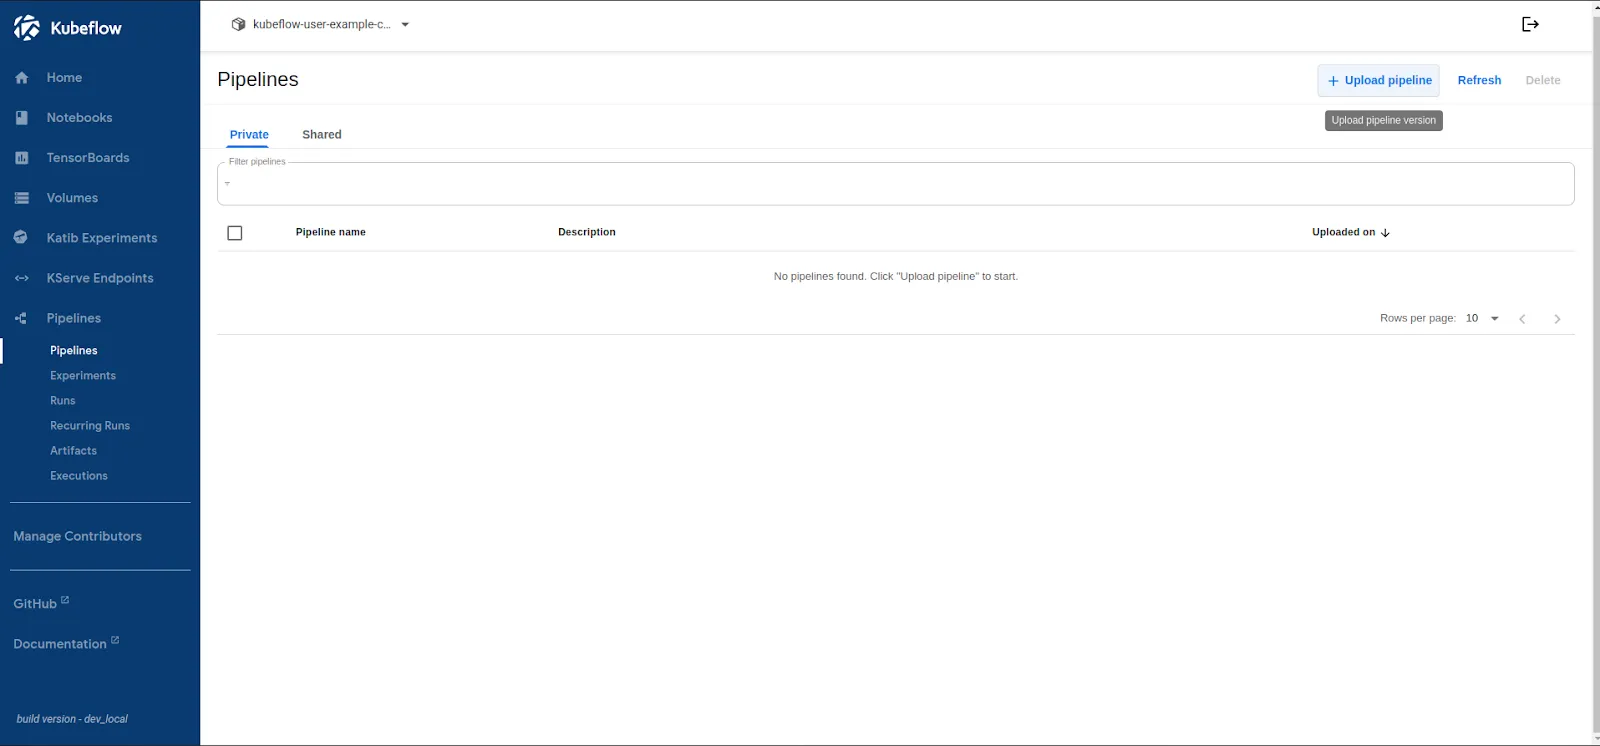
- Click “Upload Pipeline” ->“Upload a file” option:

- Select iris_pipeline.yaml, and it’ll auto-fill up the necessary information.
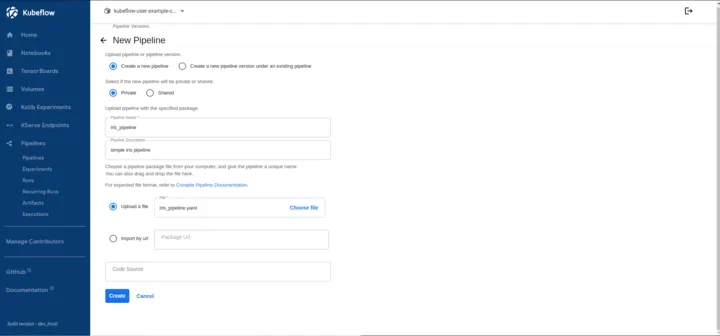
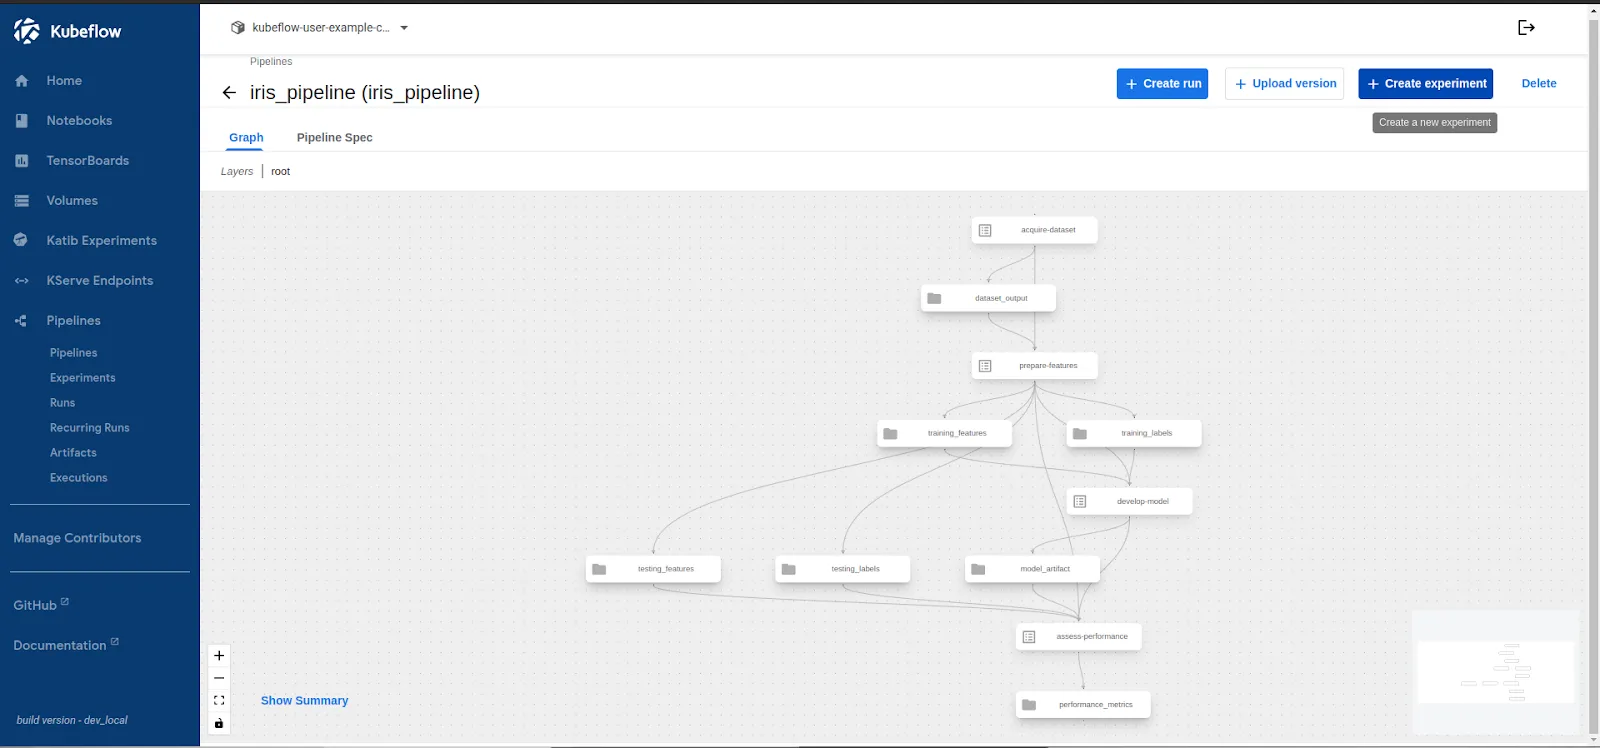
- Upon clicking on the Create button, your Pipeline will be created:
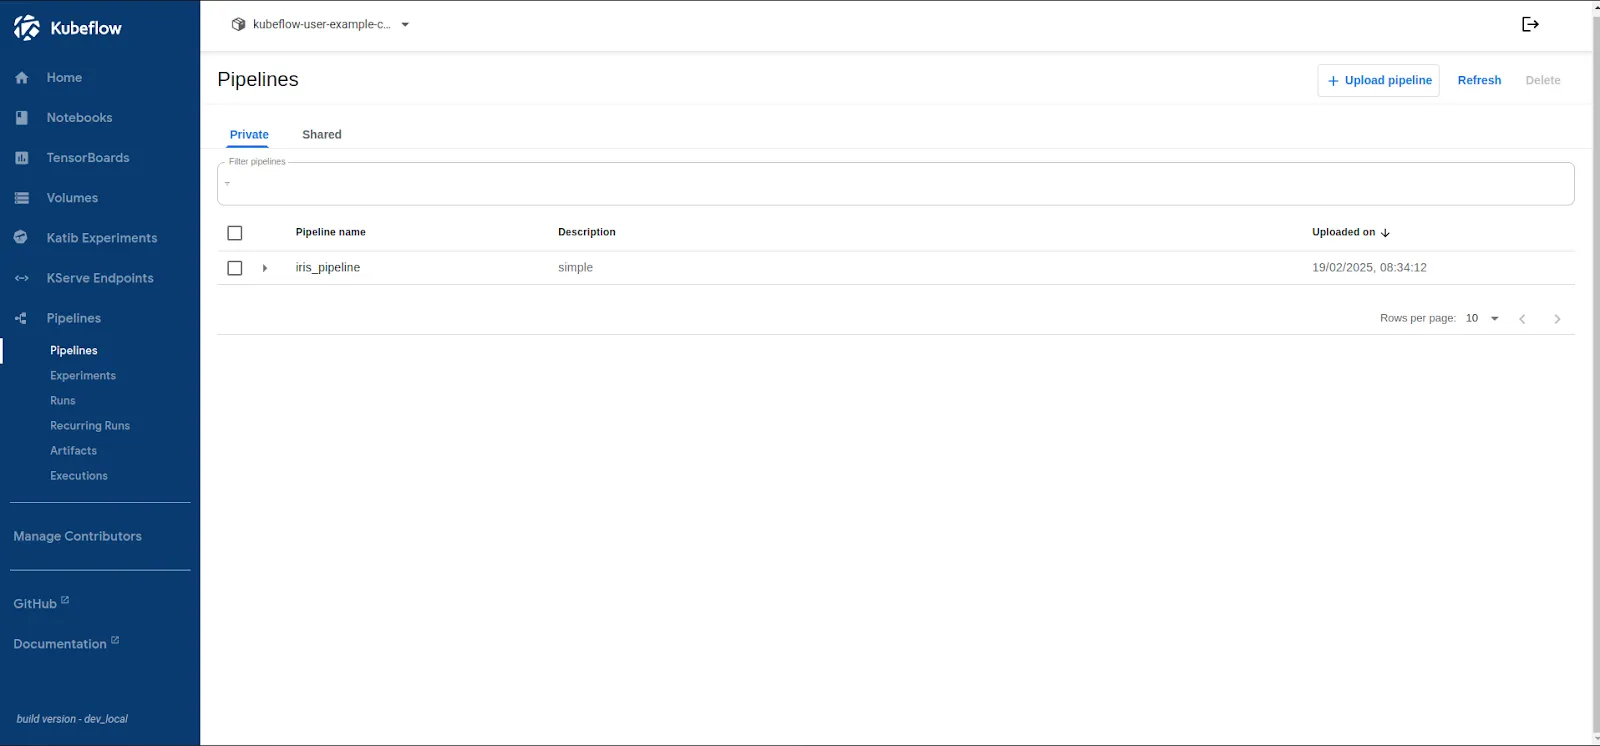
- Once uploaded your pipeline will look like this:
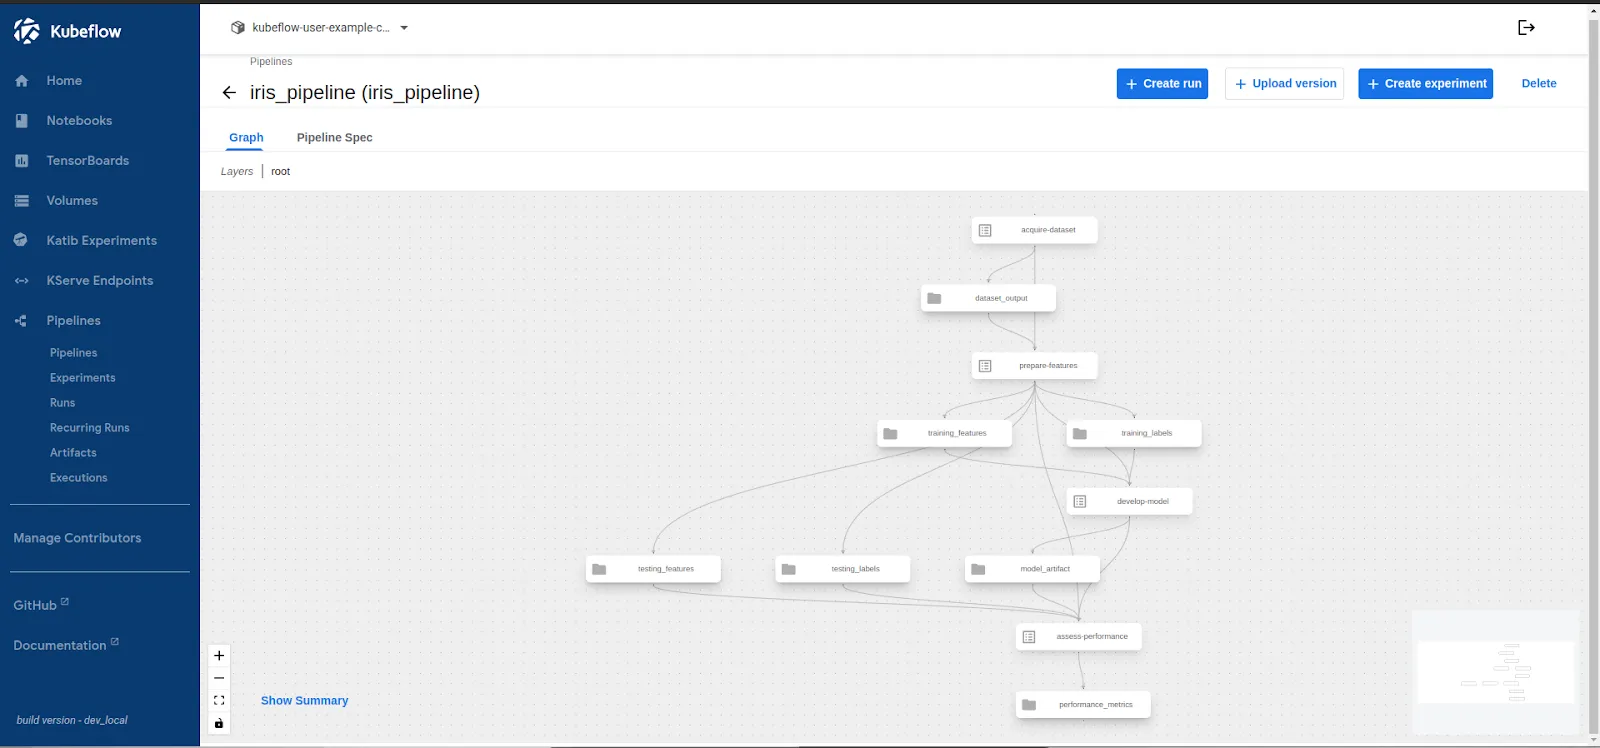
- Next you are ready to run the pipeline and validate the pipeline.
Step 6: Run the Pipeline and Store Outputs
Kubeflow Pipelines organize runs under Experiments, allowing versioning, comparison, and tracking of multiple executions. In this step, we create an experiment, run the pipeline, and monitor its execution to ensure reproducibility.
Now, let’s start with the pipeline run and check the stored outputs:
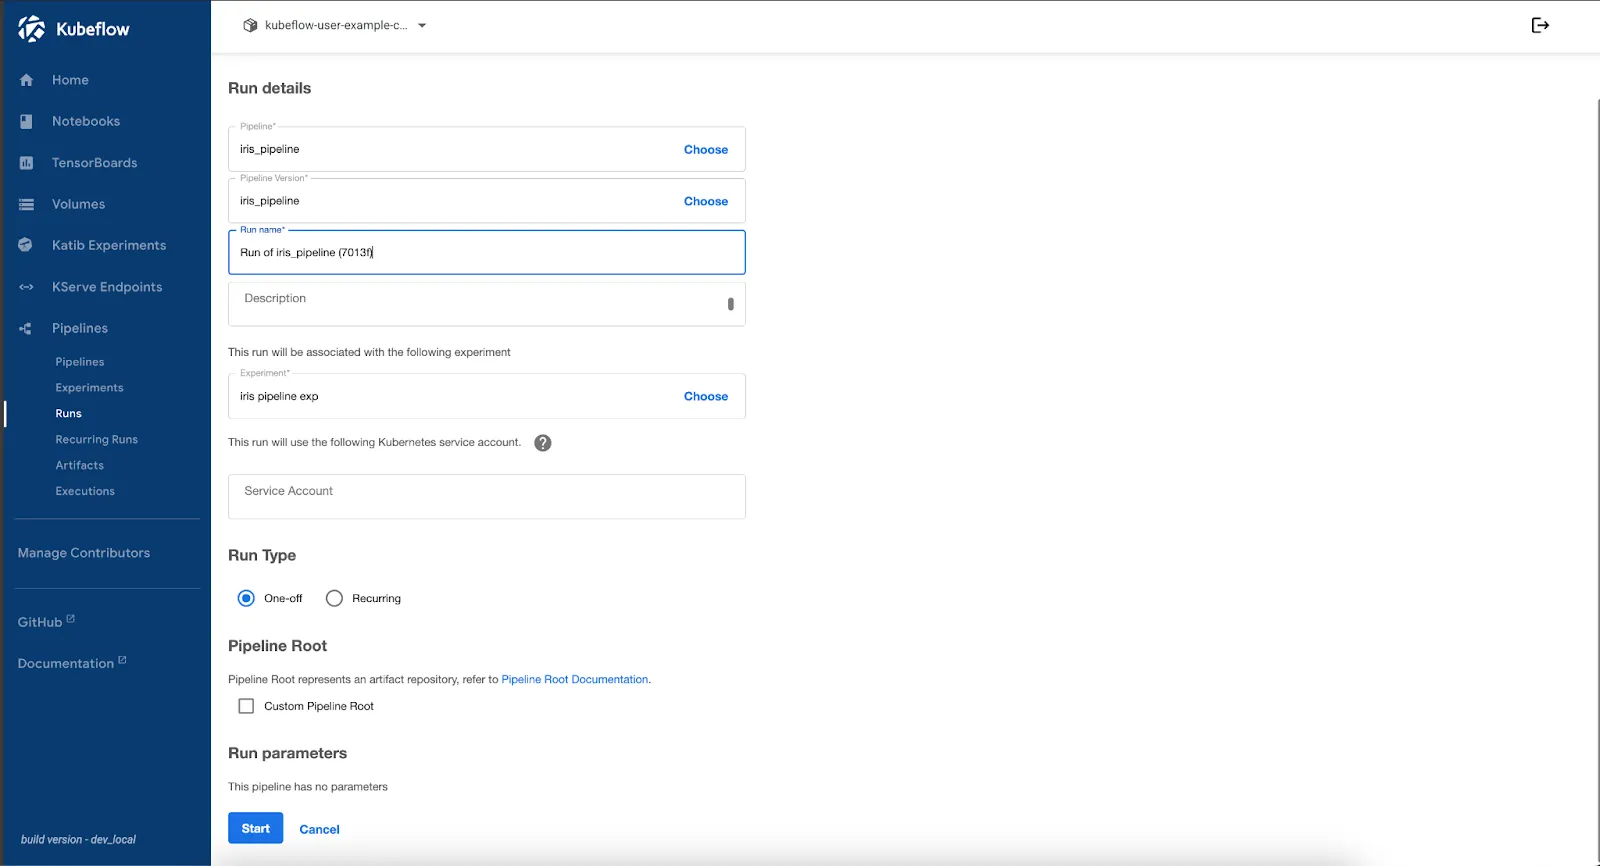
- Click on the “Create Experiment” button in the pipeline screen and fill up the experiment details like below:

- After clicking Next, you’ll be taken to the Run screen. Select your pipeline and experiment, then scroll down and click Start to begin execution.
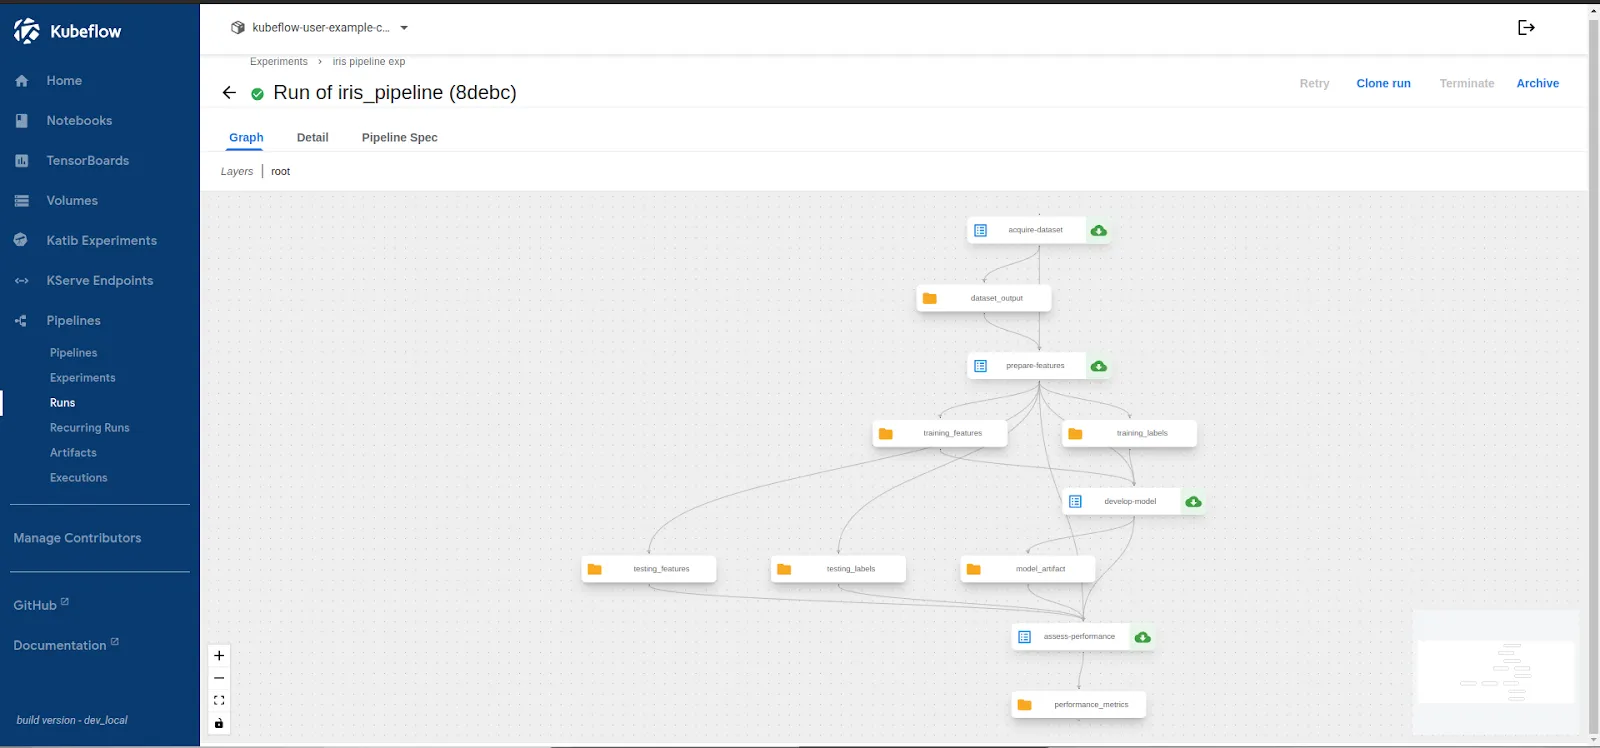
Upon the successful completion of the Run, let’s validate the stored outputs in the step.
Step 7: Verify Stored Artifacts in Portworx
Once the pipeline run is complete, we need to validate whether the pipeline artifacts—such as the trained model and evaluation metrics—are correctly stored in Portworx.
Since MinIO serves as the pipeline artifact store and uses a PVC backed by Portworx, verifying the stored data ensures storage reliability
Check Persistent Volume Claims (PVCs)
List all PVCs in the kubeflow namespace to find the one used by MinIO:
kubectl get pvc -n kubeflow
NAME                   STATUS   VOLUME                                     CAPACITY   ACCESS MODES   STORAGECLASS        VOLUMEATTRIBUTESCLASS   AGE
katib-mysql            Bound    pvc-017c3182-c62d-4196-b87b-87889bc0b6c1   10Gi       RWO            px-csi-db           <unset>                 2d4h
minio-pvc              Bound    pvc-5e334139-572d-4f40-81fa-76a20c8555dc   20Gi       RWO            px-csi-db           <unset>                 2d4h
mysql-pv-claim         Bound    pvc-2b925046-25d4-45e2-ac6e-e9af08ab7450   20Gi       RWO            px-csi-db           <unset>                 2d4h
Here, minio-pvc is bound to pvc-5e334139-572d-4f40-81fa-76a20c8555dc which is managed by Portworx
Inspect the Portworx Volume
Use pxctl to check the volume details:
```bash
kubectl exec -it -n portworx $(kubectl get pods -n portworx -l name=portworx -o jsonpath="{.items[0].metadata.name}") -- \
/opt/pwx/bin/pxctl volume inspect pvc-5e334139-572d-4f40-81fa-76a20c8555dc
        Volume                   :  830186014778378914
        Name                     :  pvc-5e334139-572d-4f40-81fa-76a20c8555dc
        Size                     :  20 GiB
        Format                   :  ext4
        HA                       :  3
        IO Priority              :  LOW
        Creation time            :  Feb 19 02:44:48 UTC 2025
        Shared                   :  no
        Status                   :  up
        State                    :  Attached: c0d383d8-4c70-4f9a-80ef-540452a44801 (10.128.0.25)
        Last Attached            :  Feb 20 23:25:54 UTC 2025
        Device Path              :  /dev/pxd/pxd830186014778378914
        Labels                   :  application-crd-id=kubeflow-pipelines,io_profile=db_remote,namespace=kubeflow,pvc=minio-pvc,repl=3
        Mount Options            :  discard
        Reads                    :  1378
        Reads MS                 :  7146
        Bytes Read               :  5849088
        Writes                   :  916
        Writes MS                :  866
        Bytes Written            :  10940416
        IOs in progress          :  0
        Bytes used               :  13 MiB
        Replica sets on nodes:
                Set 0
                  Node           : 10.128.0.27
                   Pool UUID     : a4fbd33e-2dfe-408c-8bf4-c5a1518e53c2
                  Node           : 10.128.0.25
                   Pool UUID     : 1eb883a4-ae98-41bd-bf94-e28fbc0be24b
                  Node           : 10.128.0.20
                   Pool UUID     : 3af7e6c3-58a3-4ed9-84c0-e3ec6342135b
        Replication Status       :  Up
        Volume consumers         :
                - Name           : minio-59b68688b5-kzsfb (c42388dd-cfa2-4b03-88ed-18216925809a) (Pod)
                  Namespace      : kubeflow
                  Running on     : gke-kubeflow-cluster-default-pool-b3cb124f-x4nf
                  Controlled by  : minio-59b68688b5 (ReplicaSet)
```
This confirms that:
- Portworx is actively managing MinIO’s storage (Status: up).
- Replication is enabled (HA: 3), ensuring high availability.
- MinIO is consuming the volume, so pipeline artifacts are correctly stored.
Access Stored Artifacts in MinIO
MinIO artifacts are stored under /data/mlpipeline/artifacts. To check them:
- Get the MinIO pod name:
```bash
kubectl get pods -n kubeflow -l app=minio
NAME                     READY   STATUS    RESTARTS   AGE
minio-59b68688b5-kzsfb   2/2     Running   0          8h
```
- Exec into the MinIO pod and list the stored artifacts:
```bash
kubectl exec -it minio-59b68688b5-kzsfb -n kubeflow -- ls -lh /data/mlpipeline/artifacts

drwxr-xr-x    3 root     root        4.0K Feb 20 07:37 iris-pipeline-4rbkj
drwxr-xr-x    3 root     root        4.0K Feb 20 11:15 iris-pipeline-4sq9g
drwxr-xr-x    3 root     root        4.0K Feb 21 02:16 iris-pipeline-88mvl
drwxr-xr-x    3 root     root        4.0K Feb 20 10:22 iris-pipeline-92t76
drwxr-xr-x    3 root     root        4.0K Feb 20 11:32 iris-pipeline-cfbt5
drwxr-xr-x    3 root     root        4.0K Feb 20 07:25 iris-pipeline-fvws5
drwxr-xr-x    3 root     root        4.0K Feb 20 10:35 iris-pipeline-slp5q
drwxr-xr-x    3 root     root        4.0K Feb 21 02:05 iris-pipeline-vlh9v
drwxr-xr-x    3 root     root        4.0K Feb 20 10:31 iris-pipeline-xzc8g
drwxr-xr-x    3 root     root        4.0K Feb 20 07:12 iris-pipeline-zhqj7
```
3. Inspect the contents of a specific pipeline run directory:
```bash
ls -lh /data/mlpipeline/artifacts/iris-pipeline-4rbkj
-rw-r--r--    1 root     root      12.5K Feb 20 07:37 model.joblib
-rw-r--r--    1 root     root       1.2K Feb 20 07:37 metrics.txt
```
The trained model (model.joblib) and evaluation metrics (metrics.txt) are successfully stored in Portworx-backed MinIO storage.
The Role of Kubernetes Storage and Data Management for Machine Learning
Kubeflow and Kubernetes streamline ML workflows, but they don’t fully address storage, data persistence, and data high availability needs. Without persistent, scalable, and reliable storage with proper redundancy, ML pipelines can face data loss in several cases, such as node failures, pod restarts, accidental volume deletions, and storage capacity limits. These issues can lead to lost datasets, failed model training, and disrupted workflows. Portworx protects Kubernetes machine learning workloads by providing dynamic provisioning, replication, and snapshot capabilities, ensuring data remains available, protected, and scalable across ML operations.
Key Enhancements with Portworx and Pure Storage:
Scale-out Object Storage
For large-scale ML workloads, Pure Storage FlashBlade offers high-performance, scalable object storage that seamlessly handles unstructured data. While not used in this demo, it provides an S3-compatible on-prem storage platform, allowing organizations to manage and store raw datasets efficiently without complexity. Note that Portworx Enterprise itself doesn’t provide scale-out object storage but can be used in conjunction with FlashBlade for comprehensive storage solutions. Learn more about Kubernetes storage trends and how they impact ML workloads.
Dynamic Provisioning of Block and File Volume
Portworx enables dynamic provisioning of storage volumes for Kubeflow Pipelines and Jupyter Notebooks. Data scientists can request and attach storage instantly, without needing intervention from infrastructure teams. File-based volumes can be shared across multiple notebooks, enabling collaborative data access and reducing redundant data copies.
High Availability and Replication
Machine learning jobs often run for extended periods, and node failures can disrupt training. Portworx prevents data loss by replicating volumes across multiple nodes. If a failure occurs, the data remains available, ensuring seamless recovery without restarting training from scratch.
Local Snapshots and Cloudsnaps
Portworx offers automated snapshot policies to create backups of persistent data. These snapshots can be stored on any S3-compatible storage, including Pure Storage FlashBlade. Additionally, Portworx’s Python SDK allows data scientists to trigger snapshots directly from notebooks, preserving key stages of model training and experimentation.
Multi-tenant Clusters
AI/ML workloads require optimized resource sharing. Portworx enables multi-tenancy, allowing teams to share storage infrastructure while maintaining isolation, security, and resource quotas. This ensures that multiple ML workloads coexist without performance degradation.
Understanding KubeFlow Beyond Deployment
Kubeflow Pipelines, combined with Portworx, provide a scalable, production-ready solution for managing ML workflows on Kubernetes. This guide demonstrated how to deploy Kubeflow on GKE, integrate Portworx for persistent storage, and run an end-to-end ML pipeline for Iris classification.
By leveraging modular ML pipelines, persistent storage, and automation, teams can create scalable, reproducible workflows while ensuring data durability and high availability. This setup can be extended to more complex ML use cases, such as image classification, NLP, or real-time model serving.
To enhance this setup further, consider integrating real-time model serving with FastAPI or KServe, implementing CI/CD for ML models using Argo Workflows or GitOps, and leveraging Portworx snapshots for versioning and rollback. Optimizing the pipeline for GPU workloads and distributed training can also improve performance. For further reading, explore the Kubeflow Pipelines documentation, Portworx ML solutions, and understanding KubeVirt for virtualized workloads on Kubernetes.
Get Started with Portworx
AI/ML workflows—like those powered by Kubeflow—demand more than just persistent storage. As this article explores, they require automated, policy-driven data management across environments, along with seamless integrations with developer tools and CI/CD pipelines. Portworx delivers the automation, scalability, and data protection essential for running ML workflows on Kubernetes.
Share
Subscribe for Updates
About Us
Portworx is the leader in cloud native storage for containers.
Thanks for subscribing!