The container ecosystem is thriving! This means that not only do apps change fast, so does the platform the community most often uses to manage apps: Kubernetes. This leads to a concrete problem every Ops team must solve. How does an IT team guarantee that an app will work consistently across different version of Kubernetes?
A blue-green deployment is a popular technique to solve this problem while also reducing the risk of downtime or errors associated with deployments to production environments. In a blue-green deployment scenario, you maintain two identical production environments (called blue and green) that differ only with respect to the new changes being deployed. Only one environment is ever live at a time, and traffic is directed between these environments as part of the deployment. This technique works great for stateless apps without any data, but is significantly more challenging for stateful apps like databases because you must maintain two copies of production data. This might entail backup and restore scripts for various individual databases for Postgres, MySQL, and others, or custom operations runbooks or automation scripts to manually move the underlying data from one data source to the next which can be complex and time consuming to support.
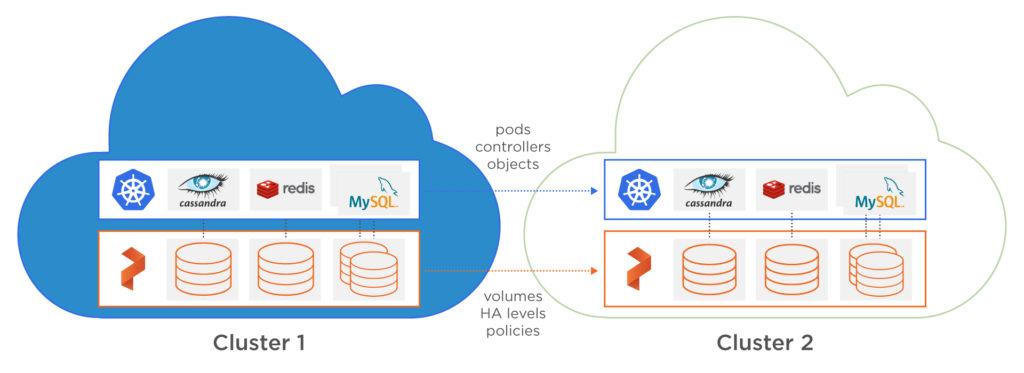
Portworx solves this data management problem for blue-green deployments of stateful apps with PX-Motion. PX-Motion enables IT teams to easily move data and application configuration between environments, radically simplifying blue-green deployments of stateful apps.
In this blog we explore the features and capabilities of PX-Motion. Specifically, we’ll show how to perform a blue-green deployment of a stateful LAMP stack running on two different versions of Kubernetes.
In summary, we will:
- Pair two Kubernetes clusters (called source and destination) together so that data, configuration and pods can be moved between them as part of our blue-green deployment.
- Use Kubernetes to deploy a LAMP stack to our source cluster and validate that our apps are running.
- Use PX-Motion to migrate the Kubernetes Deployments, Secrets, Replicasets, Services, Persistent Volumes, Persistent Volume Claims and data from the source cluster to the designation cluster for testing and validation. All pods will continue to run on the source cluster, even after the migration is complete. We will now have two clusters running, a blue and a green.
- Use Kubernetes to validate that our apps are running with their data on the destination cluster.
- Once we have validated our deployment on the new cluster, we can update our load balancer settings to point all traffic to the new cluster. Our blue-green deployment is complete.
Let’s get started!

Setup PX-Motion
Pre-requisites
If you are trying out PX-Migration, make sure and have all necessary prerequisites complete.
Pairing Kubernetes clusters for data migration
To migrate our workloads from a source cluster (Kubernetes 1.10.3) to our destination cluster (Kubernetes 1.12.0), we’ll need to pair our clusters. Pairing is a concept similar to the way that you would pair a mobile phone with a bluetooth speaker in order to use the two distinct devices together.
The first thing we’ll do to pair our clusters is to configure the destination cluster. First, setup access to pxctl (“pixie-cuttle”), the Portworx CLI. Below shows you how pxctl can be used from a workstation with kubectl access.
$ kubectl config use-context <destination-cluster>
$ PX_POD_DEST_CLUSTER=$(kubectl get pods --context
   <DESTINATION_CLUSTER_CONTEXT> -l name=portworx -n kube-system
   -o jsonpath='{.items[0].metadata.name}')
$ alias pxctl_dst="kubectl exec $PX_POD_DEST_CLUSTER \
   --context <DESTINATION_CLUSTER_CONTEXT>
   -n kube-system /opt/pwx/bin/pxctl"
Next, setup the destination cluster object store so that it is ready to pair with the source cluster. We need to set up an object storage endpoint on the destination cluster because this is where our data will be staged during the migration.
$ pxctl_dst -- volume create --size 100 objectstore
$ pxctl_dst -- objectstore create -v objectstore
$ pxctl_dst -- cluster token show
Token is <UUID>
Next, create the cluster pair YAML configuration file that will get applied to the source Kubernetes cluster. This clusterpair.yaml file will include information about how to authenticate with the destination cluster scheduler and Portworx storage. A cluster pair can be created by running the following command and editing the YAML file:
$ storkctl generate clusterpair --context <destination-cluster> > clusterpair.yaml
- Note that you can replace metadata.name with your own name.
- Note that for options.token in the below example, use the token produced from the cluster token show command above.
- Note that for options.ip in the below example, a reachable IP or DNS of a load balancer or Portworx node will be needed for access to ports 9001 and 9010.
Next, apply this cluster pair on the source cluster by using kubectl.
$ kubectl config use-context <source-cluster>
$ kubectl create -f clusterpair.yaml
In architectures like this one, the cluster pair connects across the internet (VPC to VPC). This means we need make sure our object store is available to connect properly to and from the source cluster. Please follow these directions.
- Note: These steps are only temporary and will be replaced with automation in a future release.
- Note: Cloud to Cloud and On-Prem to Cloud or vice versa would need similar steps.
If all is successful, list the cluster pair using storkctl and it should show Ready status for both Storage and Scheduler. If it says Error, use kubectl describe clusterpair for more information.
$ storkctl get clusterpair
NAME      STORAGE-STATUS   SCHEDULER-STATUS   CREATED
green     Ready            Ready              19 Nov 18 11:43 EST
$ kubectl describe clusterpair new-cluster | grep paired
  Normal  Ready   2m    stork  Storage successfully paired
  Normal  Ready   2m    stork  Scheduler successfully paired
pxctl can also be used to list the cluster pair.
$ pxctl_src cluster pair list
CLUSTER-ID  NAME               ENDPOINT                      CREDENTIAL-ID
c604c669    px-cluster-testing http://portworx-api.com:9001  a821b2e2-788f
Our clusters are now successfully paired.
Testing workloads on Kubernetes 1.12.0
Now that the Kubernetes 1.10.3 source cluster is paired with the 1.12.0 destination cluster, we can qualify applications on the newer version of Kubernetes by migrating the running workloads, their configurations and their data from one cluster to the other. During the migration and after it is complete, all our pods will continue to run on the source cluster. We will have two identical clusters, a blue and a green, that differ only in the version of Kubernetes that they are running.
$ kubectl config use-context <1.10.3 source cluster context>
To double check what version of Kubernetes we are currently using, run the kubectl version command. This command will output the client and server versions it is currently interacting with. As seen below, the server version is 1.10.3 which is what we’d expect.
$ kubectl version --short | awk -Fv '/Server Version: / {print "Kubernetes Version: " $3}'
Kubernetes Version: 1.10.3-eks
Deploy Applications on 1.10.3
In order to migrate workloads, there needs to be an existing workload on the source cluster. For this demo, we’ll create a LAMP stack on the source cluster using Heptio’s example lamp stack modified to use Portworx for its MySQL volumes. The stack includes a storage class for Portworx, secrets, PHP Web Front End, and a MySQL database backed by a replicated Portworx volume.
$ kubectl create ns lamp

$ kubectl create -f . -n lamp
job.batch "mysql-data-loader-with-timeout" created
storageclass.storage.k8s.io "portworx-sc-repl3" created
persistentvolumeclaim "database" created
deployment.extensions "mysql" created
service "mysql" created
deployment.extensions "php-dbconnect" created
service "web" created
secret "mysql-credentials" created
Retrieve the pods using kubectl and make sure they are in the Running state.
$ kubectl get po -n lamp
NAME                                   READY     STATUS    RESTARTS   AGE
mysql-6f95f464b8-2sq4v                 1/1       Running   0          1m
mysql-data-loader-with-timeout-f2nwg   1/1       Running   0          1m
php-dbconnect-6599c648-8wnvf           1/1       Running   0          1m
php-dbconnect-6599c648-ckjqb           1/1       Running   0          1m
php-dbconnect-6599c648-qv2dj           1/1       Running   0          1m
Fetch the Web service. Take note of the CLUSTER-IP and EXTERNAL-IP of the service. After the migration this will be different as it will exist on a new cluster.
$ kubectl get svc web -n lamp -o wide
NAME      TYPE           CLUSTER-IP       EXTERNAL-IP             PORT(S)      AGE   SELECTOR
web       LoadBalancer   172.20.219.134   abe7c37c.amazonaws.com  80:31958/TCP 15m   app=php-dbconnect
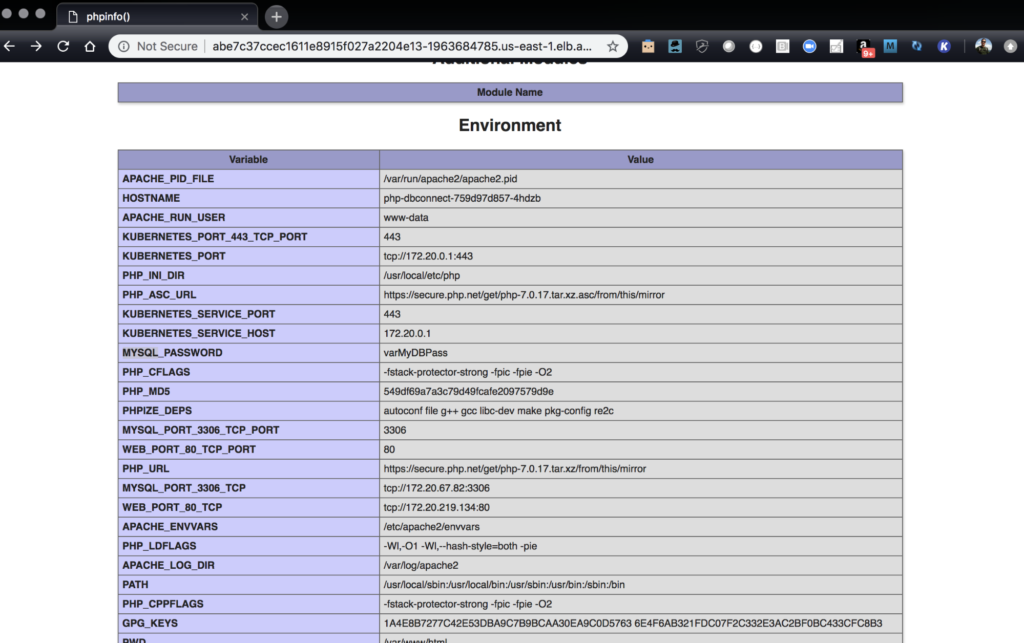
Visit the endpoint or use curl make sure that WordPress is installed and is in fact serving correctly and can connect to MySQL.
Web Front End
MySQL Connection
$ curl -s abe7c37c.amazonaws.com/mysql-connect.php | jq
{
  "outcome": true
}
Verify that there are PVCs created for the MySQL container as well. Below we see the the PVC, database, for the deployment with 3 replicas. This volume is the ReadWriteOnce block volume for MySQL.
$ kubectl get pvc -n lamp
NAME       STATUS    VOLUME                                     CAPACITY   ACCESS MODES   STORAGECLASS        AGE
database   Bound     pvc-c572277d-ec15-11e8-9f4d-12563b3068d4   2Gi        RWO            portworx-sc-repl3   28m
The volume information can also be shown using pxctl. Example output from the volume list command is below.
$ pxctl_src -- volume list
ID                 NAME                                      SIZE  HA STATUS
618216855805459265 pvc-c572277d-ec15-11e8-9f4d-12563b3068d4  2 GiB 3  attached on 10.0.3.145
Migrate applications to Kubernetes 1.12.0
Configure the local kubectl client to use the destination cluster running 1.12.0.
$ kubectl config use-context <1.12.0 destination cluster context>
Run the kubectl version command, this will output the client and server versions it is currently interacting with. Below we see that we are running 1.12.0.
$ kubectl version --short | awk -Fv '/Server Version: / {print "Kubernetes Version: " $3}'
Kubernetes Version: 1.12.0
Verify that the LAMP stack pods are not running yet. Below shows that there are no resources in the namespace for this cluster, showing nothing has been migrated yet.
$ kubectl get po
No resources found.
Next, using the Stork client storkctl, create the migration that will move the LAMP stack resources and volumes from the 1.10.3 cluster to this 1.12.0 cluster. Inputs to the storkctl create migration command include the clusterPair, namespaces and the options includeResources, and startApplications to include associated resources and start the applications once they are migrated. More information on this command can be found here.
$ storkctl --context <source-cluster-context> \
   create migration test-app-on-1-12 \
   --clusterPair green \
   --namespaces lamp \
   --includeResources \
   --startApplications
Migration test-app-on-1-12 created successfully
Once the migration is created, use storkctl to get the status of the migration.
$  storkctl --context <source-cluster-context> get migration
NAME               CLUSTERPAIR   STAGE     STATUS       VOLUMES   RESOURCES   CREATED
test-app-on-1-12   green         Volumes   InProgress   0/1       0/7         19 Nov 18 13:47 EST
pxctl can also be used to see the status of the migration. Volumes will show the STAGE and STATUS associated with the migration.
$ pxctl_src cloudmigrate status

CLUSTER UUID: 33293033-063c-4512-8394-d85d834b3716
TASK-ID            VOLUME-ID               VOLUME-NAME                               STAGE     STATUS
85d3-lamp-database 618216855805459265      pvc-c572277d-ec15-11e8-9f4d-12563b3068d4  Done      Initialized
Once finished, the migration will show that it is in STAGE → Final and STATUS → Successful.
$ storkctl --context  <source-cluster-context> get migration

NAME               CLUSTERPAIR   STAGE     STATUS       VOLUMES   RESOURCES   CREATED
test-app-on-1-12   green         Final     Successful   1/1       7/7         19 Nov 18 13:47 EST
Now, from the destination cluster, get the pods. As seen below, PHP and MySQL are both running in the destination cluster now.
$ kubectl get po -n lamp
NAME                            READY     STATUS    RESTARTS   AGE
mysql-66d895ff69-z49jl          1/1       Running   0          11m
php-dbconnect-f756c7854-2fc2l   1/1       Running   0          11m
php-dbconnect-f756c7854-c48x8   1/1       Running   0          11m
php-dbconnect-f756c7854-h8tgh   1/1       Running   0          11m
Note that the CLUSTER-IP and EXTERNAL-IP are now different. This means that the service is running on the new Kubernetes 1.12 cluster and also contains a different subnet than before because it is running on a new cluster.
$  kubectl get svc web -n lamp -o wide
NAME      TYPE           CLUSTER-IP     EXTERNAL-IP            PORT(S)       AGE  SELECTOR
web       LoadBalancer   10.100.0.195   aacdee.amazonaws.com   80:31958/TCP  12m  app=php-dbconnect
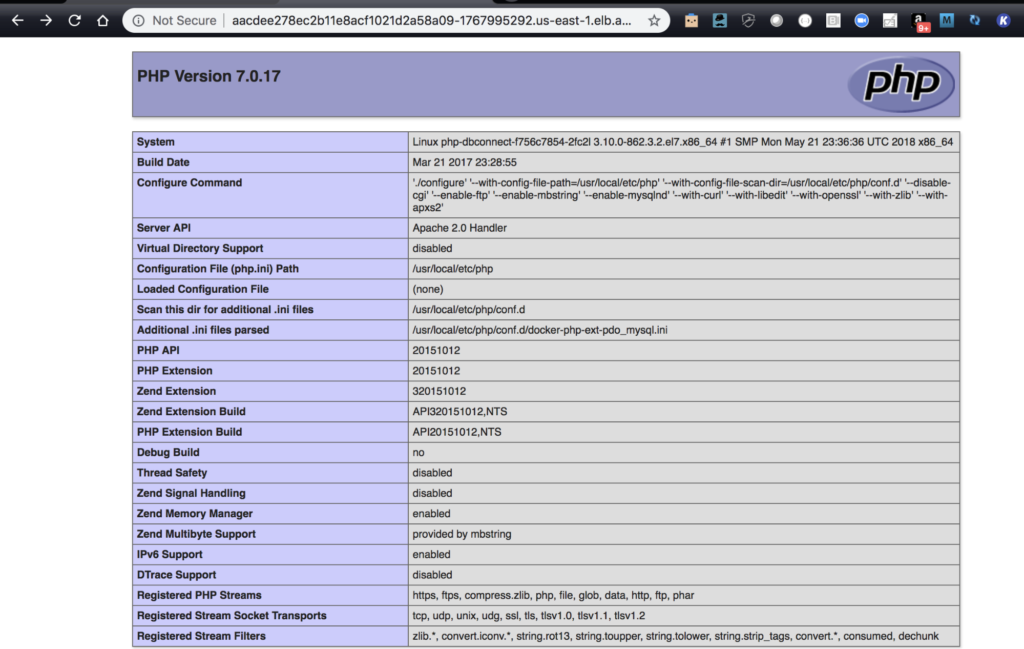
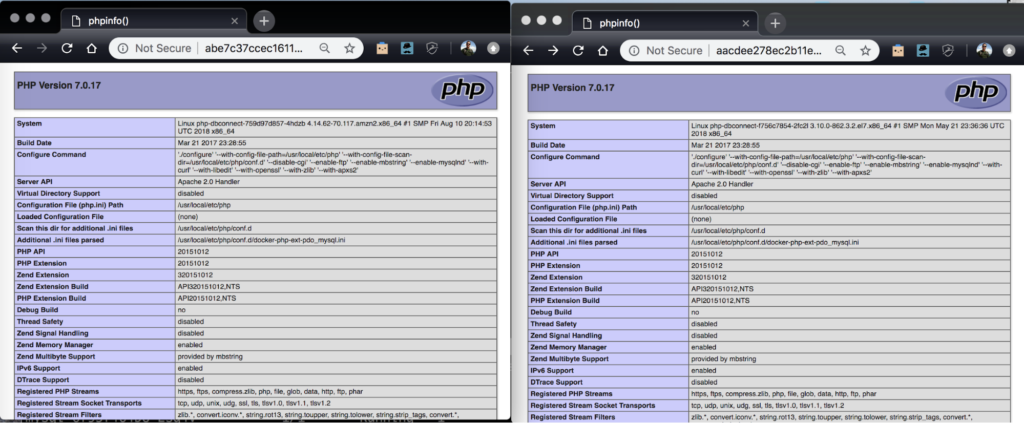
If the website is accessed on the 1.12.0 cluster, it should return the same output as before if all is running correctly and data has been correctly migrated to the 1.12.0 cluster.
Web Front End
MySQL Connection
$ curl -s http://aacdee.amazonaws.com//mysql-connect.php | jq
{
  "outcome": true
}
Below we see the source (bottom) and destination (top) cluster kubectl get po -n lamp output on both clusters. Notice the AGE of the pods, noting that the destination cluster (top) had the LAMP stack migrated to it recently.
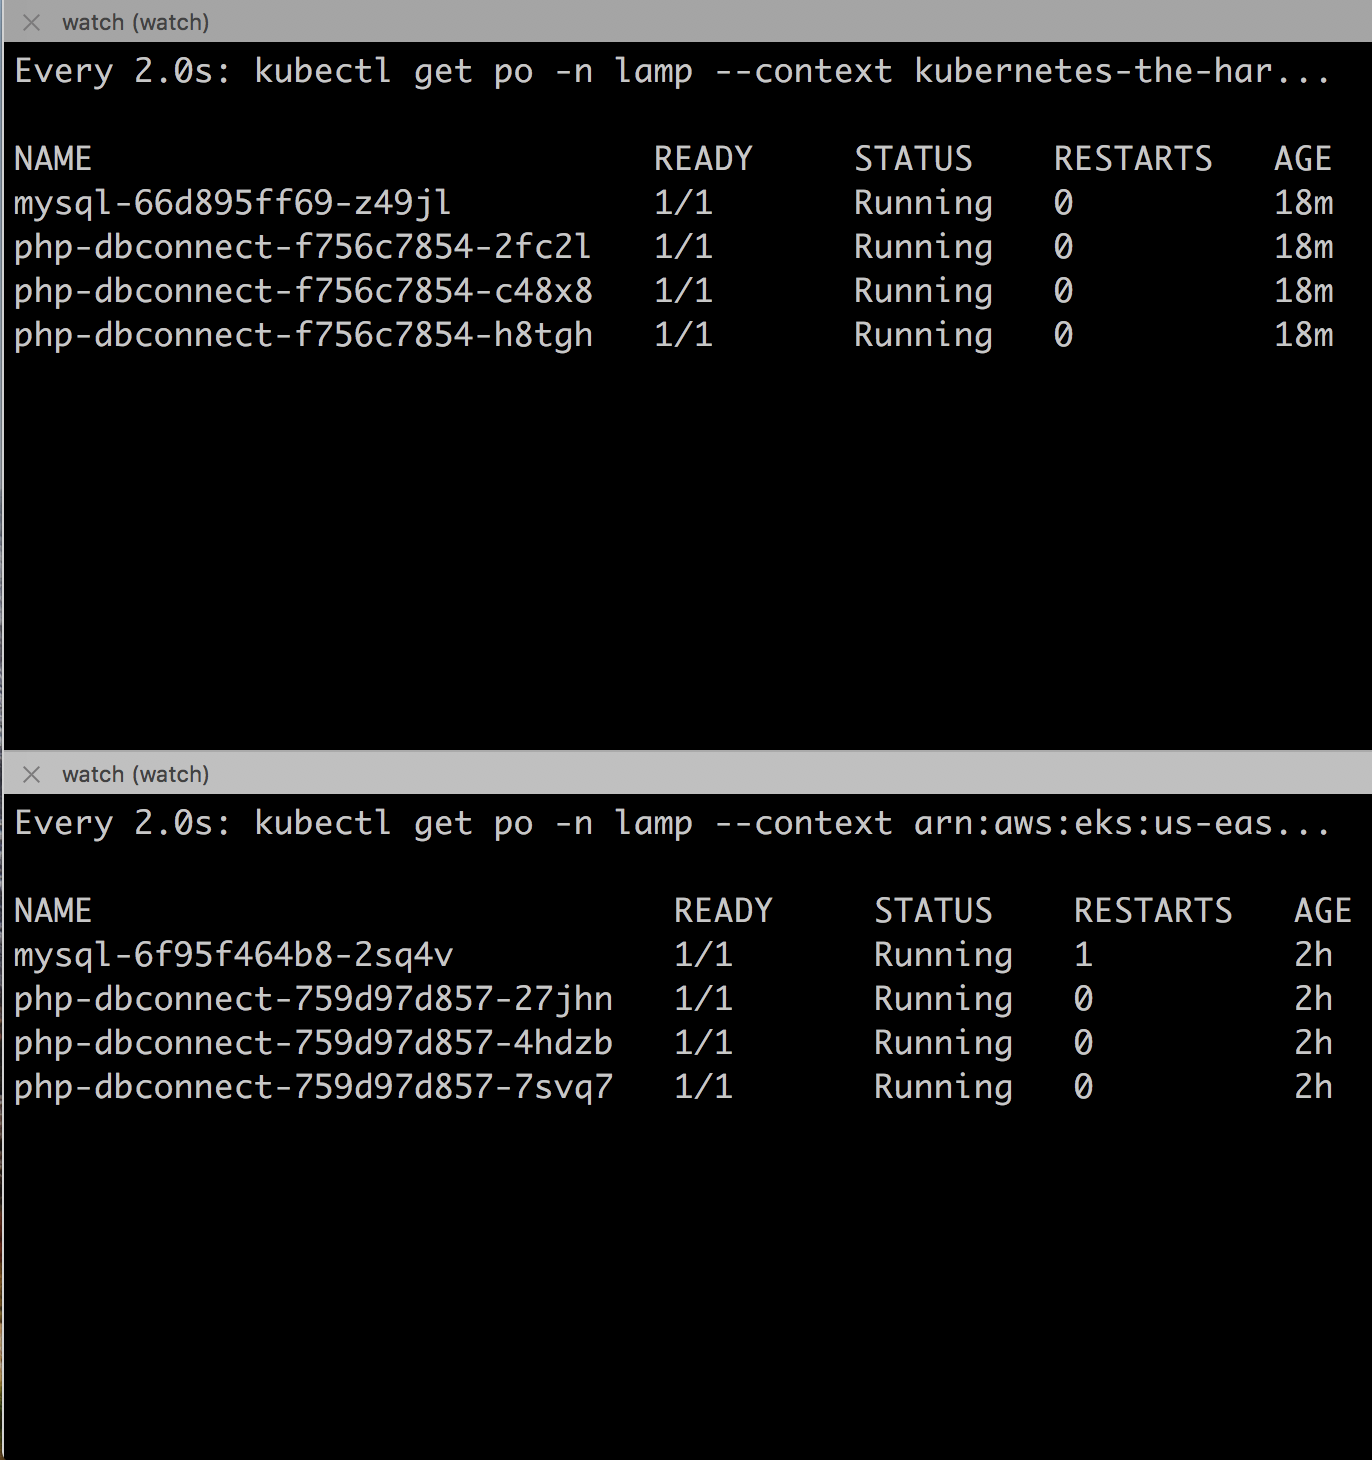
Notice, both clusters are now serving the same application and data after the migration.
To recap what happened:
- First, the 1.10.3 EKS cluster and the 1.12.0 cluster were paired.
- A LAMP (Linux, Apache, MySQL, PHP) stack was deployed on the 1.10.3 cluster.
- Using PX-Motion, the Kubernetes Deployments, Secrets, Replicasets, Services, Persistent Volumes, Persistent Volume Claims and data from that LAMP stack, we migrated to the 1.12.0 cluster.
- The application was then accessed on the 1.12.0 cluster where it was verified to be working correctly.
Persistent volumes and claims were migrated by Portworx across clusters in the background using PX-Motion and the Kubernetes resources and replicas were started on the destination cluster using the Portworx Stork integration.
Now, we have two fully operational Kubernetes clusters running in two separate environments: a blue and a green deployment. Now, in practice, run any tests you have on your green cluster, ensuring that your applications do not regress in unexpected ways on the new cluster. Once you are confident that your testing is complete, cut over your load balancer from the blue cluster to the new green cluster and your deployment is complete!
Conclusion
PX-Motion introduces the ability to migrate Portworx volumes and Kubernetes resources between clusters. The above use case uses PX-Motion to enable teams to test their workloads and real data on new versions of Kubernetes and enable them to “turn on” these applications in the new “green” clusters to achieve blue-green deployments of stateful applications. Testing real workloads with real data on versions of Kubernetes gives operations teams confidence before going live on a new version of Kubernetes. Blue-Green deployments aren’t the only use case for PX-Motion, check out our other blogs in the Exploring PX-Motion series.
Video Demo
Share
Subscribe for Updates
About Us
Portworx is the leader in cloud native storage for containers.
Thanks for subscribing!

Ryan Wallner
Portworx | Technical Marketing ManagerExplore Related Content:
- data mobility
- kubernetes
- migration
- multicloud


