This is part two in a series about Openshift Virtualization with Portworx. The series will cover installation and usage, backup and restore, and data protection for virtual machines on Openshift. You can read part one here.
Enterprises are increasingly moving applications to containers, but many teams also have a huge investment in applications that run virtual machines (VMs). Many of these VMs often provide services to new and existing containerized applications as organizations break the monolith into microservices. Enterprises are diving head first into their container platforms, which often provide a seamless integration of computing, storage, networking, and security. Portworx often provides the data management and protection layer for these containerized applications. OpenShift Virtualization uses KubeVirt to offer a way for teams to run their VM-based applications side by side with their containerized apps as teams and applications grow and mature. This provides a single pane of glass for developers and operations alike. In this blog series, we’ll show you how Portworx can provide the data management layer for containers and for VMs. You can think of Portworx much like the v-suite of products in vSphere. Portworx can provide disks to VMs like vSAN, and data protection like vMotion but for both VMs and containers on OpenShift Container Platform.
Pre-requisites
- Please see Part 1 of the series for more detail on the install and configuration as well as how to create VMs using Portworx.
- Install Helm and PX-Backup
curl -fsSL -o get_helm.sh https://raw.githubusercontent.com/helm/helm/master/scripts/get-helm-3
chmod 700 get_helm.sh
./get_helm.sh

helm repo add portworx http://charts.portworx.io/ && helm repo update

helm install px-backup portworx/px-backup --namespace px-backup --create-namespace
- Configure PX-Backup with credentials and backup location
Backup and Restore for VMs using PX-Backup
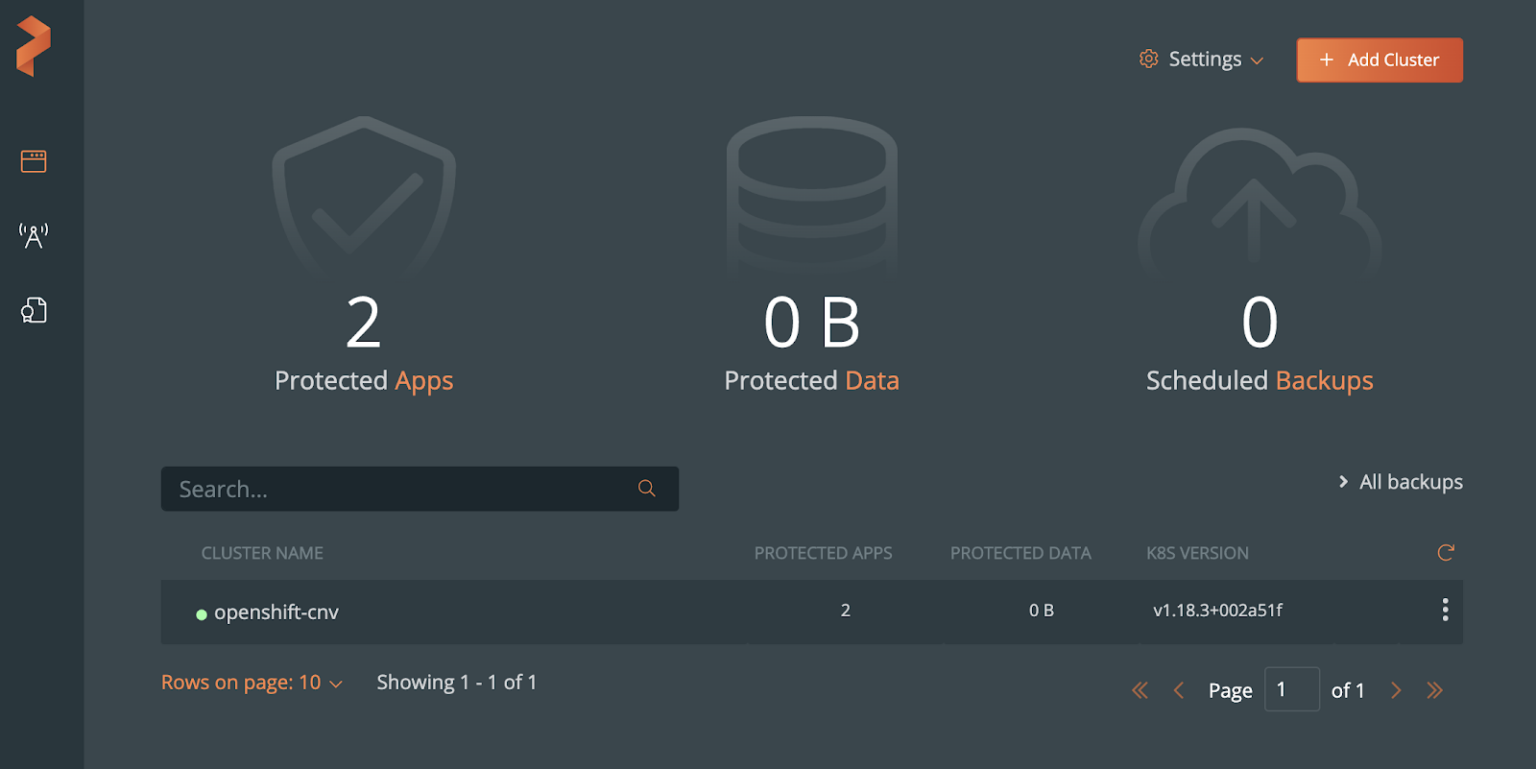
First, add the OCP cluster to PX-Backup by selecting “Add Cluster` at the top right of the PX-Backup interface. In the below image, the cluster we are working with is already added and named “openshift-cnv”.
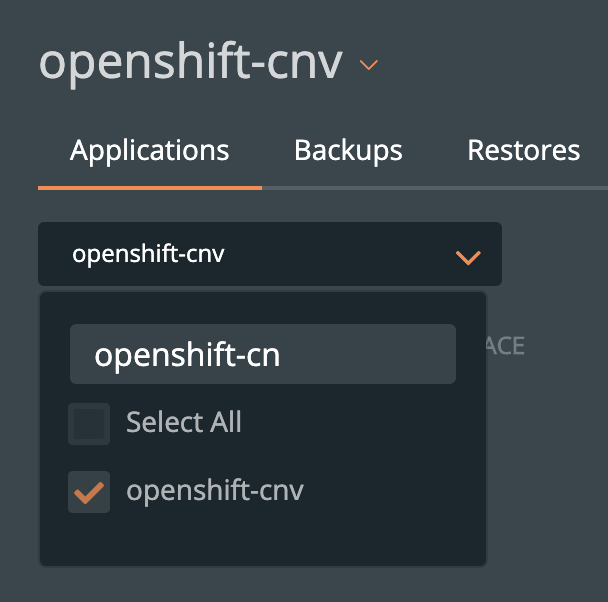
Then, navigate to the namespace which is running the VMs you wish to backup.
Openshift virtual machines use CRDs to deploy into Kubernetes. We need to make sure PX-Backup is able to back these specific objects up, so let’s make sure and register these CRDs with our Portworx environment. This will allow PX-Backup to view, backup and restore these CRDs needed by virtual machines.
Apply both YAML files below, they will register VirtualMachineInstance and VirtualMachine CRDs with Portworx.
apiVersion: stork.libopenstorage.org/v1alpha1
kind: ApplicationRegistration
metadata:
  name: cnv-virtualmachine-instance
resources:
- PodsPath: ""
  group: kubevirt.io
  version: v1alpha3
  kind: VirtualMachineInstance
  keepStatus: false
apiVersion: stork.libopenstorage.org/v1alpha1
kind: ApplicationRegistration
metadata:
  name: cnv-virtualmachine
resources:
- PodsPath: ""
  group: kubevirt.io
  version: v1alpha3
  kind: VirtualMachine
  keepStatus: false
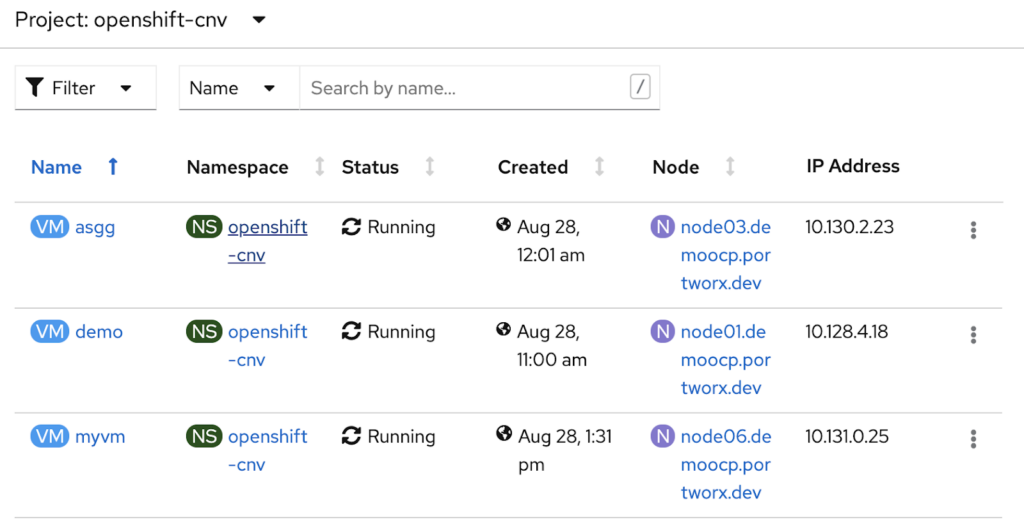
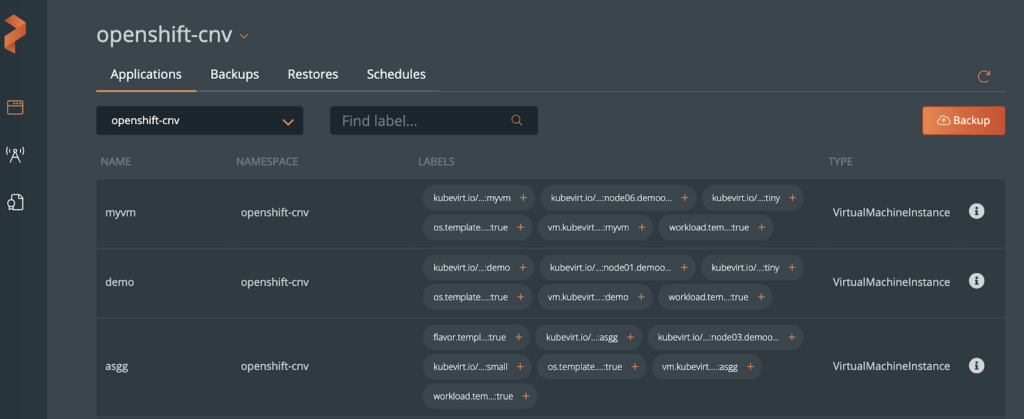
After you apply the specs above, you should be able to see the same VMs that you see in the Openshift UI in PX-Backup.
Here are the VMs within the Openshift console.
Here are the same VMs withn the PX-Backup UI.
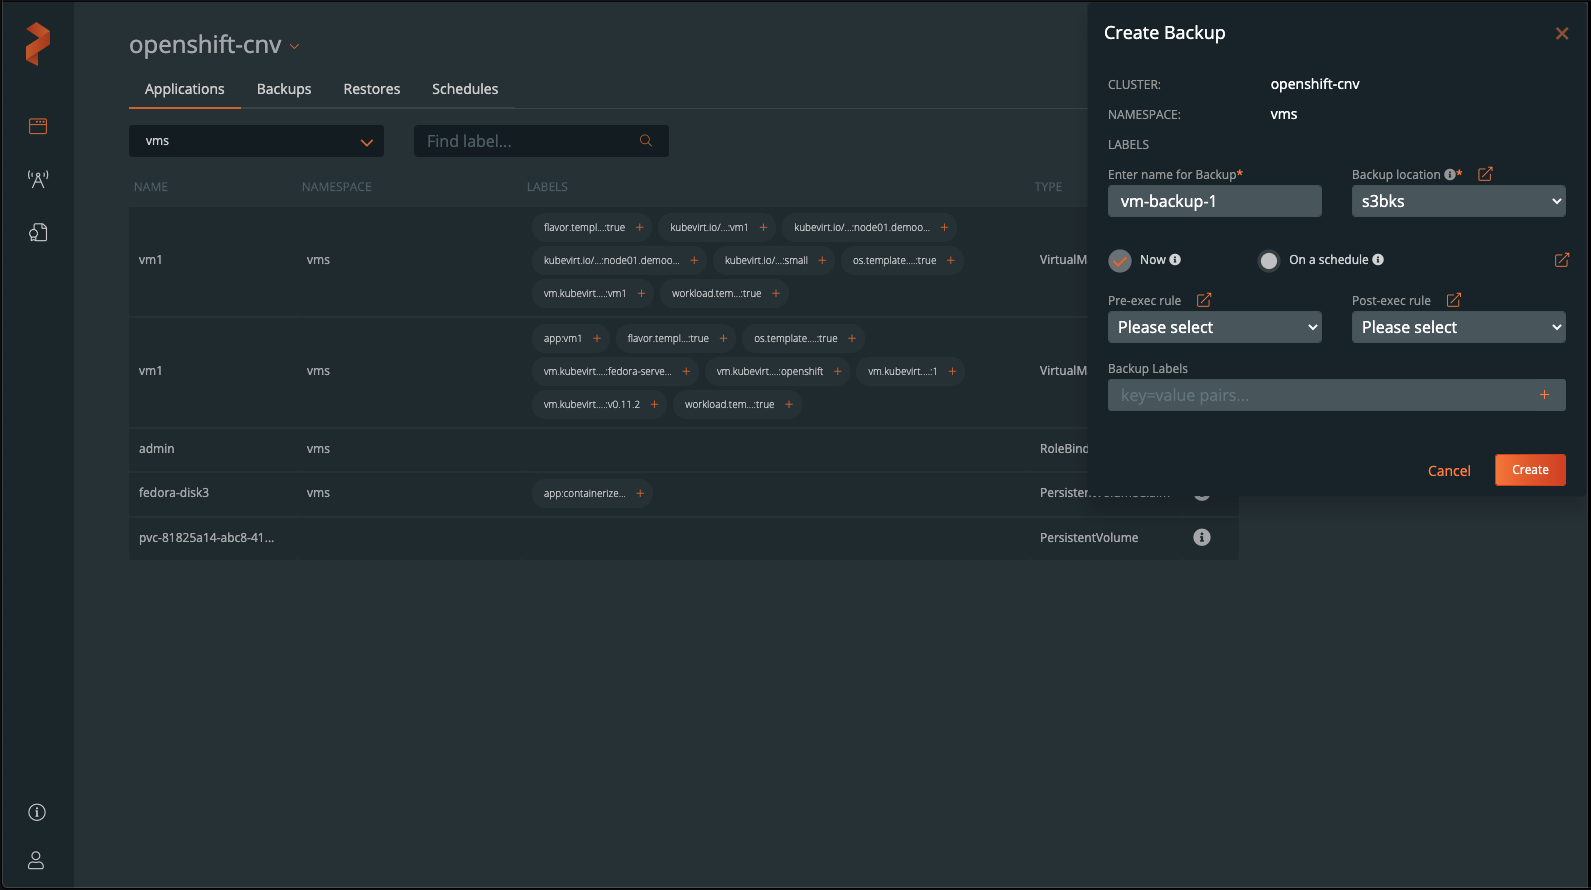
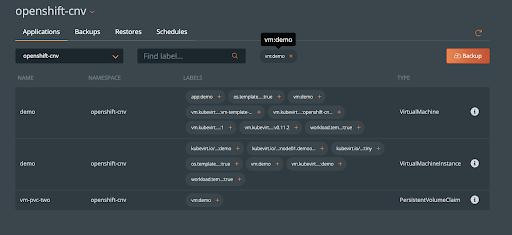
Note, if you have many VMs within a single namespace and you want to backup only one of them, make sure and label the VM resources you need to backup. In this case, I’ve made sure the VM resources and PVCs have a label of vm: demo. Select this label within the PX-Backup UI to backup the needed VM resources.
Create a backup and wait for the backup to complete. You should see a green cloud icon on the left indicating successful backup of the VM.

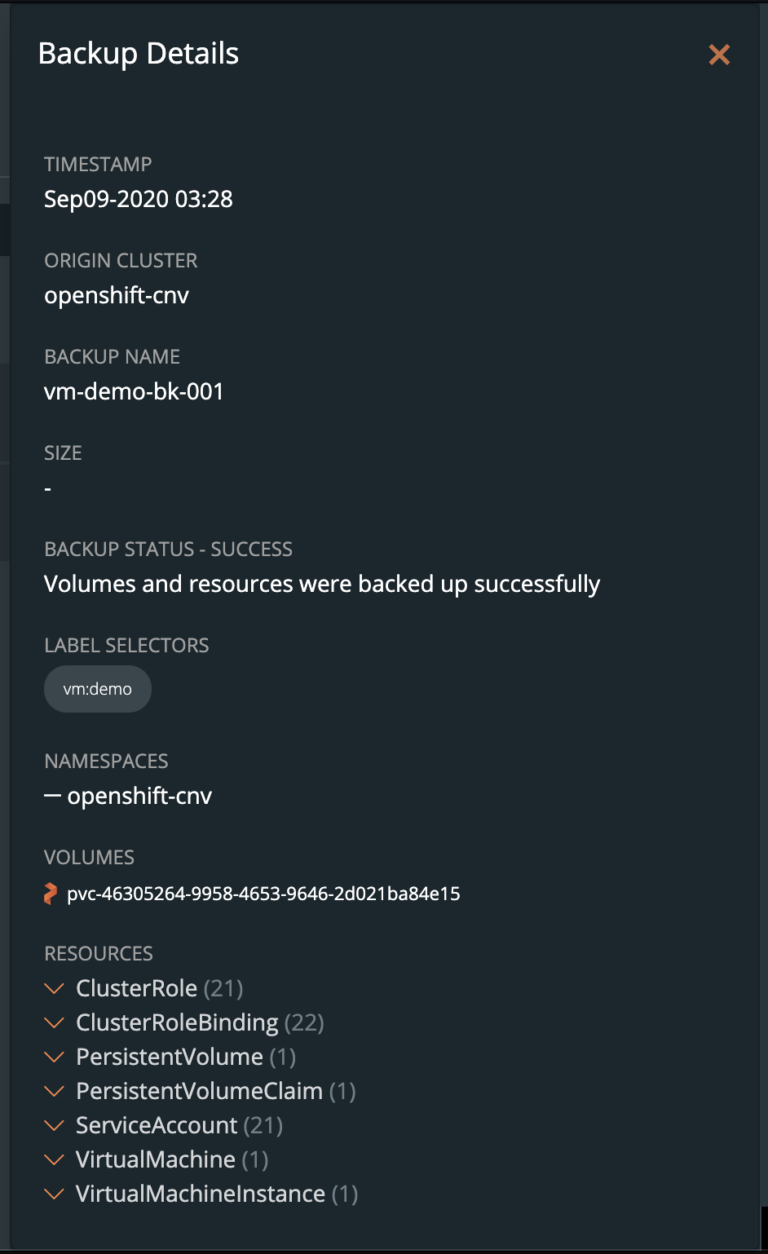
You can also select Show Details from the specific backup to see what resources are within the backup.
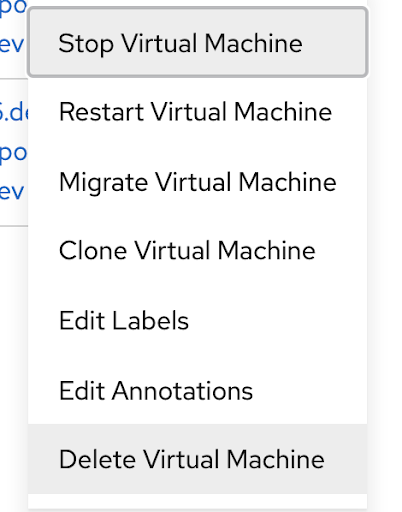
Once your backup is complete, the VM can be deleted to simulate the need to restore a VM. Select “Delete Virtual Machine” from the Openshift VM menu.
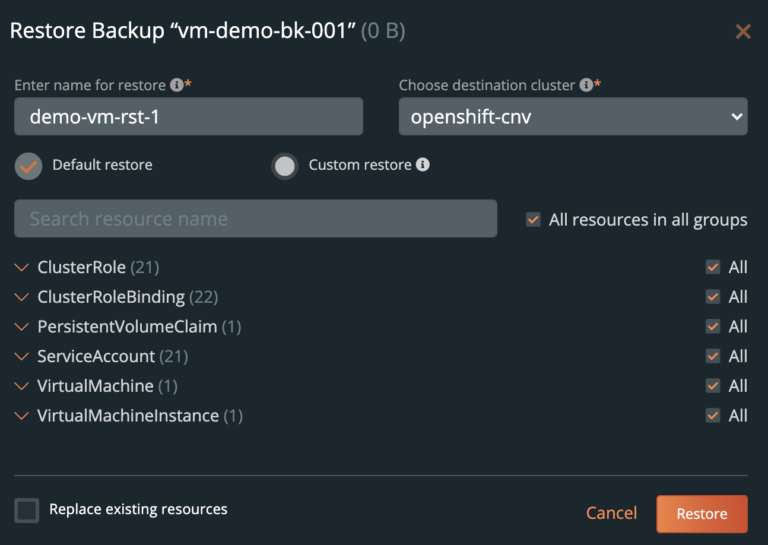
Next, select the backup from PX-Backup and click “Restore”. Fill out the needed restore information such as the restore name and destination cluster. Leave the “replace existing resource” checkbox unchecked, we want the restore job to only replace what is missing (our deleted VM). Click restore to start the recovery.
The restore job should complete after some time, this will be indicated by the green cloud icon to the left of the restore job. Within the Openshift dashboard you will see the VM starting again if the restore completed successfully.

Watch this short demo of a backup and restore workflow for VMs on Openshift 4.5.
Enabling Live Migration with Portworx Shared Volumes
OpenShift virtualization enables live migration of VMs with the support from underlying storage classes. Portworx is one of these storage classes that supports the live migration features by using the sharedv4 flag for PVCs. Use the below storage class example to enable live migration workflows for Openshift virtual machines.
apiVersion: storage.k8s.io/v1
kind: StorageClass
metadata:
  name: shared-px-replicated
parameters:
  sharedv4: "true"
  repl: "2"
provisioner: kubernetes.io/portworx-volume
reclaimPolicy: Delete
volumeBindingMode: Immediate
Make sure to update the AccessMode of the Openshift virtualization default data volume configuration to “<storage-class>.ReadWriteMany”. This is a requirement live migrations to work properly.
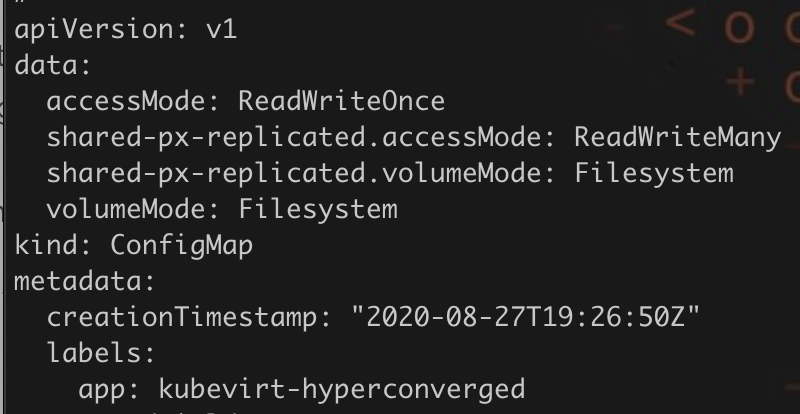
Once you have done that, you can create a PVC that uses this storage class. Then, a VM can use this PVC as its root disk. One example of this is to create a CDI based image that loads the Fedora cloud image into a PVC. Take note of the annotation “cdi.kubevirt.io/storage.import.endpoint“ which will load the Fedora image into the Portworx volume.
apiVersion: v1
kind: PersistentVolumeClaim
metadata:
  name: "fedora-disk1"
  labels:
    app: containerized-data-importer
  annotations:
    cdi.kubevirt.io/storage.import.endpoint: "https://dl.fedoraproject.org/pub/fedora/linux/releases/31/Cloud/x86_64/images/Fedora-Cloud-Base-31-1.9.x86_64.qcow2"
spec:
  storageClassName: shared-px-replicated
  accessModes:
  - ReadWriteMany
  resources:
    requests:
      storage: 20Gi
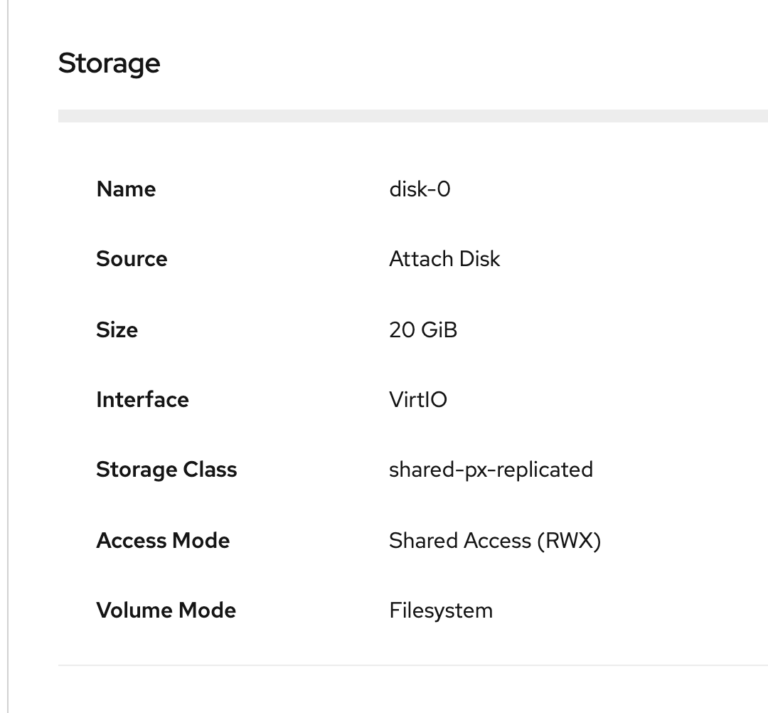
Once it’s completed, you can select the above disk as your boot disk in the virtual machine wizard. Notice that it should show that it is using “Shared Access (RWX)” for its Access Mode.
Now, once the VM is running, simply click on the right menu bar and select “Migrate Virtual Machine”

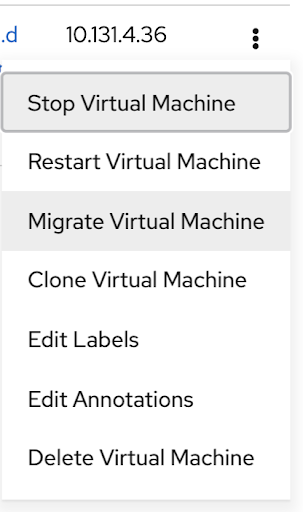


Note that the above images show that the VM moved from node02 to node01. We can also get more information about this movement using kubectl and pxctl.
Using kubectl we can view the pods, this shows the Completed vm on node node02 and it is now running on node01
NAME                      READY   STATUS      RESTARTS   AGE   IP            NODE                           NOMINATED NODE   READINESS GATES
virt-launcher-vm1-5j5q8   1/1     Running     0          10m   10.128.4.45   node01.demoocp.portworx.dev    <none>           <none>
virt-launcher-vm1-x5r9x   0/1     Completed   0          12m   10.131.4.37   node02.demoocp.portworx.dev    <none>           <none>
We can also inspect the volume using pxctl. This shows that there have been Volume Consumers on both node01 and node02 as expected and Potworx was able to provide the shared volume to both nodes.
# /opt/pwx/bin/pxctl v i 326738006419398040
Volume :  326738006419398040
Name              :  pvc-81825a14-abc8-4123-8ba7-4cb255fbde7a
Size              :  20 GiB
Format            :  ext4
HA                :  2
IO Priority       :  HIGH
Creation time     :  Sep 10 18:06:25 UTC 2020
Shared            :  v4
Status            :  up
State             :  Attached: 8a045618-657f-4e0f-89a4-3cdc75144b0a (10.180.5.20)
Device Path       :  /dev/pxd/pxd326738006419398040
Reads             :  3616
Reads MS          :  1192
Bytes Read        :  186867712
Writes            :  6135
Writes MS         :  36221
Bytes Written     :  637800448
IOs in progress   :  0
Bytes used        :  1.3 GiB
Replica sets on nodes:
Set 0
  Node   : 10.180.5.20 (Pool eb8214d6-67f0-491c-bb37-9f7670fb88bc )
  Node   : 10.180.5.16 (Pool 80a656b7-b5b1-41e7-8d51-a3541c81c34a )
Replication Status  :  Up
Volume consumers  :
- Name           : virt-launcher-vm1-5j5q8 (de6e3e03-8023-4010-a01c-1fa7ac6ec09d) (Pod)
  Namespace      : vms
  Running on     : node01.demoocp.portworx.dev
  Controlled by  : vm1 (VirtualMachineInstance)
- Name           : virt-launcher-vm1-cg6vf (c9d0a57c-55a2-49cf-891d-4378cab5fa2a) (Pod)
  Namespace      : vms
  Running on     : node02.demoocp.portworx.dev
  Controlled by  : vm1 (VirtualMachineInstance)
Conclusion
Portworx often provides the data management and protection layer for containerized applications in Openshift. With OpenShift Virtualization, Portworx can offer a way for teams to run their VM-based applications side-by-side with their containerized apps with a single data management layer. This allows end users to get the same data protection and high availability for VMs and containers alike.
Share
Subscribe for Updates
About Us
Portworx is the leader in cloud native storage for containers.
Thanks for subscribing!


