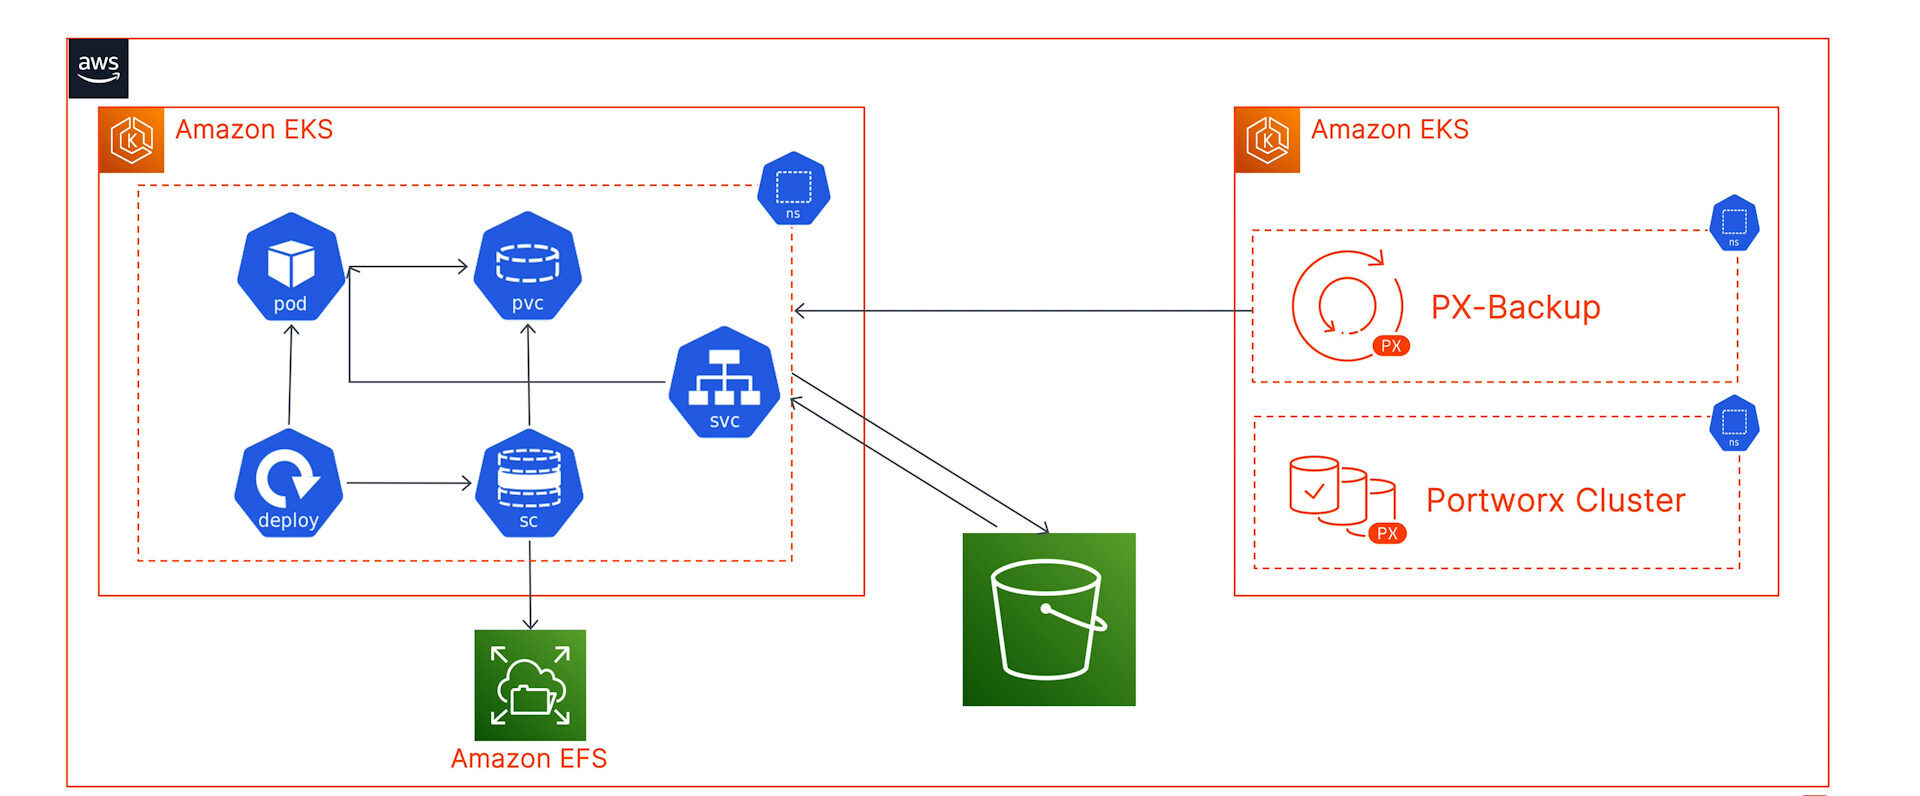
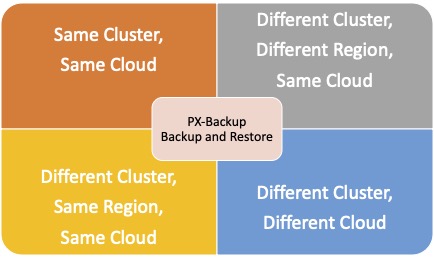
With PX-Backup 2.1.1 now generally available, customers can architect cross-cloud migrations for their stateful applications running on Kubernetes clusters deployed on any cloud environment. This allows organizations, who might already be using multiple cloud platforms to run their Kubernetes clusters and applications, to migrate their applications from one public cloud to another. Using PX-Backup, organizations can use any of the following supported scenarios to restore their application:
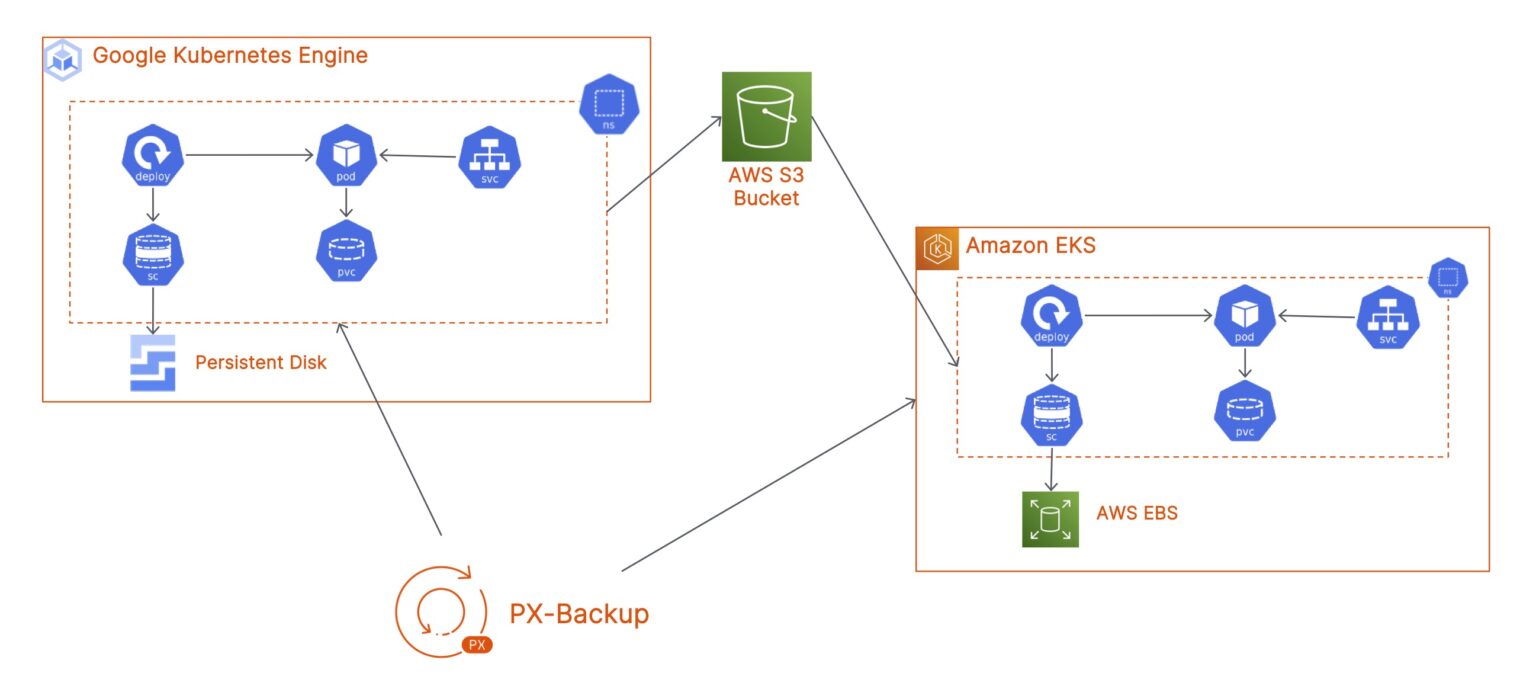
In this blog, we will talk about how you can migrate a stateful application running on a Google Kubernetes Engine (GKE) cluster in the GCP us-east1 region to an Amazon Elastic Kubernetes Service (EKS) cluster running in the AWS us-east-1 region.
You can choose to run PX-Backup on either the GKE or the EKS cluster, but since we wanted to restrict failure domains, we have deployed PX-Backup on a dedicated backup cluster running in AWS. You can choose to store your backup snapshots either in a Google Cloud Object Storage Bucket, or you can store them in an AWS S3 bucket to expedite the restore process.
And if you want an additional level of resiliency, you can store your snapshots in both of these object storage endpoints. Neither of these clusters (GKE, EKS, or PX-Backup EKS cluster) are using Portworx Enterprise as the Kubernetes storage layer. We are just consuming storage from the default storage class that has been deployed as part of our Kubernetes cluster.

- To install PX-Backup 2.1.1, you can navigate to PX-Central, generate a specification, and use Helm for the deployment.
- Once the deployment is successful, navigate to the PX-Backup UI using the AWS ELB load balancer endpoint and log in using the default PX-Backup credentials (admin/admin). To fetch the PX-Backup UI endpoint, use the following command:
kubectl get svc -n central
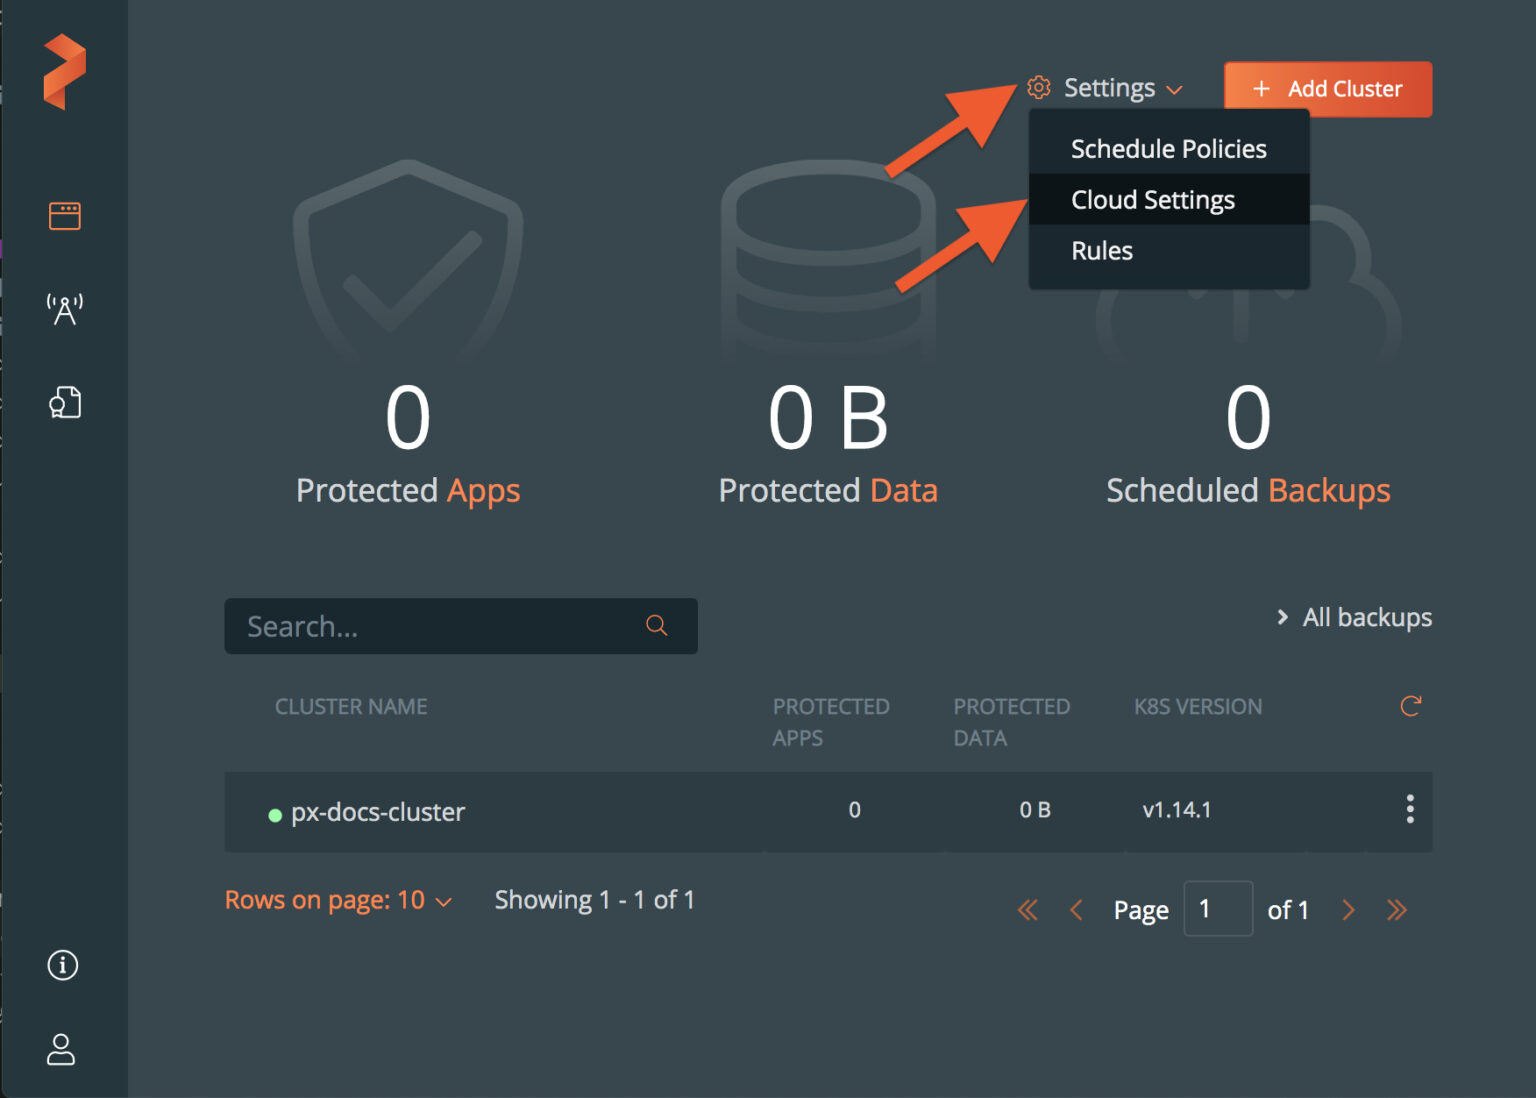
- Next, connect your AWS and GCP accounts to your PX-Backup instance by navigating to the Cloud Settings section in the top right. You can use your AWS access key and secret access key to connect to your AWS account and use your GCP SA’s JSON key to connect to your GCP account.
- Once you are connected, you can follow our documentation to add your backup targets.
- Next, let’s connect our GKE and EKS clusters. Click Add Cluster on the PX-Backup dashboard, enter a name for your GKE cluster, and paste the output from the following command in the kubeconfig textbox:
kubectl config view --flatten --minify
For PX-Backup to interact with your Kubernetes clusters, we need to install a Stork on your Kubernetes clusters. For the cross-cloud migration to work, we will install Stork version 2.8.2. You can just copy the command for “Non PX Cluster” from the UI and run it against your GKE and EKS cluster. You will see Stork pods being deployed in your kube-system namespace on your Kubernetes clusters.
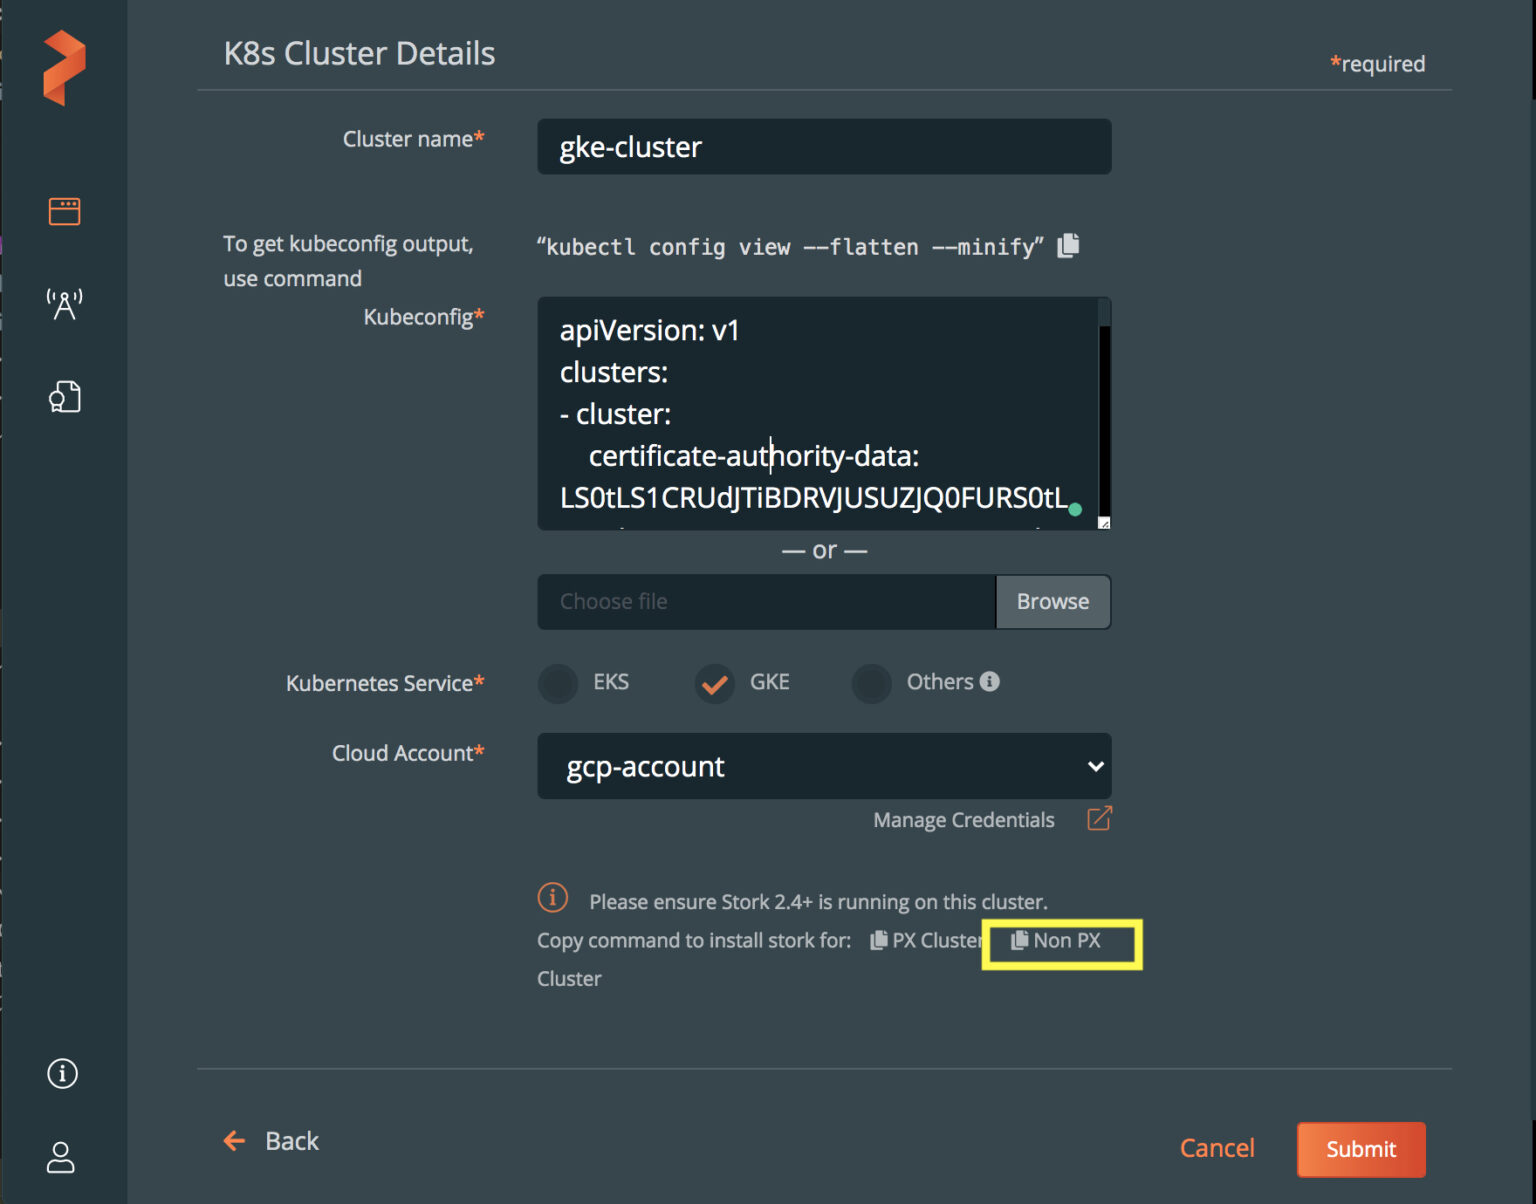
- Once your GKE and EKS clusters are added to your PX-Backup instance, we need to update the “kdmp-config” config map on your source cluster. Use the following command to update the config map:
kubectl edit cm kdmp-config -n kube-system

#Add the following parameter in the data section:
BACKUP_TYPE: “Generic”
- Next, we can start creating backup jobs for our applications running on our GKE cluster. To do that, navigate to the PX-Backup UI and select the GKE cluster. PX-Backup automatically displays all the different namespaces you have configured on your cluster. You can select the namespace where your application is running and select all resources in that namespace by default, or you can pick and choose different Kubernetes objects by Type or Labels. Once you have selected everything you need to backup, click on Backup, enter a name for the Backup job, select a backup location, and select a schedule policy and any pre- and post-backup rules you might need for your application. Click Create to initialize the backup job.
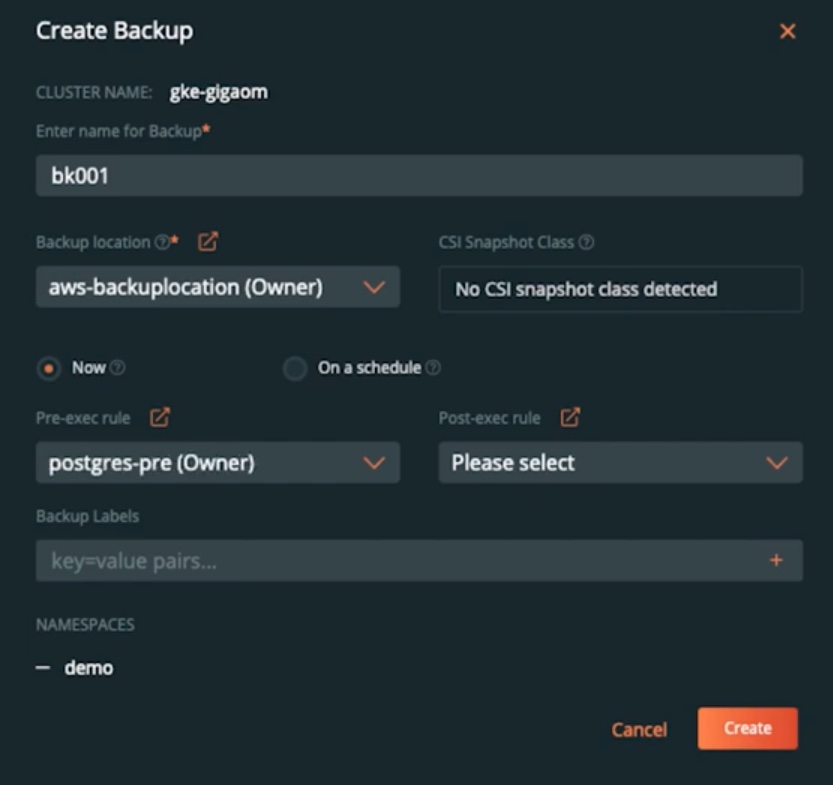
- At this point, PX-Backup interacts with Stork running on your source cluster and asks it to create a new backup job. This involves copying your persistent volumes, your Kubernetes objects, and all your application configuration and storing it in your backup repository.
- Next, let’s try restoring your GKE backup to an EKS cluster. To do that, navigate to the GKE cluster and find the snapshot that you want to restore from. Select the backup snapshot and select Restore. Here, we can give the restore object a name and select a destination cluster. Since we are moving from GKE to EKS, we can also customize the way our application is restored. We can select a destination StorageClass that we want to use for our persistent volumes. Since we are moving to EKS, we will select the gp2 storage class. We can also select a namespace that exists on the EKS cluster. And optionally, you can select to restore all resources or just a subset of resources from our backup job. Click Restore, and PX-Backup will instantiate a restore operation of your application on EKS.
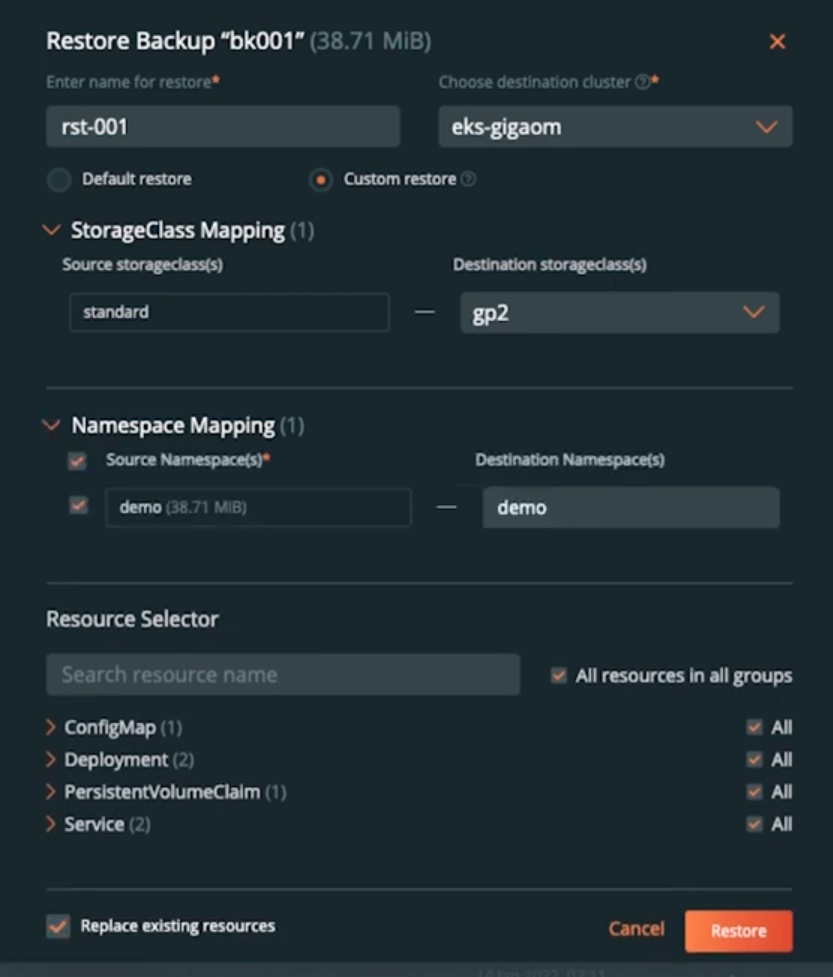
- Once you have your application restored, you can use kubectl and verify that all of your application components and data have been successfully deployed and restored from GKE to EKS.
kubectl get all -n demo
kubectl get pvc -n demo
This cross-cloud migration workflow opens up some interesting use cases for our customers. For example, one of our customers runs their development environment in GKE and their production environment in EKS. Using PX-Backup gives them the ability to easily promote their applications from dev/test to production without any manual steps or configuration.
If you want to see this in action, check out the demonstration on our YouTube channel:
Share
Subscribe for Updates
About Us
Portworx is the leader in cloud native storage for containers.
Thanks for subscribing!


