OpenShift is a clear leader when it comes to Enterprise Kubernetes distributions. Organizations are moving forward with their mission-critical applications and are combining the capabilities of OpenShift with leaders in other categories—such as data storage like Portworx. These tools work together to give users the most comprehensive solution around container orchestration and data management. Applications in production need “table stakes” features, such as (not all inclusive)
- Application lifecycle management
- Security
- Monitoring
- Logging
- Data protection
- Backup and restore
- Disaster recovery
Portworx has you covered for data protection, backup and restore, and disaster recovery. In this blog post we’ll talk about how users and administrators alike can easily use Openshift 4.4 with PX-Backup for a seamless and intuitive backup and recovery solution.
Using PX-Backup with OpenShift 4.4
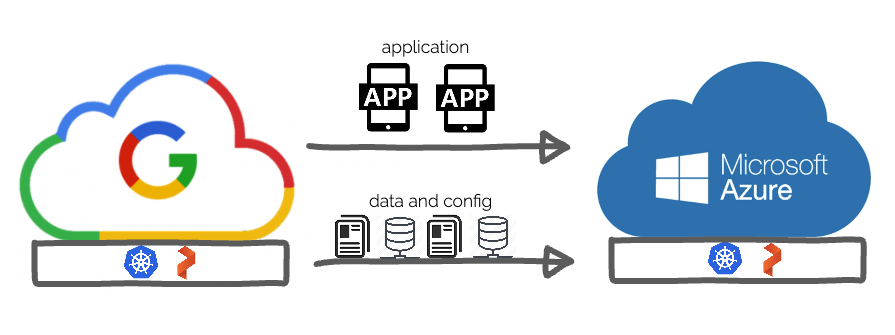
Portworx Enterprise is being used in conjunction with PX-Backup in the solution presented in this blog post; however, it is important to note that PX-Backup can provide backup and restore for applications on OpenShift clusters running on cloud providers such as Amazon AWS, Google Kubernetes Engine, and Azure Kubernetes Service as well. This is because PX-Backup can backup both stateless and stateful components as well as choose whether to backup persistent data using the cloud provider’s storage—such as Amazon EBS and Azure disk—rather than a Portworx volume. Keep in mind, though, when you use Portworx, the advantage is that the volumes presented by Portworx can be moved anywhere—across cloud providers or even on-prem and back.
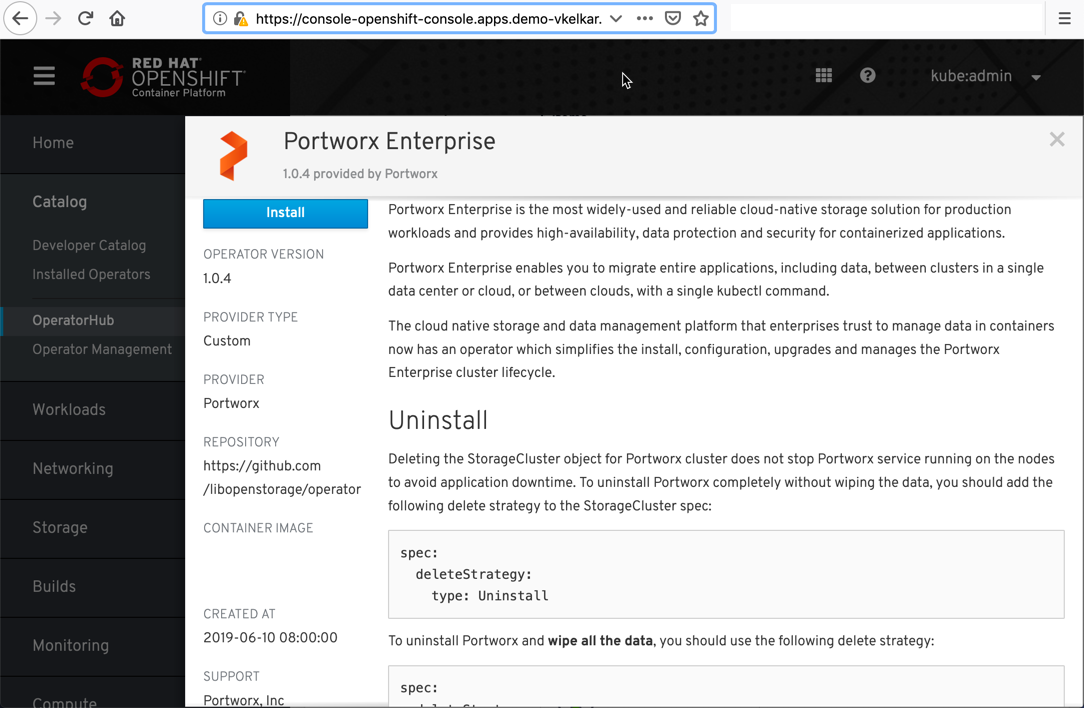
You can easily install Portworx by choosing Portworx Enterprise from the OperatorHub.
Next, you will need to install PX-Backup; this should be done in a separate Kubernetes environment so that PX-Backup can be on its own fault domain and be accessible as a central component. This is often done in a management zone of the infrastructure such that it can connect to many different OpenShift or Kubernetes environments from a central location. You can watch a quick video of how to install PX-Backup below.
Once PX-Backup is up and running, adding your OpenShift cluster to PX-Backup is just like adding any other Kubernetes cluster. Simply click Add Cluster, give your backup cluster a name, then retrieve and enter your KubeConfig from the OpenShift cluster. If you want to follow along on how to configure a new cluster to be added to PX-Backup, watch this short video below and then continue reading.
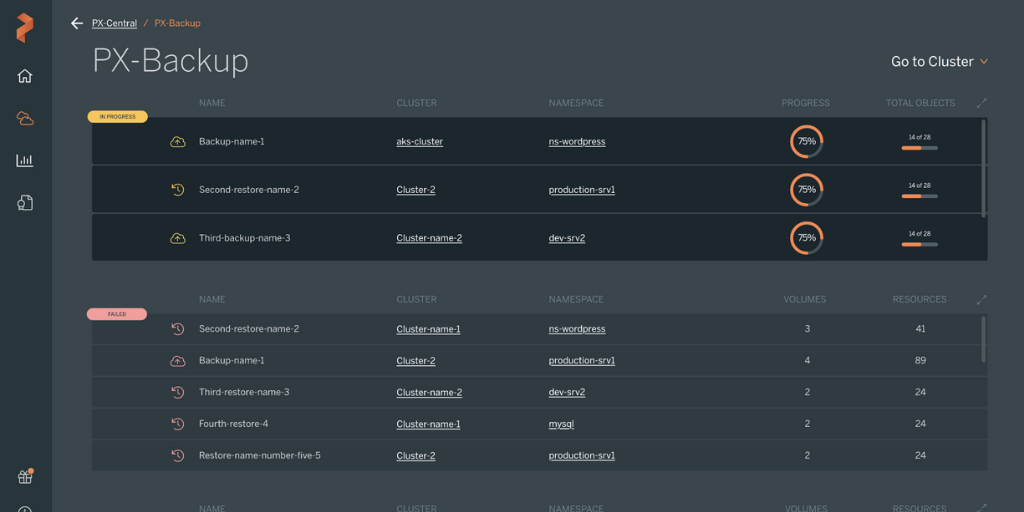
Once your OpenShift cluster is added to PX-Backup, you may use the navigation to select which namespace(s) and applications you want backups for.
> Note, PX-Backup is completely multi-user, and an end user with a Kubeconfig that might have limited visibility compared to an administrator can still control backup and restore for what they have access to. This allows individual teams to take control of how often they want to backup and protect their data, separate from any administrative and compliance policies that an admin may need to carry out.
Once in a namespace, you can select what applications and resources you want to create a backup for, and the following options are available to you.
OpenShift Backup options
| Backup Option | Description |
| Backup the entire namespace | Select backup without any labels to backup the entire namespace and every object within it.
|
| Select specific applications to backup | Select the label(s) you want the backup to filter by; the backup will only backup resources with these labels. (optional)
|
| Provide a Backup Schedule | Provide a periodic, daily, weekly, or monthly schedule for the backup to repeat. (optional)
|
| Provide a Pre-Backup Rule | Provide rules that occur before a backup occurs. These rules have actions that can run in the pods of the backup resources. (optional)
|
| Provide a Post-Backup Rule | Provide rules that occur after a backup occurs. These rules have actions that can run in the pods of the backup resources. (optional)
|
| Provide backup labels | Provide arbitrary labels for tracking and identification. (optional)
|
Once you have taken a backup of an application, you can simply click on the backup that was created and click Restore in the options to initiate a restore. Select the cluster you want to restore to, and provide the following options for backup.
OpenShift Restore options
| Restore Option | Description |
| Restore to different cluster | Restores do not have to occur in the same cluster as the backup source; you may select a different Kubernetes cluster.
|
| Provide a custom namespace | You do not need to restore to the same namespace that the backup was taken; you can create or select a different namespace to restore to. (optional)
|
| Restore jobs | You can restore Kuberentes jobs that may be completed already. (optional)
|
| Replace existing resources | This will delete the resources that match resources being restored and allow the restore to essentially overwrite the matching resources. (optional)
|
You can find all of the above and more in our backup and restore documentation on our documentation site.
Below you will find a demo of PX-Backup being used for OpenShift 4.4 in AWS to back up both a stateful database that uses Portworx volumes as well as a stateless service without any persistent volumes or persistent volume claims.
For your 30 day free trial and to learn more about PX-Backup, you can visit the PX-Backup landing page.
Share
Subscribe for Updates
About Us
Portworx is the leader in cloud native storage for containers.
Thanks for subscribing!