


This is part two in a series about Openshift Virtualization with Portworx. The series will cover installation and usage, backup and restore, and data protection for virtual machines on Openshift. You can read part one here.
As organizations modernize their application platforms, containers are becoming the preferred deployment model. However, many enterprises still rely on a significant number of virtual machine (VM)-based applications that continue to support critical business services. OpenShift Virtualization, powered by KubeVirt, enables organizations to run VM-based and containerized workloads side by side on a single platform, providing a unified operational experience for developers and administrators.
Portworx complements this approach by delivering a common data management and protection layer for both containers and VMs. With capabilities such as persistent storage, high availability, backup and recovery, and disaster recovery, Portworx helps simplify operations while ensuring consistent data services across all workloads. In this blog, we’ll explore how Portworx enables seamless VM operations on OpenShift Virtualization, including features such as Live Migration using the px-rwx-block-kubevirt StorageClass.
Install the helm3 using the below command
curl -fsSL -o get_helm.sh https://raw.githubusercontent.com/helm/helm/main/scripts/get-helm-3
chmod 700 get_helm.sh
./get_helm.sh
The specification shown below can be generated from the Portworx Spec Generator: Portworx Spec Generator
Step 1
Create a kubernetes Secret using the following command.
kubectl apply -f - <<EOF
apiVersion: v1
kind: Namespace
metadata:
name: central
---
apiVersion: v1
kind: Secret
metadata:
name: pxc-credentials
namespace: central
data:
mongodb-px-backup-password: YWRtaW4xMjM=
mongodb-root-password: YWRtaW4xMjM=
mongodb-replica-set-key: YWRtaW4xMjM=
postgresql-password: YWRtaW4xMjM=
mysql-password: YWRtaW4xMjM=
EOF
Step 2
Add the repository by using the ‘helm add’ command and specifying the path to the repository. Then, update the repository with the ‘helm repo update’ command.
helm repo add portworx http://charts.portworx.io/ && helm repo update
Step 3
Refer to the documentation for advanced configuration. To create a namespace and install Portworx Central
Install using the ‘set’ command:
helm install px-central portworx/px-central --namespace central --create-namespace --version 2.11.0 --set persistentStorage.enabled=true,persistentStorage.storageClassName="px-csi-db",pxbackup.enabled=true
Before creating backups, PX-Backup must be configured with the appropriate cloud credentials and a backup location. Credentials provide secure access to the object storage service, while the backup location defines where backup data will be stored. Once configured, PX-Backup can use this location to store and restore application and virtual machine backups, ensuring reliable data protection and recovery across your OpenShift environment.
First, add the OCP cluster to PX-Backup by selecting “Add Cluster”
at the top right of the PX-Backup interface. In the below image, the cluster we are working with is already added and named “openshift-cnv”

Then, navigate to the VM tab and find out the VMs you wish to backup from namespace. This will list all VM’s from all namespaces
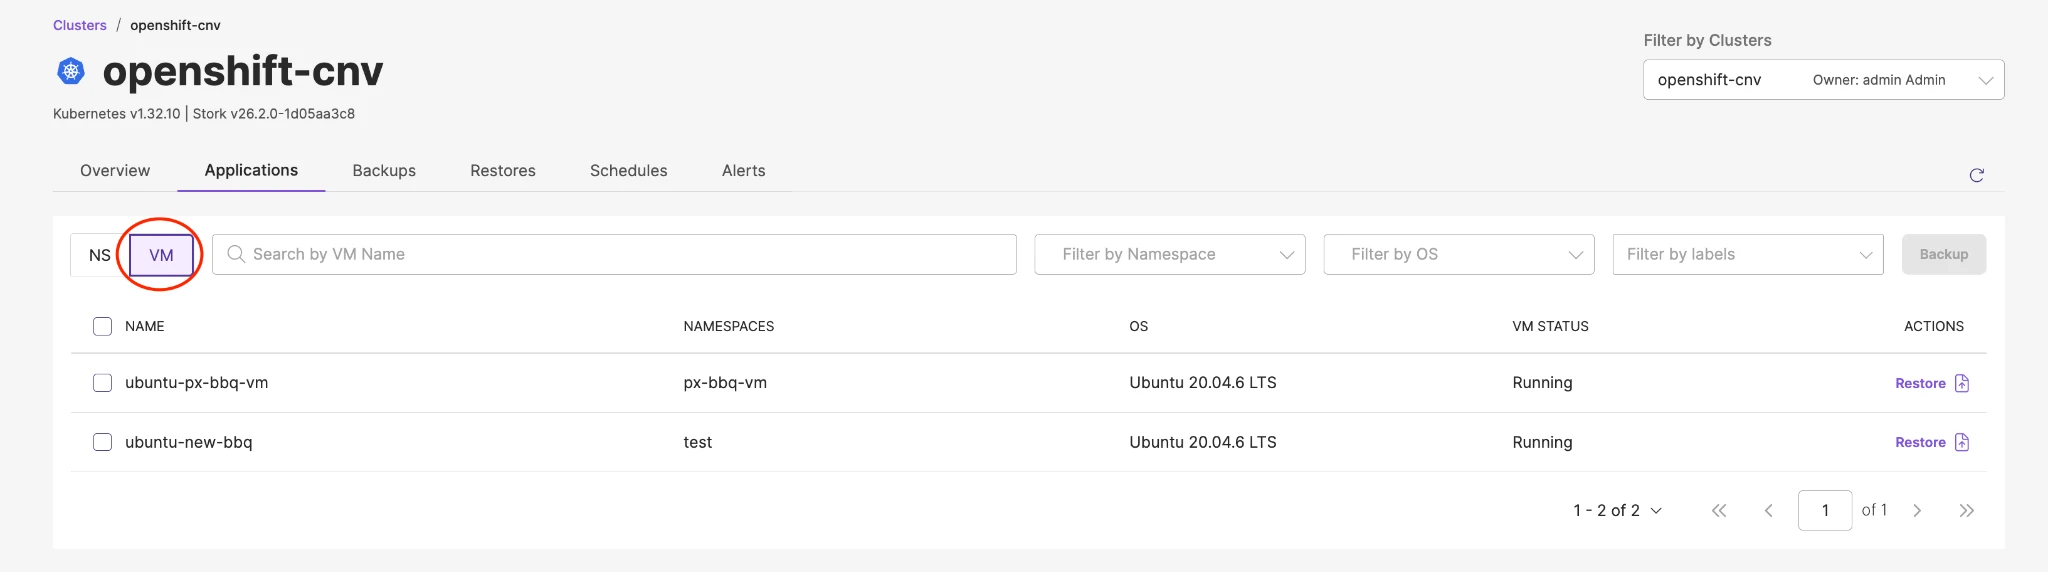
I have selected the VM under the “test” namespace which needs to be backed up.
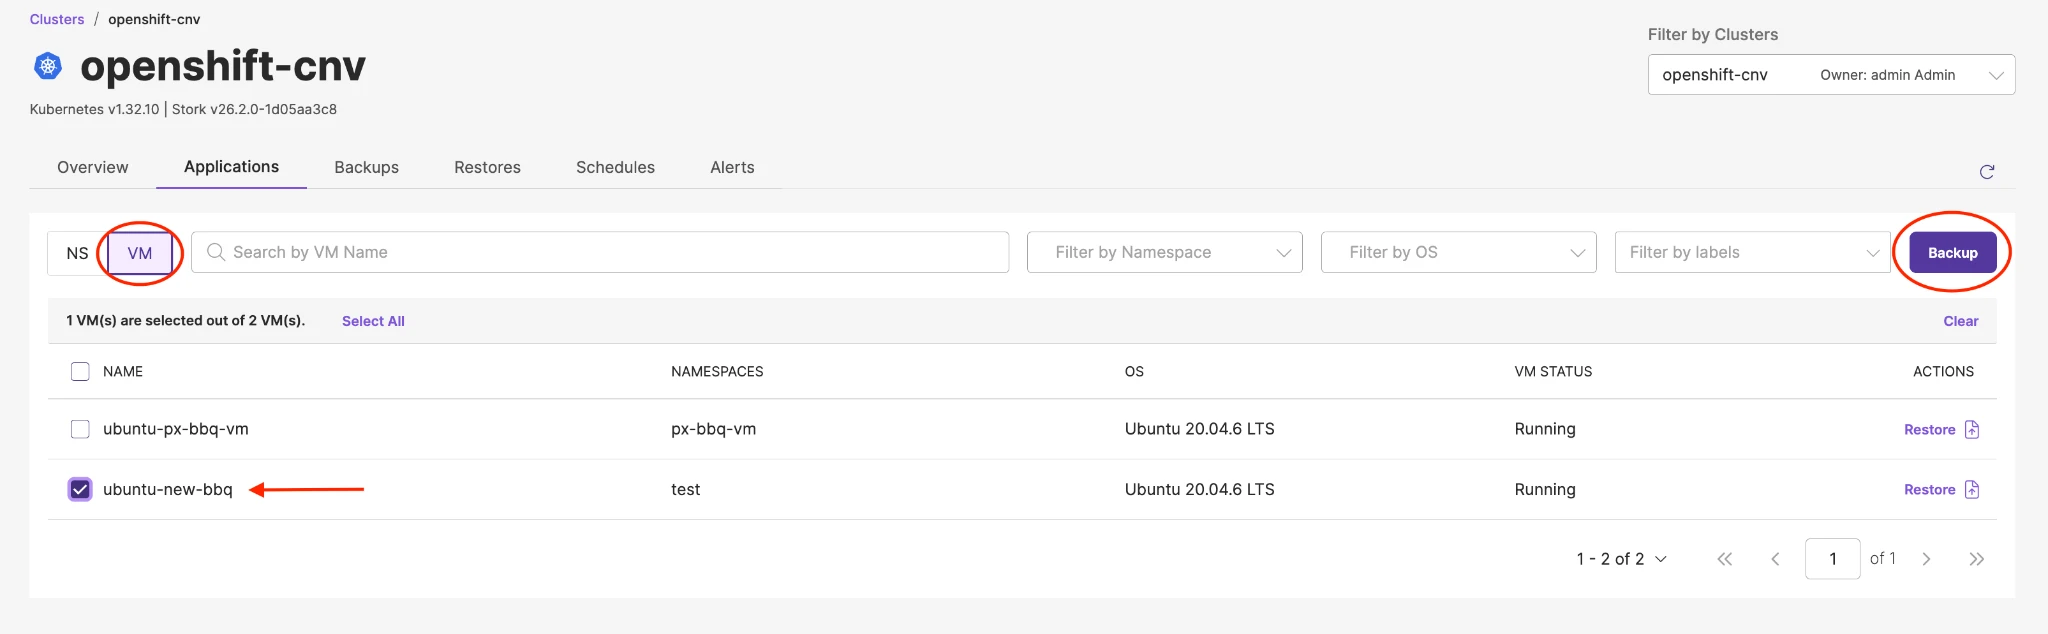
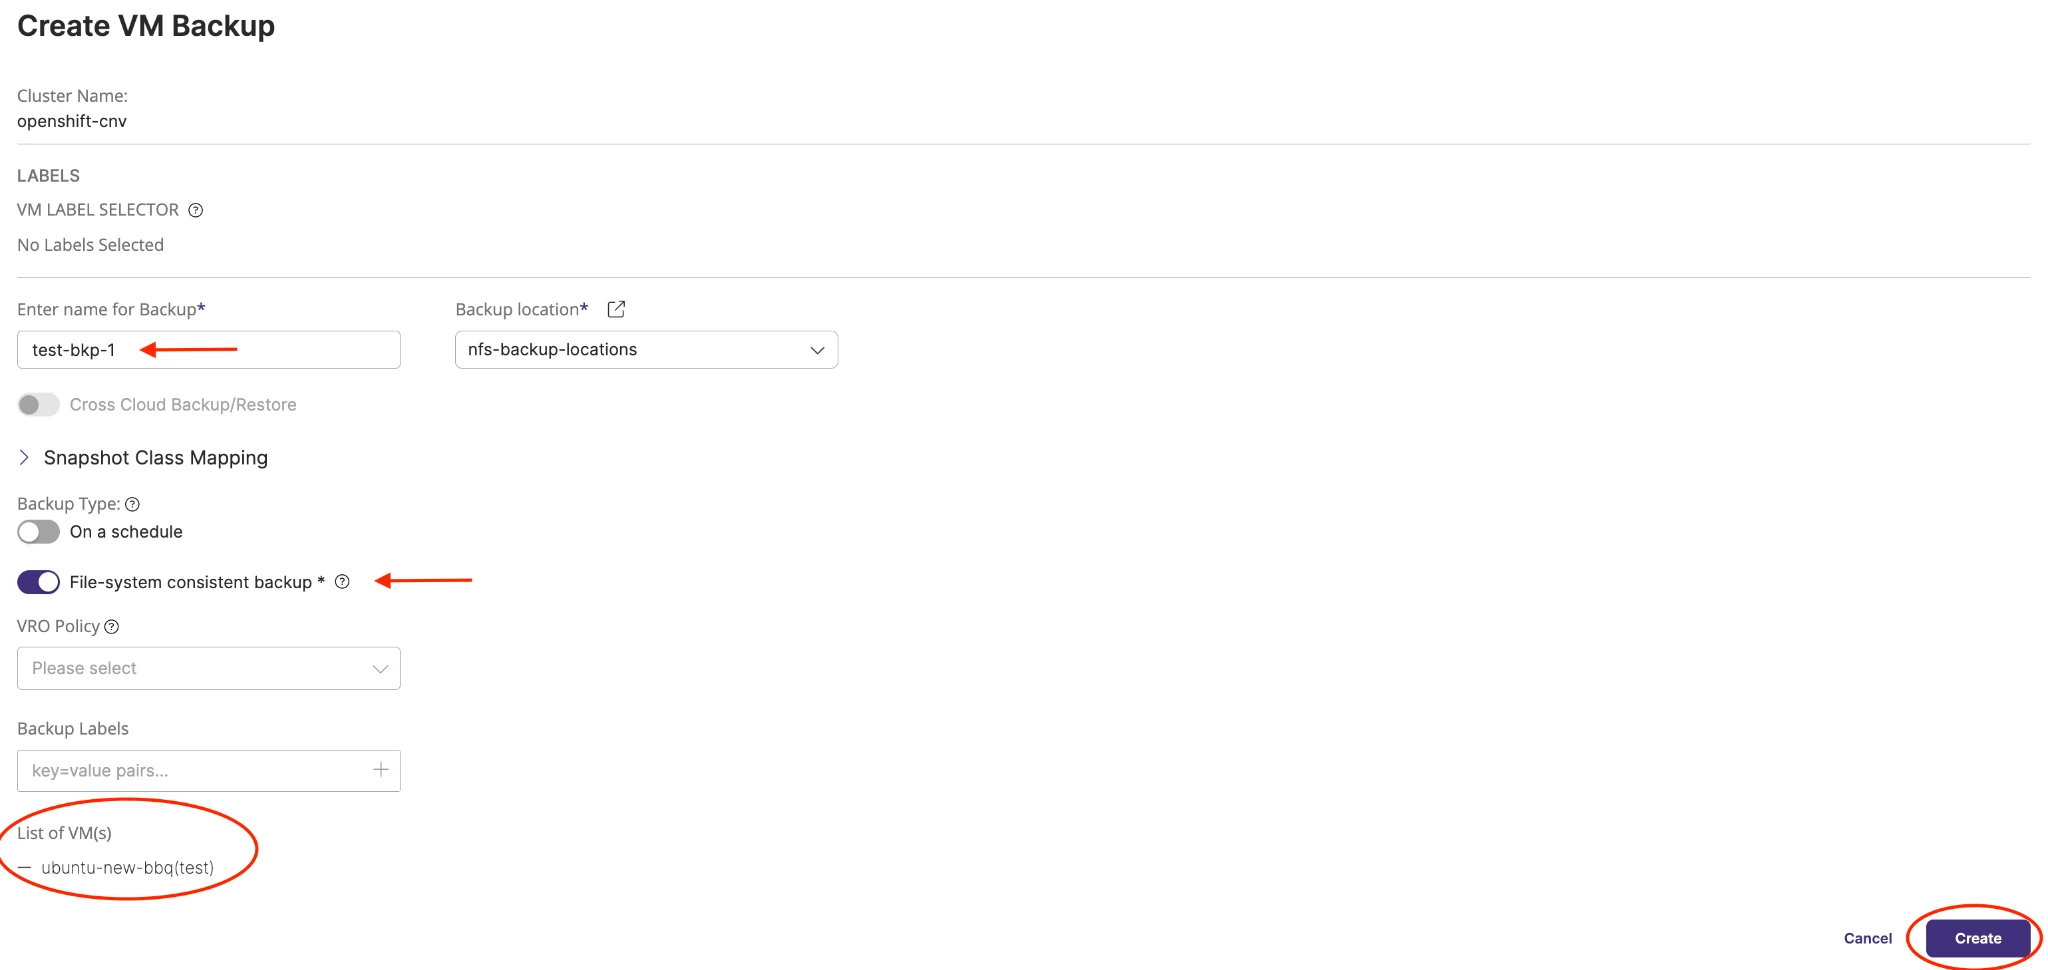
Create a backup and wait for the backup to be complete.
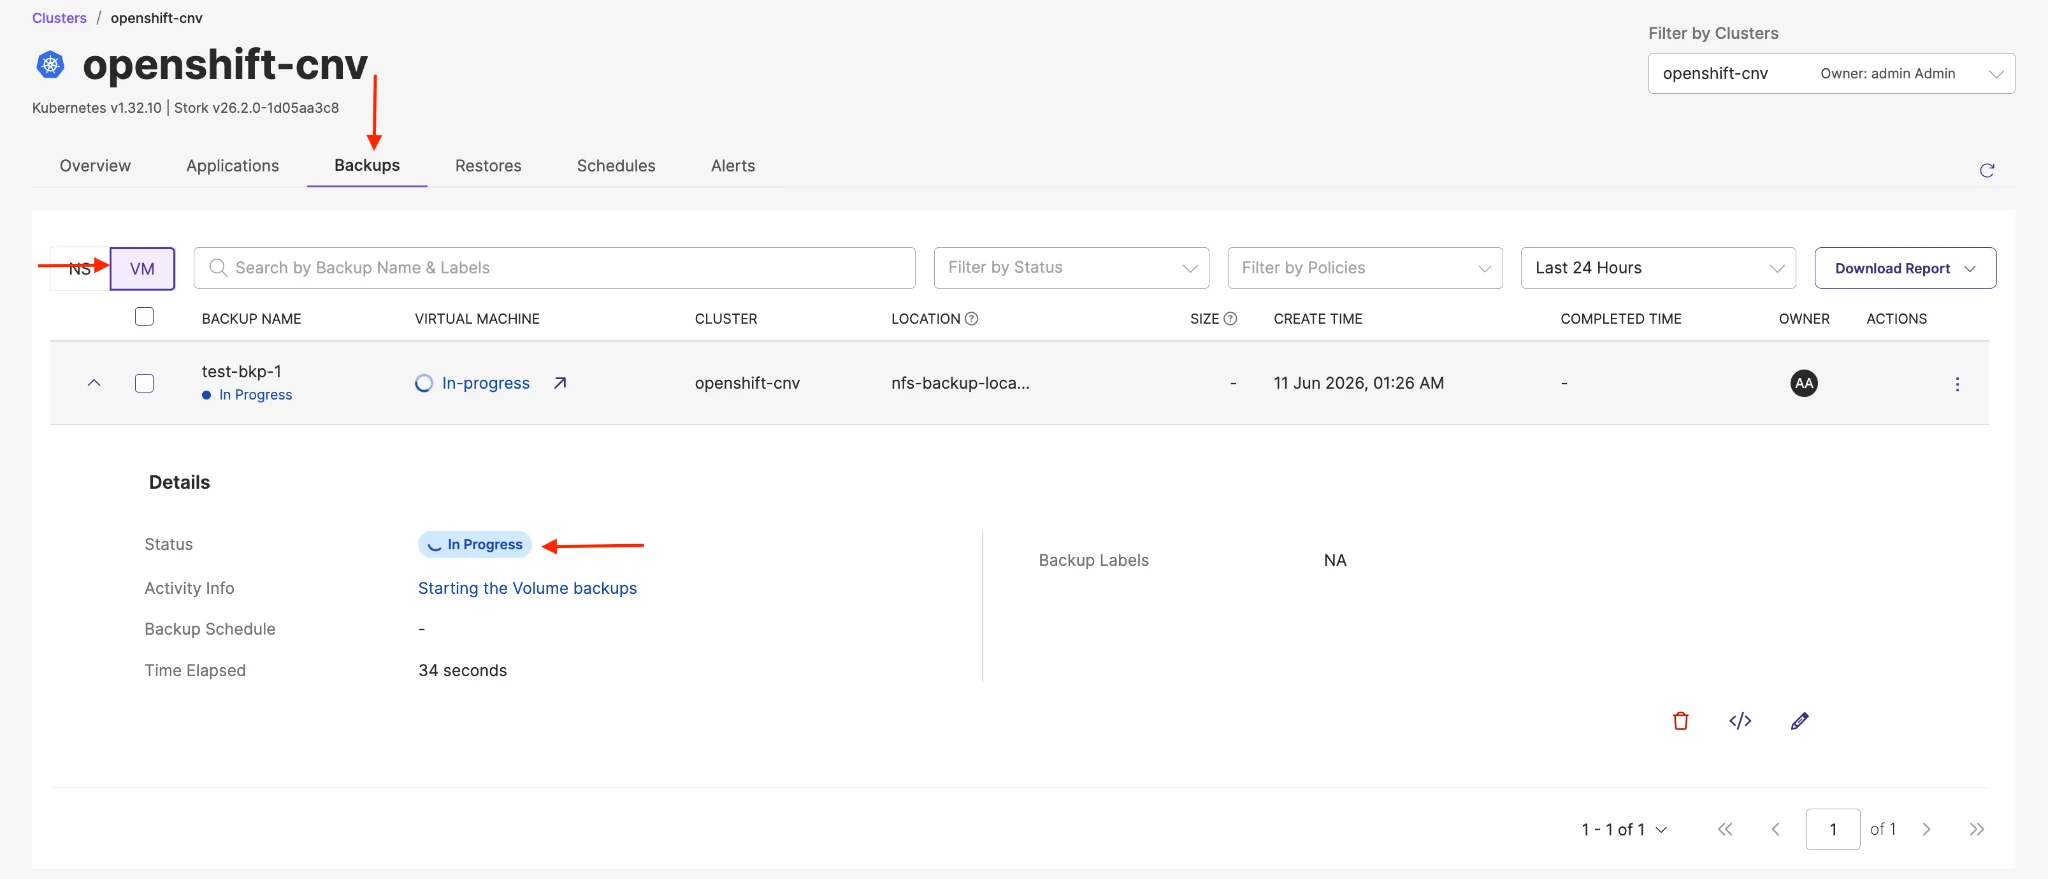
Click on the Backups tab, under that VM tab and you will see in progress, wait until get completed.
The backup status is reported as “Success” and includes the duration required to complete the operation.
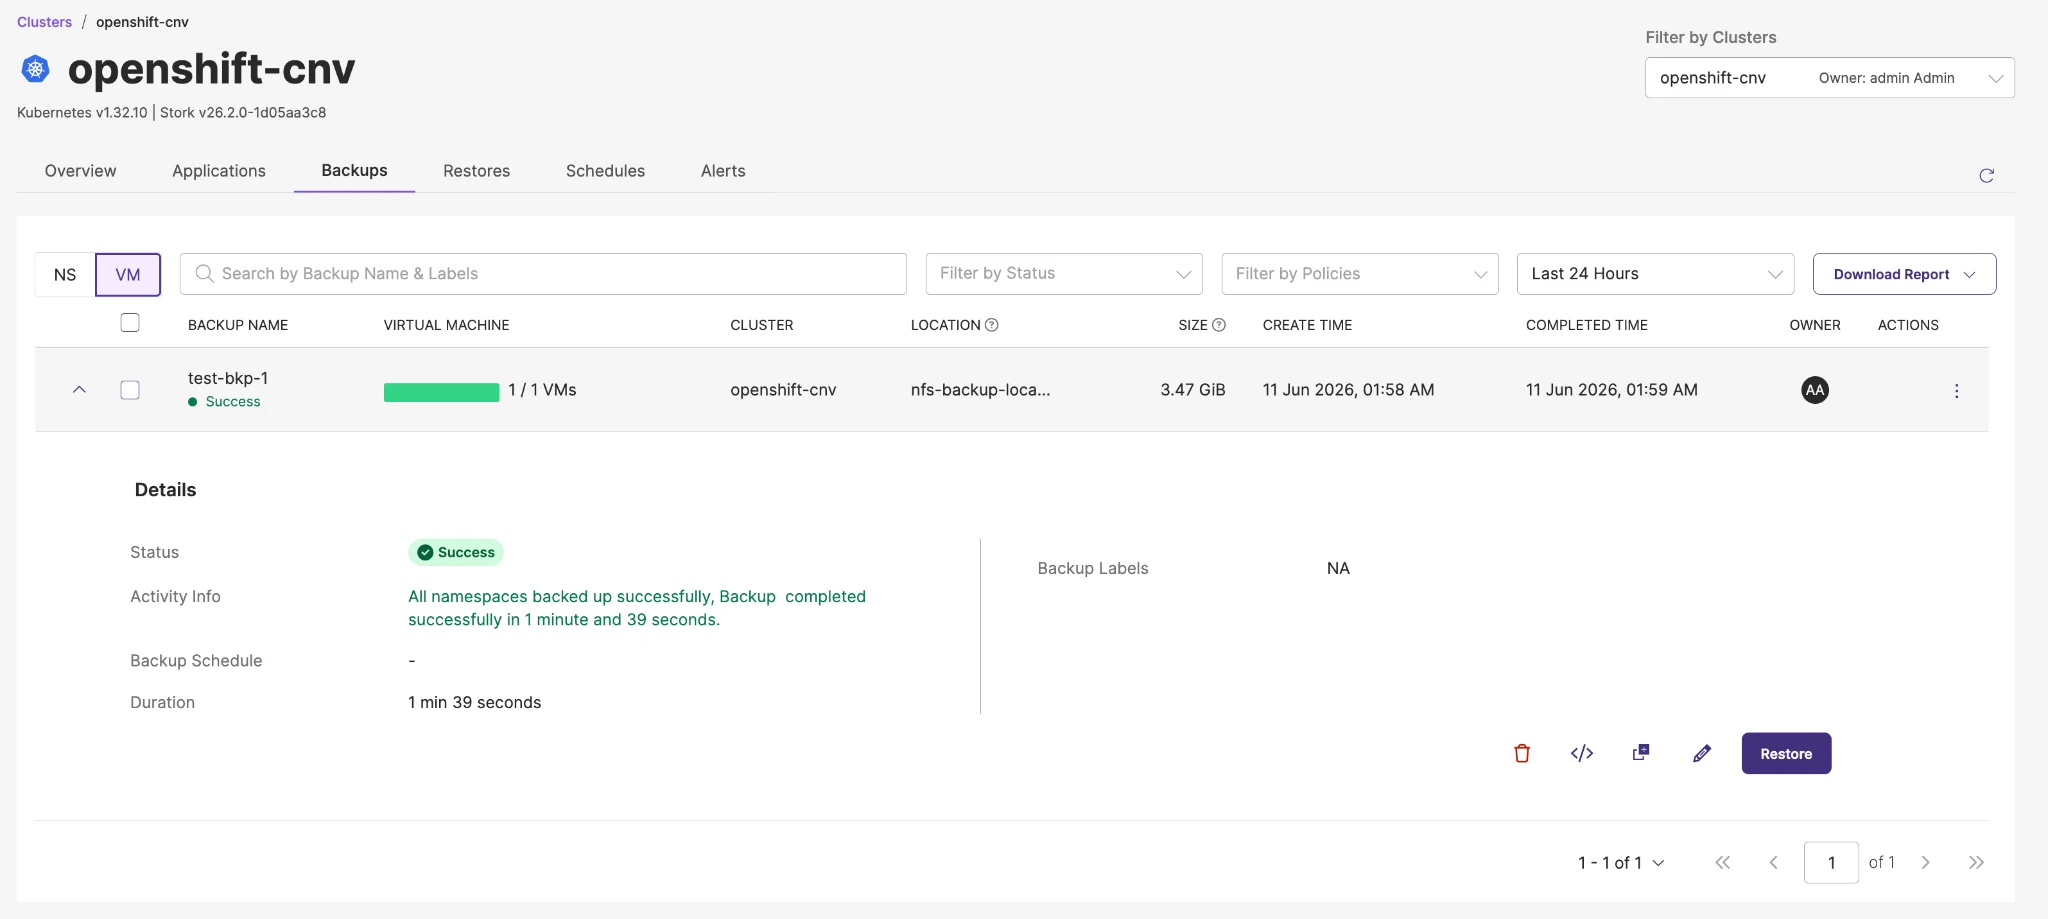
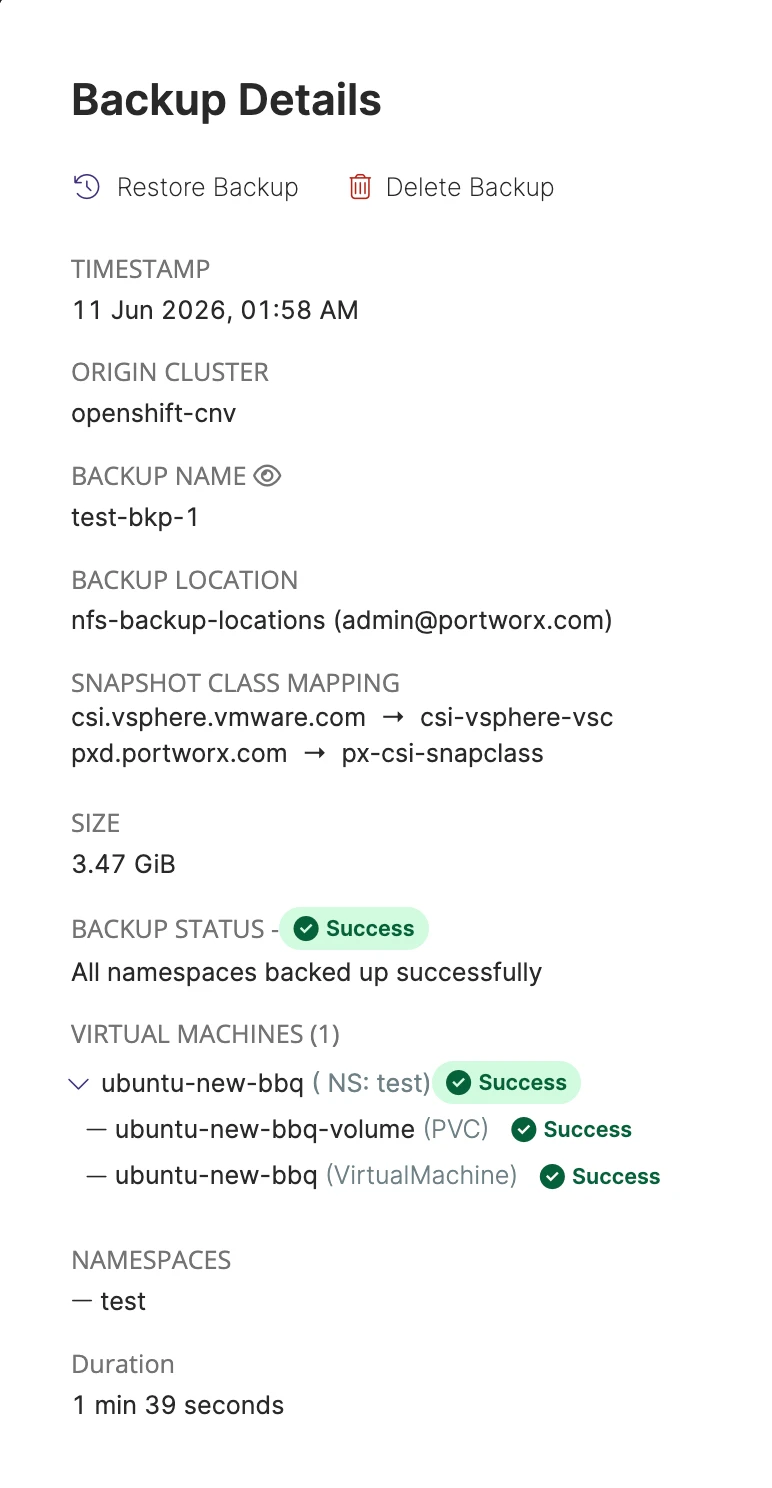
You can also select Show Details from the specific backup to see what resources are within the backup.
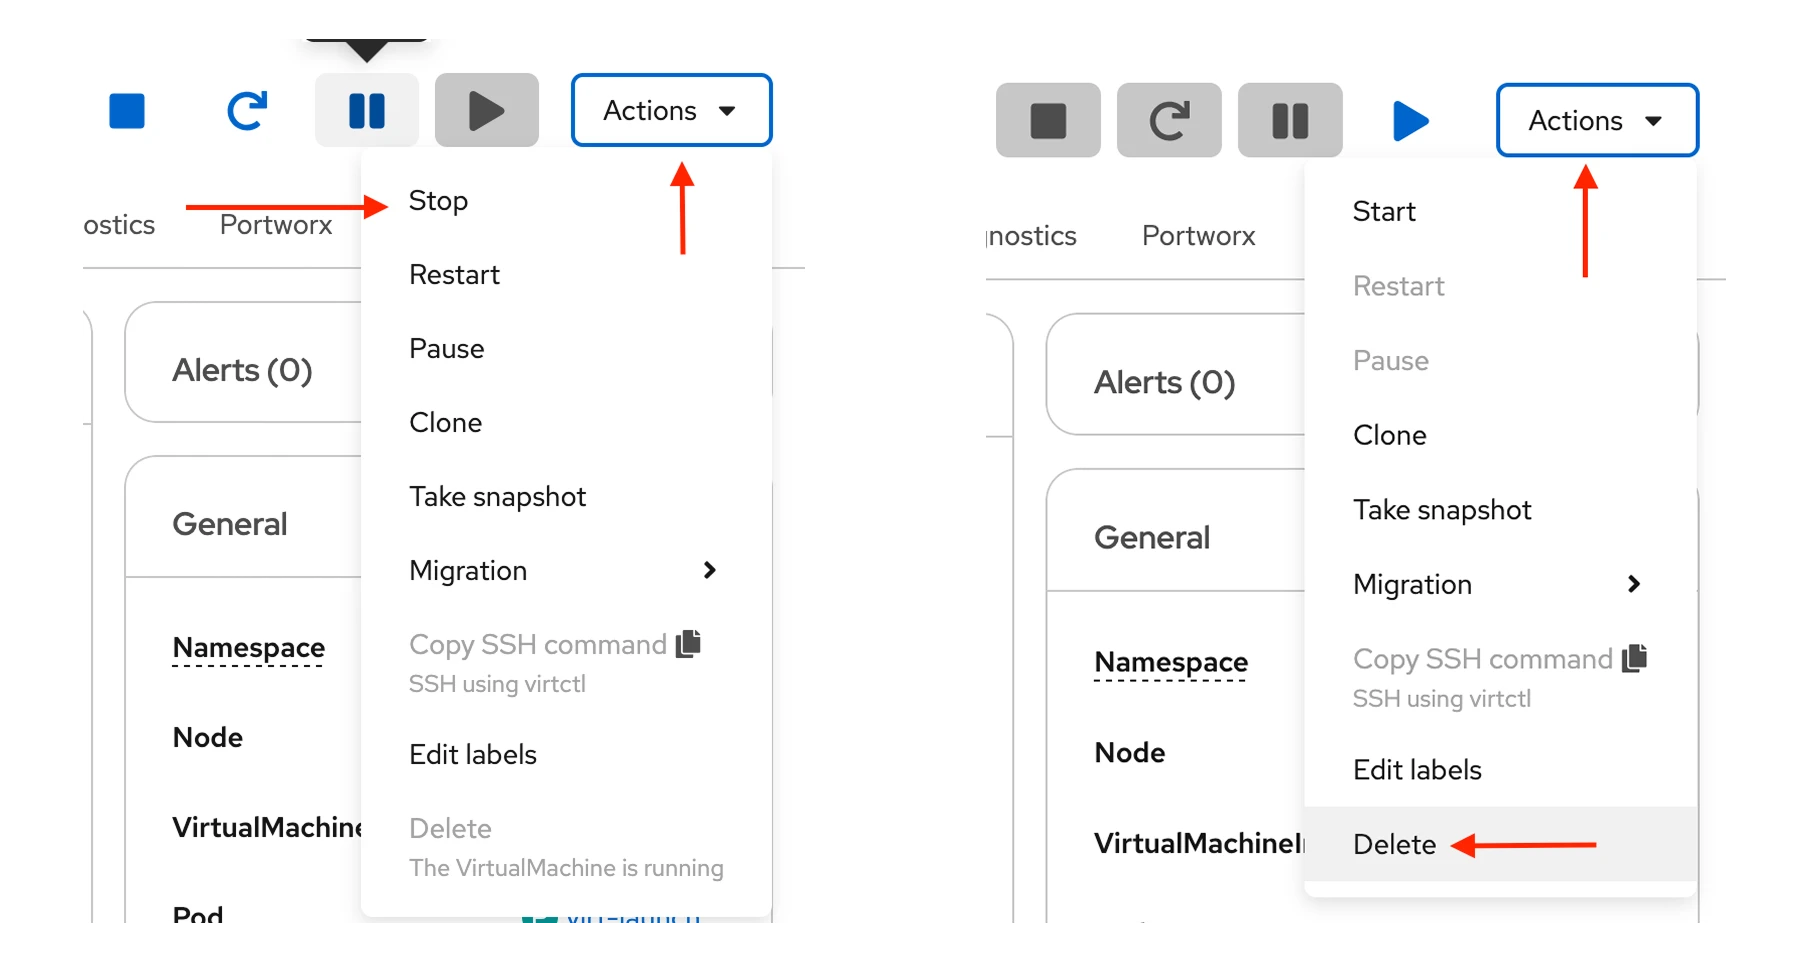
Once your backup is complete, the VM can be deleted to simulate the need to restore a VM. First “Stop” the Virtual Machine and then proceed to “Delete” from the Openshift VM menu.
Next, select the backup from PX-Backup and click “Restore”, you will see two options for restore.
The full restore functionality to restore all VMs and their associated resources from the VM backup to the destination cluster. The full restore replaces all the VMs and their associated resources in the destination cluster.
Portworx Backup facilitates you to restore the selected VMs from a VM backup to the destination cluster. The specific VMs restore replaces the selected VMs and their associated resources in the destination cluster.
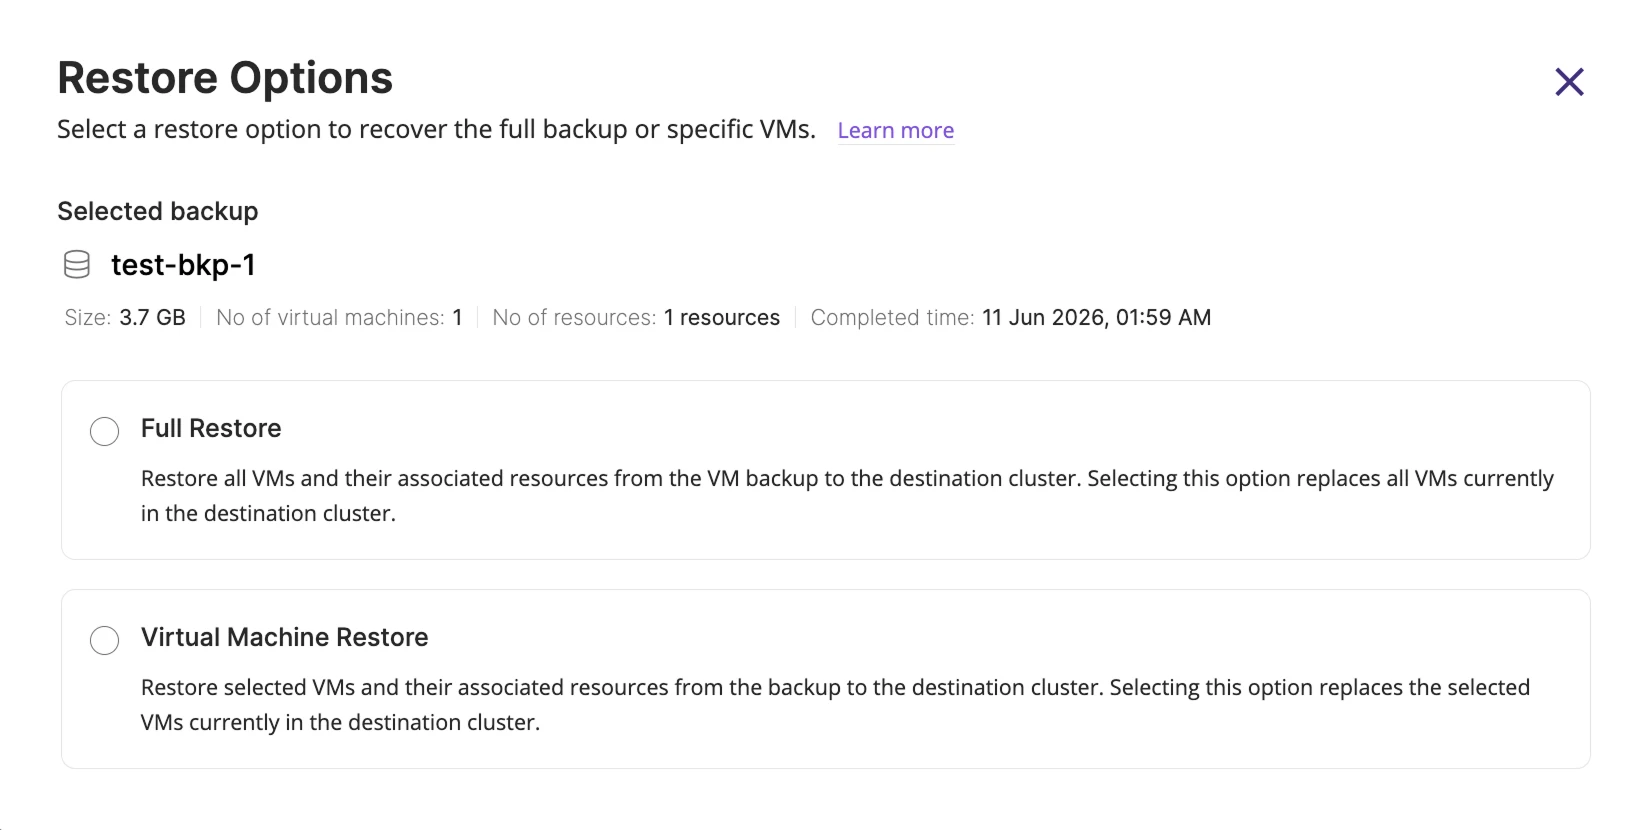
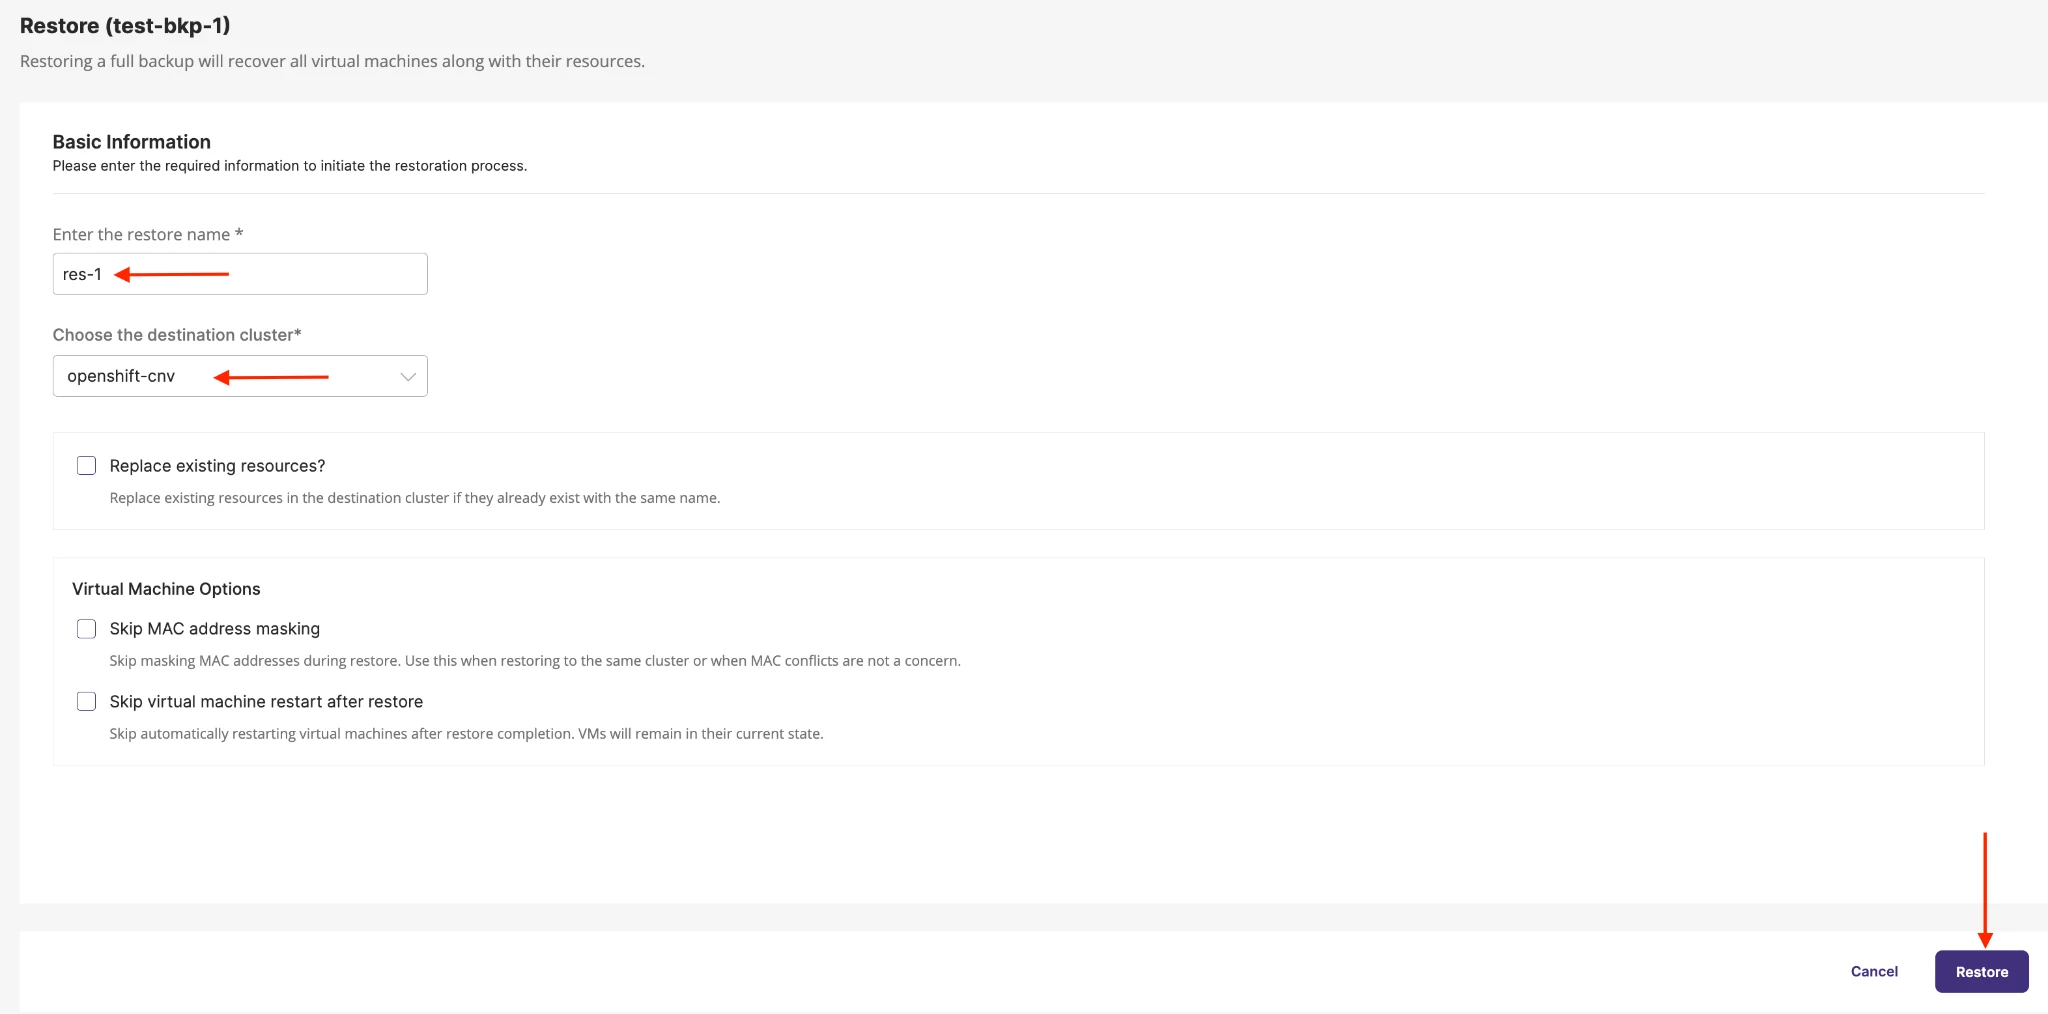
Select “Full Restore” and fill out the needed restore information such as the restore name and destination cluster. Click restore to start the recovery.
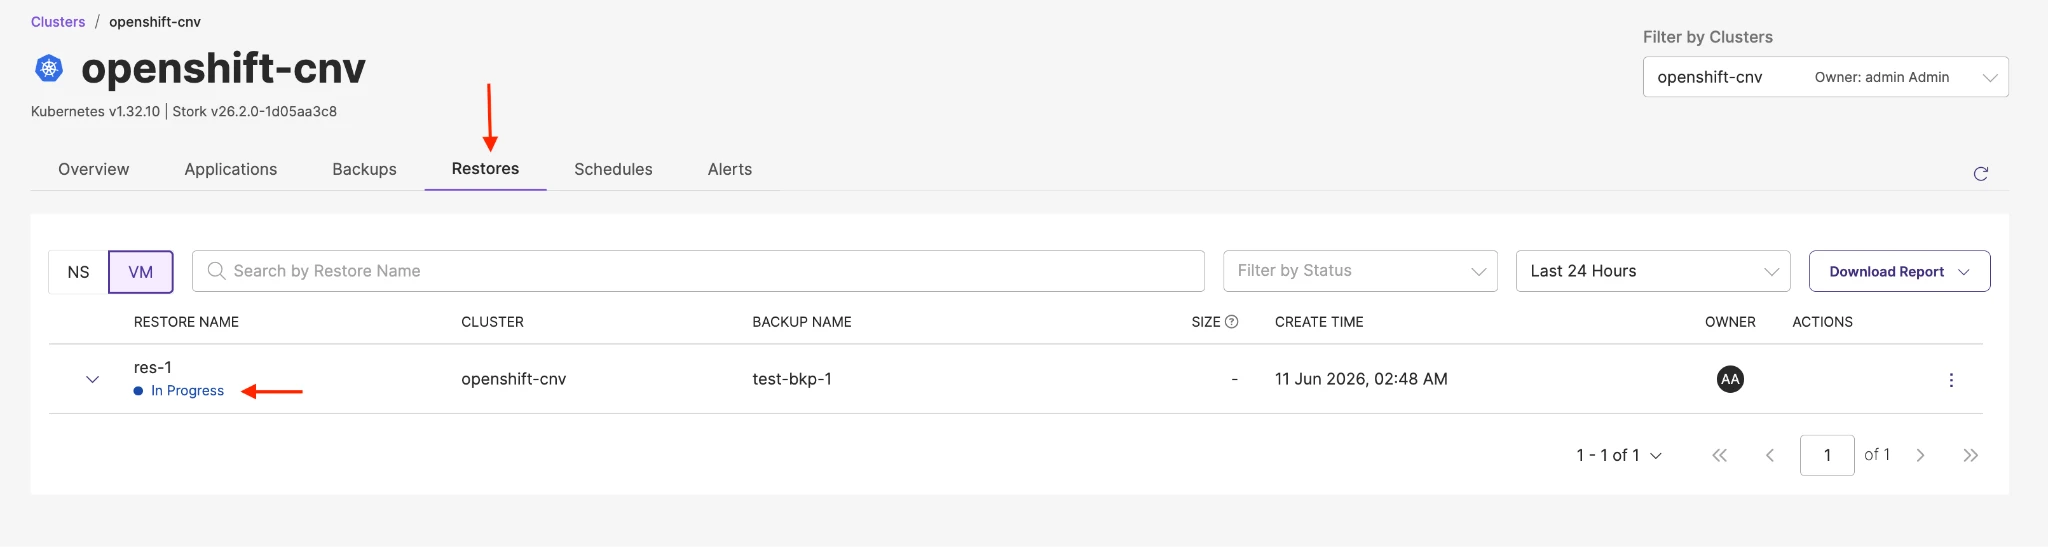
Click on the “Restore” tab, under the VM tab you will restore is in progress, wait until it is completed.
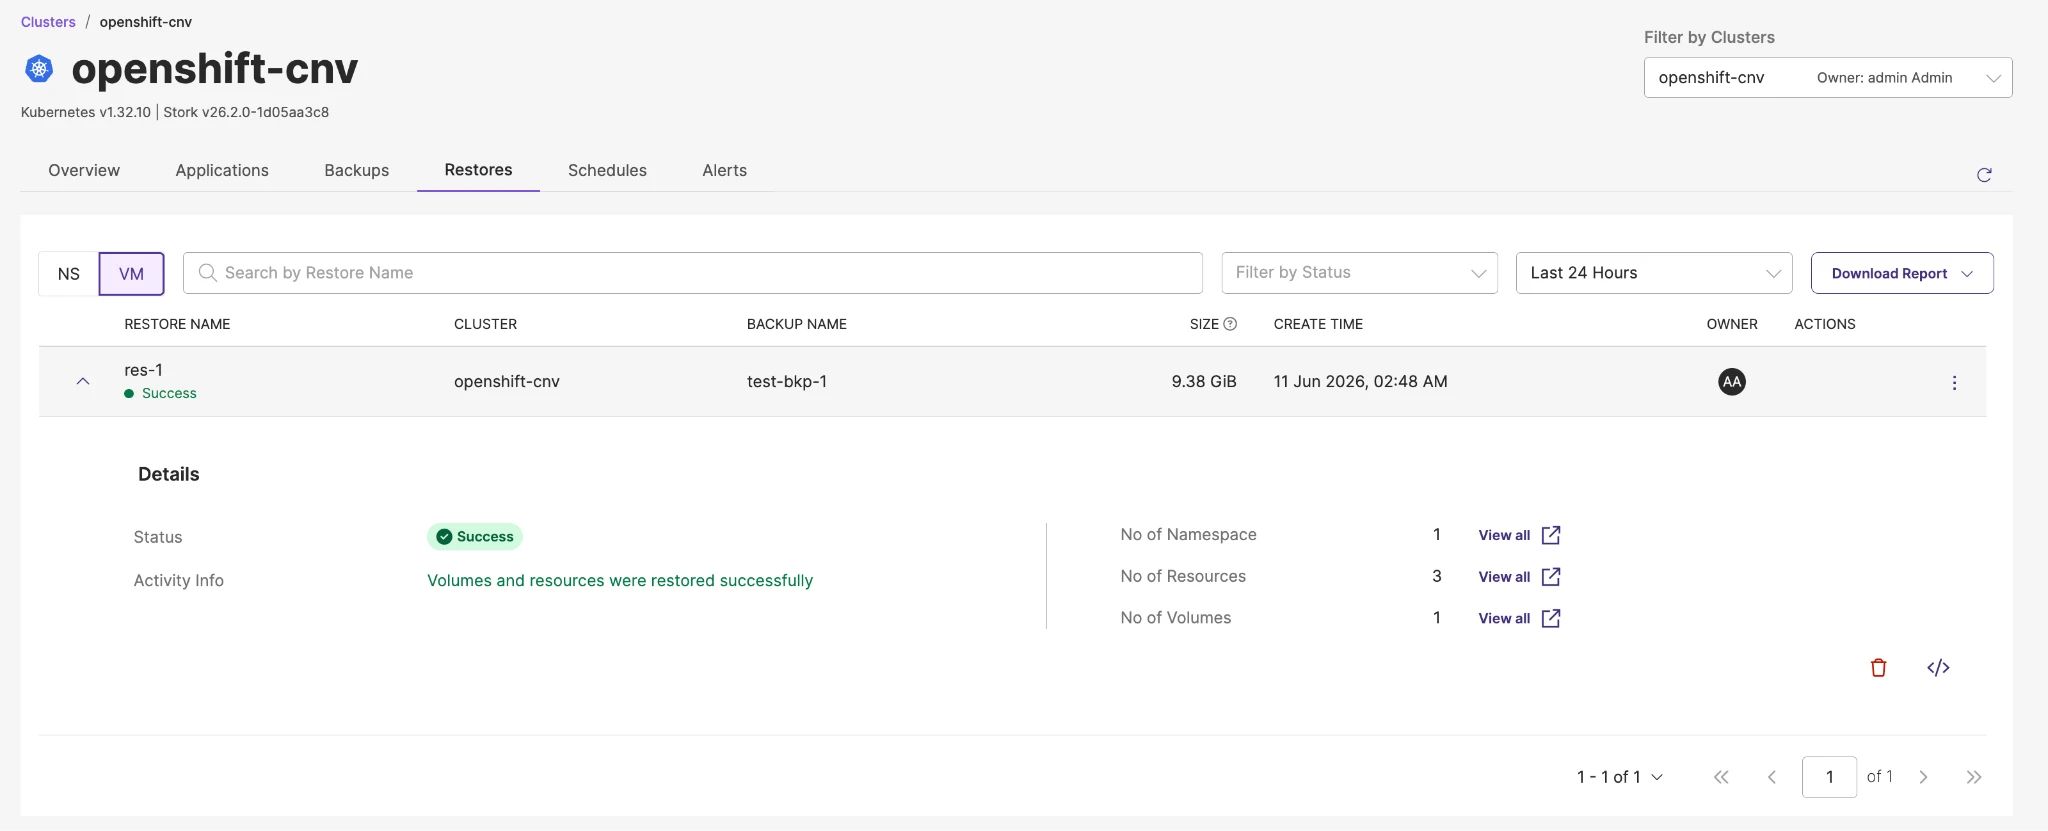
Once the restore job is completed you will see the Status as “Success”.
Within the Openshift Virtualisation dashboard you will see the VM starting/started again if the restore completed successfully.
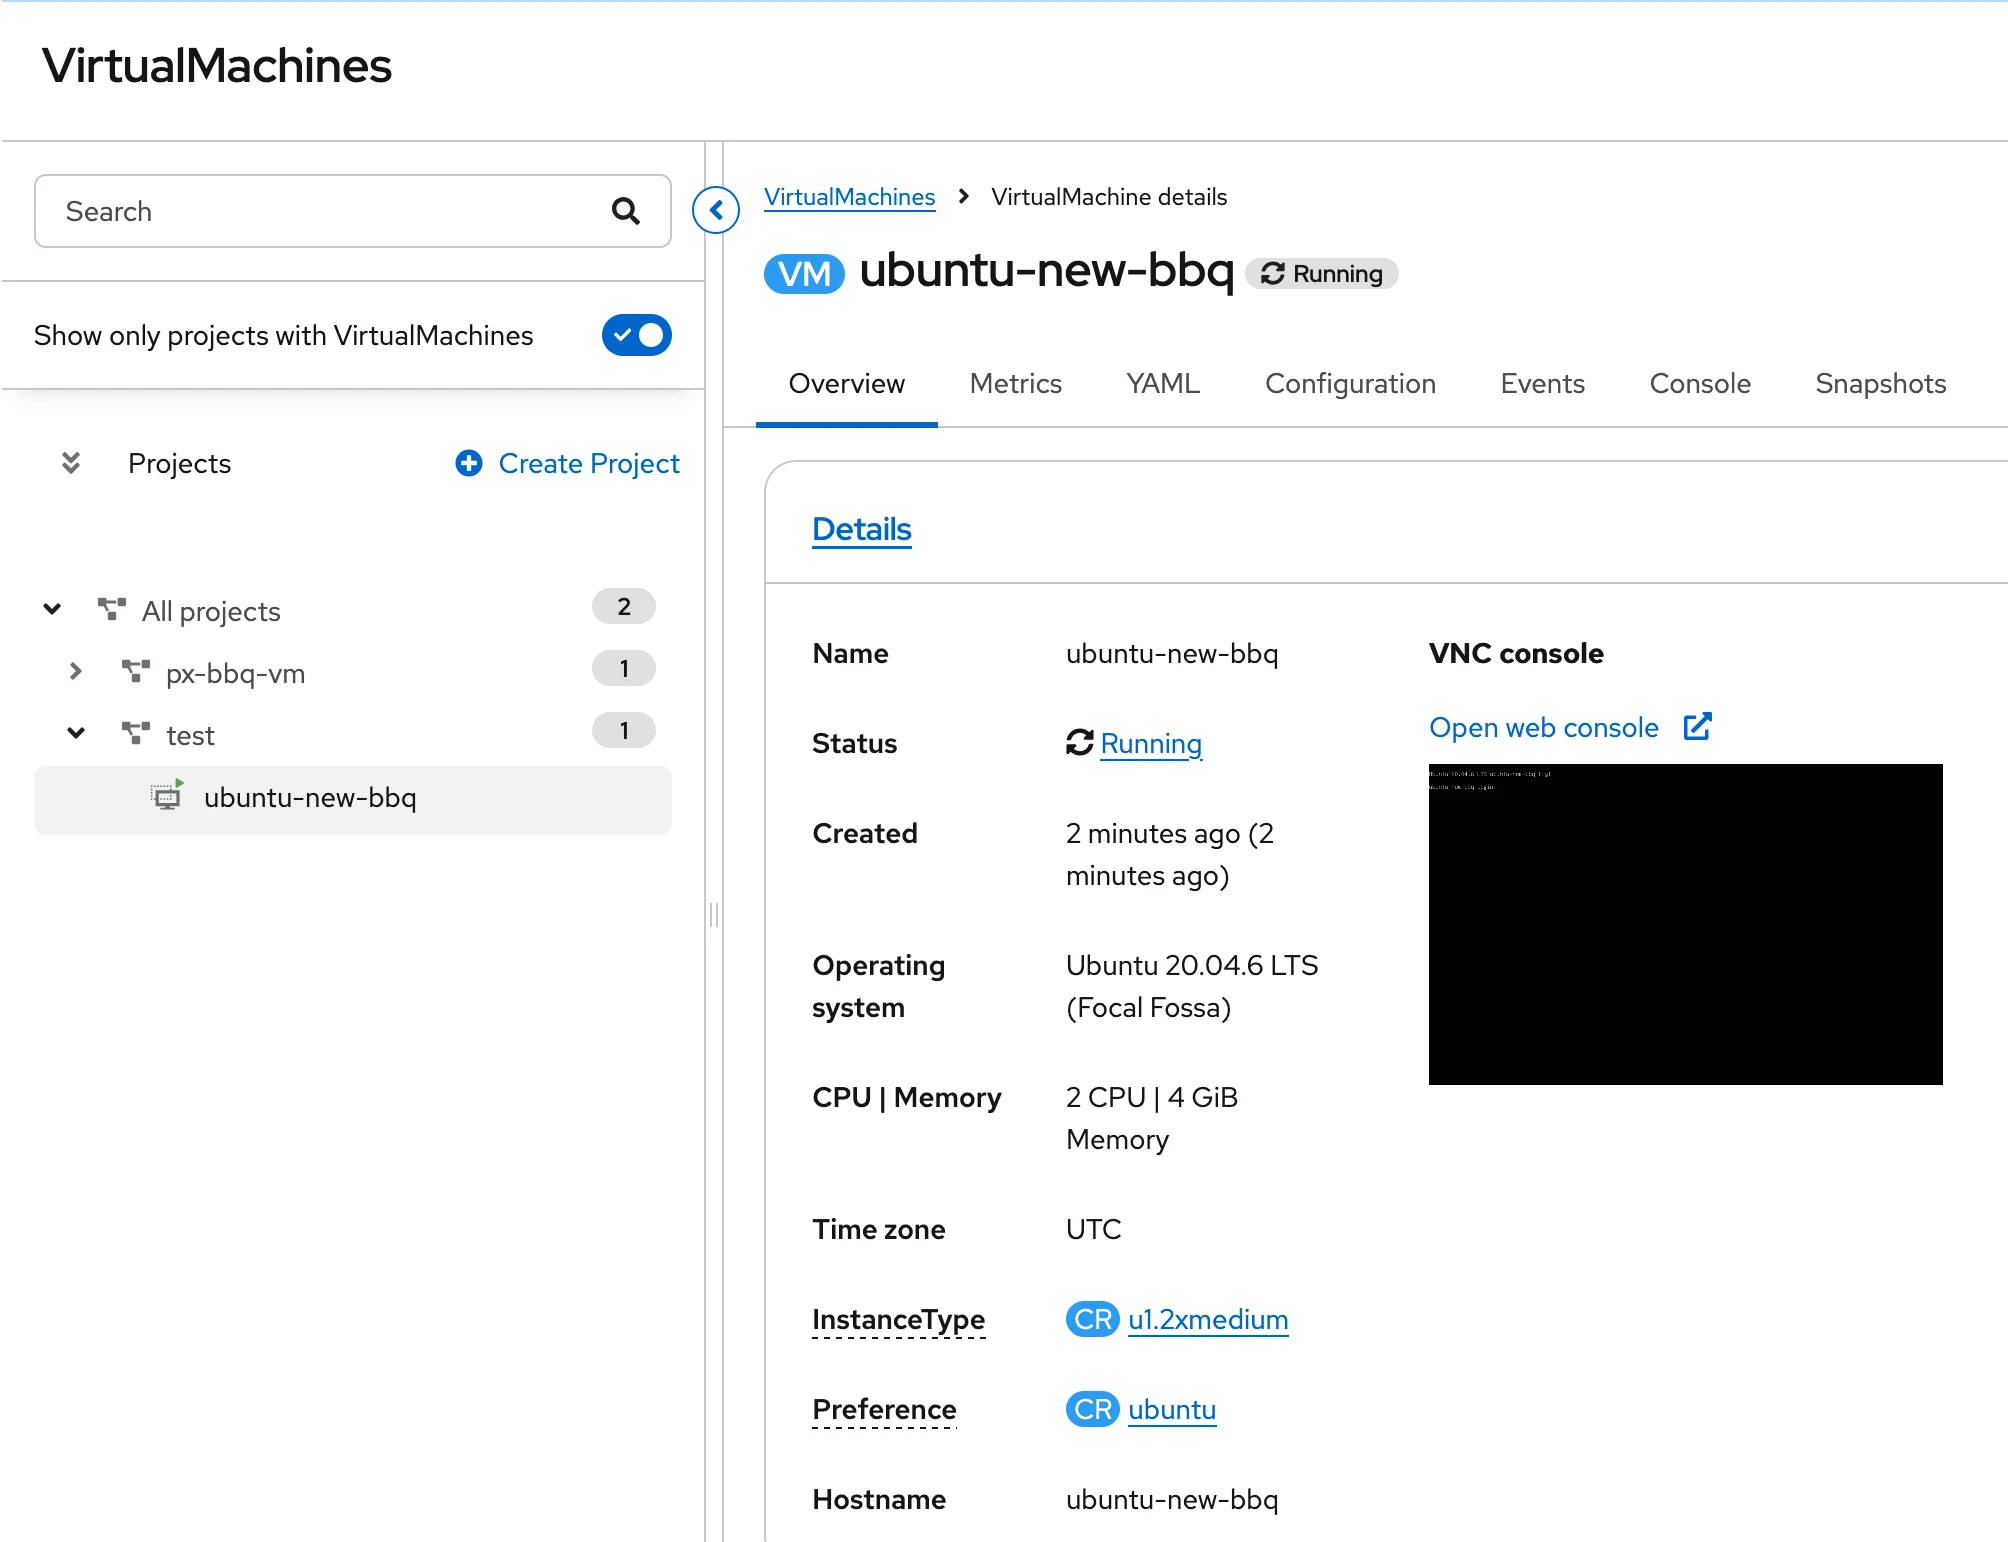
In Openshift Virtualisation, you can see under the “test” namespace/project a restore VM is in “Running” state.
Portworx deploys several pre-configured StorageClasses after the cluster is created.
Live Migration allows a running virtual machine (VM) to move from one OpenShift worker node to another with little to no application downtime.
The px-rwx-block-kubevirt StorageClass provides ReadWriteMany (RWX) block storage for KubeVirt VMs. By exposing VM disks as shared raw block devices, it enables seamless live migration while maintaining high-performance storage characteristics expected for virtualization workloads.
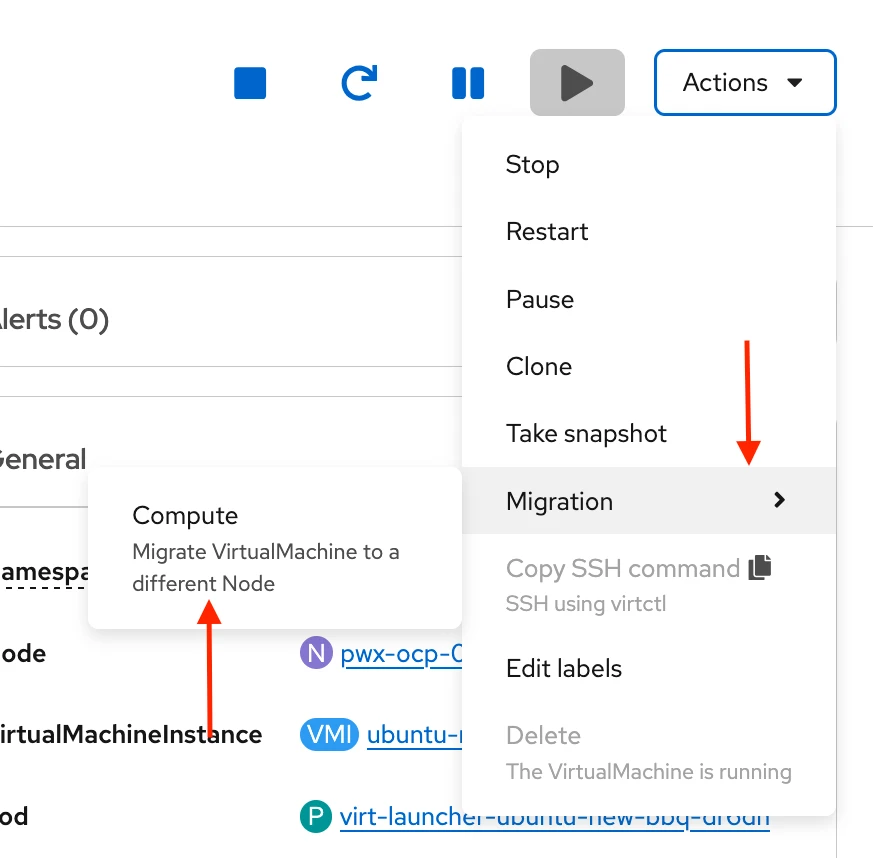
The VM which is running, simply click on the right menu bar and select “Migration”
First, identify the current host node for the VM. In the screenshot below, the VM is running on “pwx-ocp-0-183-ktfcf-worker-0-b4zkz”

From the OpenShift console, navigate to “Migration” and select the “Compute” tab.
Once the migration completes, verify the pod status again. You should see the pod running on the new node, “pwx-ocp-0-183-ktfcf-worker-0-zl259”

Portworx provides a unified data management layer for both containers and virtual machines on OpenShift. With OpenShift Virtualization, organizations can run VM-based and containerized applications side by side while benefiting from the same high availability, data protection, backup, and disaster recovery capabilities, simplifying operations and improving application resilience.
Q. Is OpenShift Virtualization a viable alternative to VMware?
Many organizations are evaluating OpenShift Virtualization as a platform for consolidating virtual machines and containerized workloads. It enables a gradual modernization strategy while leveraging existing VM investments.
Q. How does Portworx support organizations migrating from VMware?
Portworx provides persistent storage, backup, disaster recovery, and high availability services for virtual machines running on OpenShift Virtualization, helping organizations build a modern virtualization platform on Kubernetes.
Q. What storage features are available for OpenShift Virtualization with Portworx?
Portworx provides features such as dynamic provisioning, storage expansion, snapshots, cloning, replication, live migration support, backup, disaster recovery, and multi-site data protection.
Q. Does Portworx support both virtual machines and Kubernetes applications?
Yes. Portworx delivers a unified data platform that supports virtual machines, databases, stateful applications, and cloud-native workloads running on Kubernetes.