Apache Cassandra is an open source, distributed, NoSQL database. Cassandra was originally designed at Facebook as a decentralized structured storage system. Over the past decade, a number of startups and many of the largest enterprises—like Apple, Best Buy, Grubhub, Hulu, Spotify, Discord, and more—have implemented Cassandra to support applications like Apple Maps, iCloud, iTunes, Hulu’s streaming platform, Spotify’s personalization stack, etc. Features like distributed masterless architecture, linear scaling, fault tolerance, and high performance make Cassandra a popular choice when selecting a NoSQL database to support your applications. As enterprises are modernizing the way they build and deploy applications using containers and Kubernetes, they also need a way to run Apache Cassandra on Kubernetes reliably.
In this blog, we will talk about how you can deploy a highly available Cassandra instance using the K8ssandra project on your Tanzu Kubernetes Clusters running on-prem with Portworx. We will walk you through the Cassandra deployment using the Cass Operator and then discuss failure handling and scaling operations for your Cassandra database.
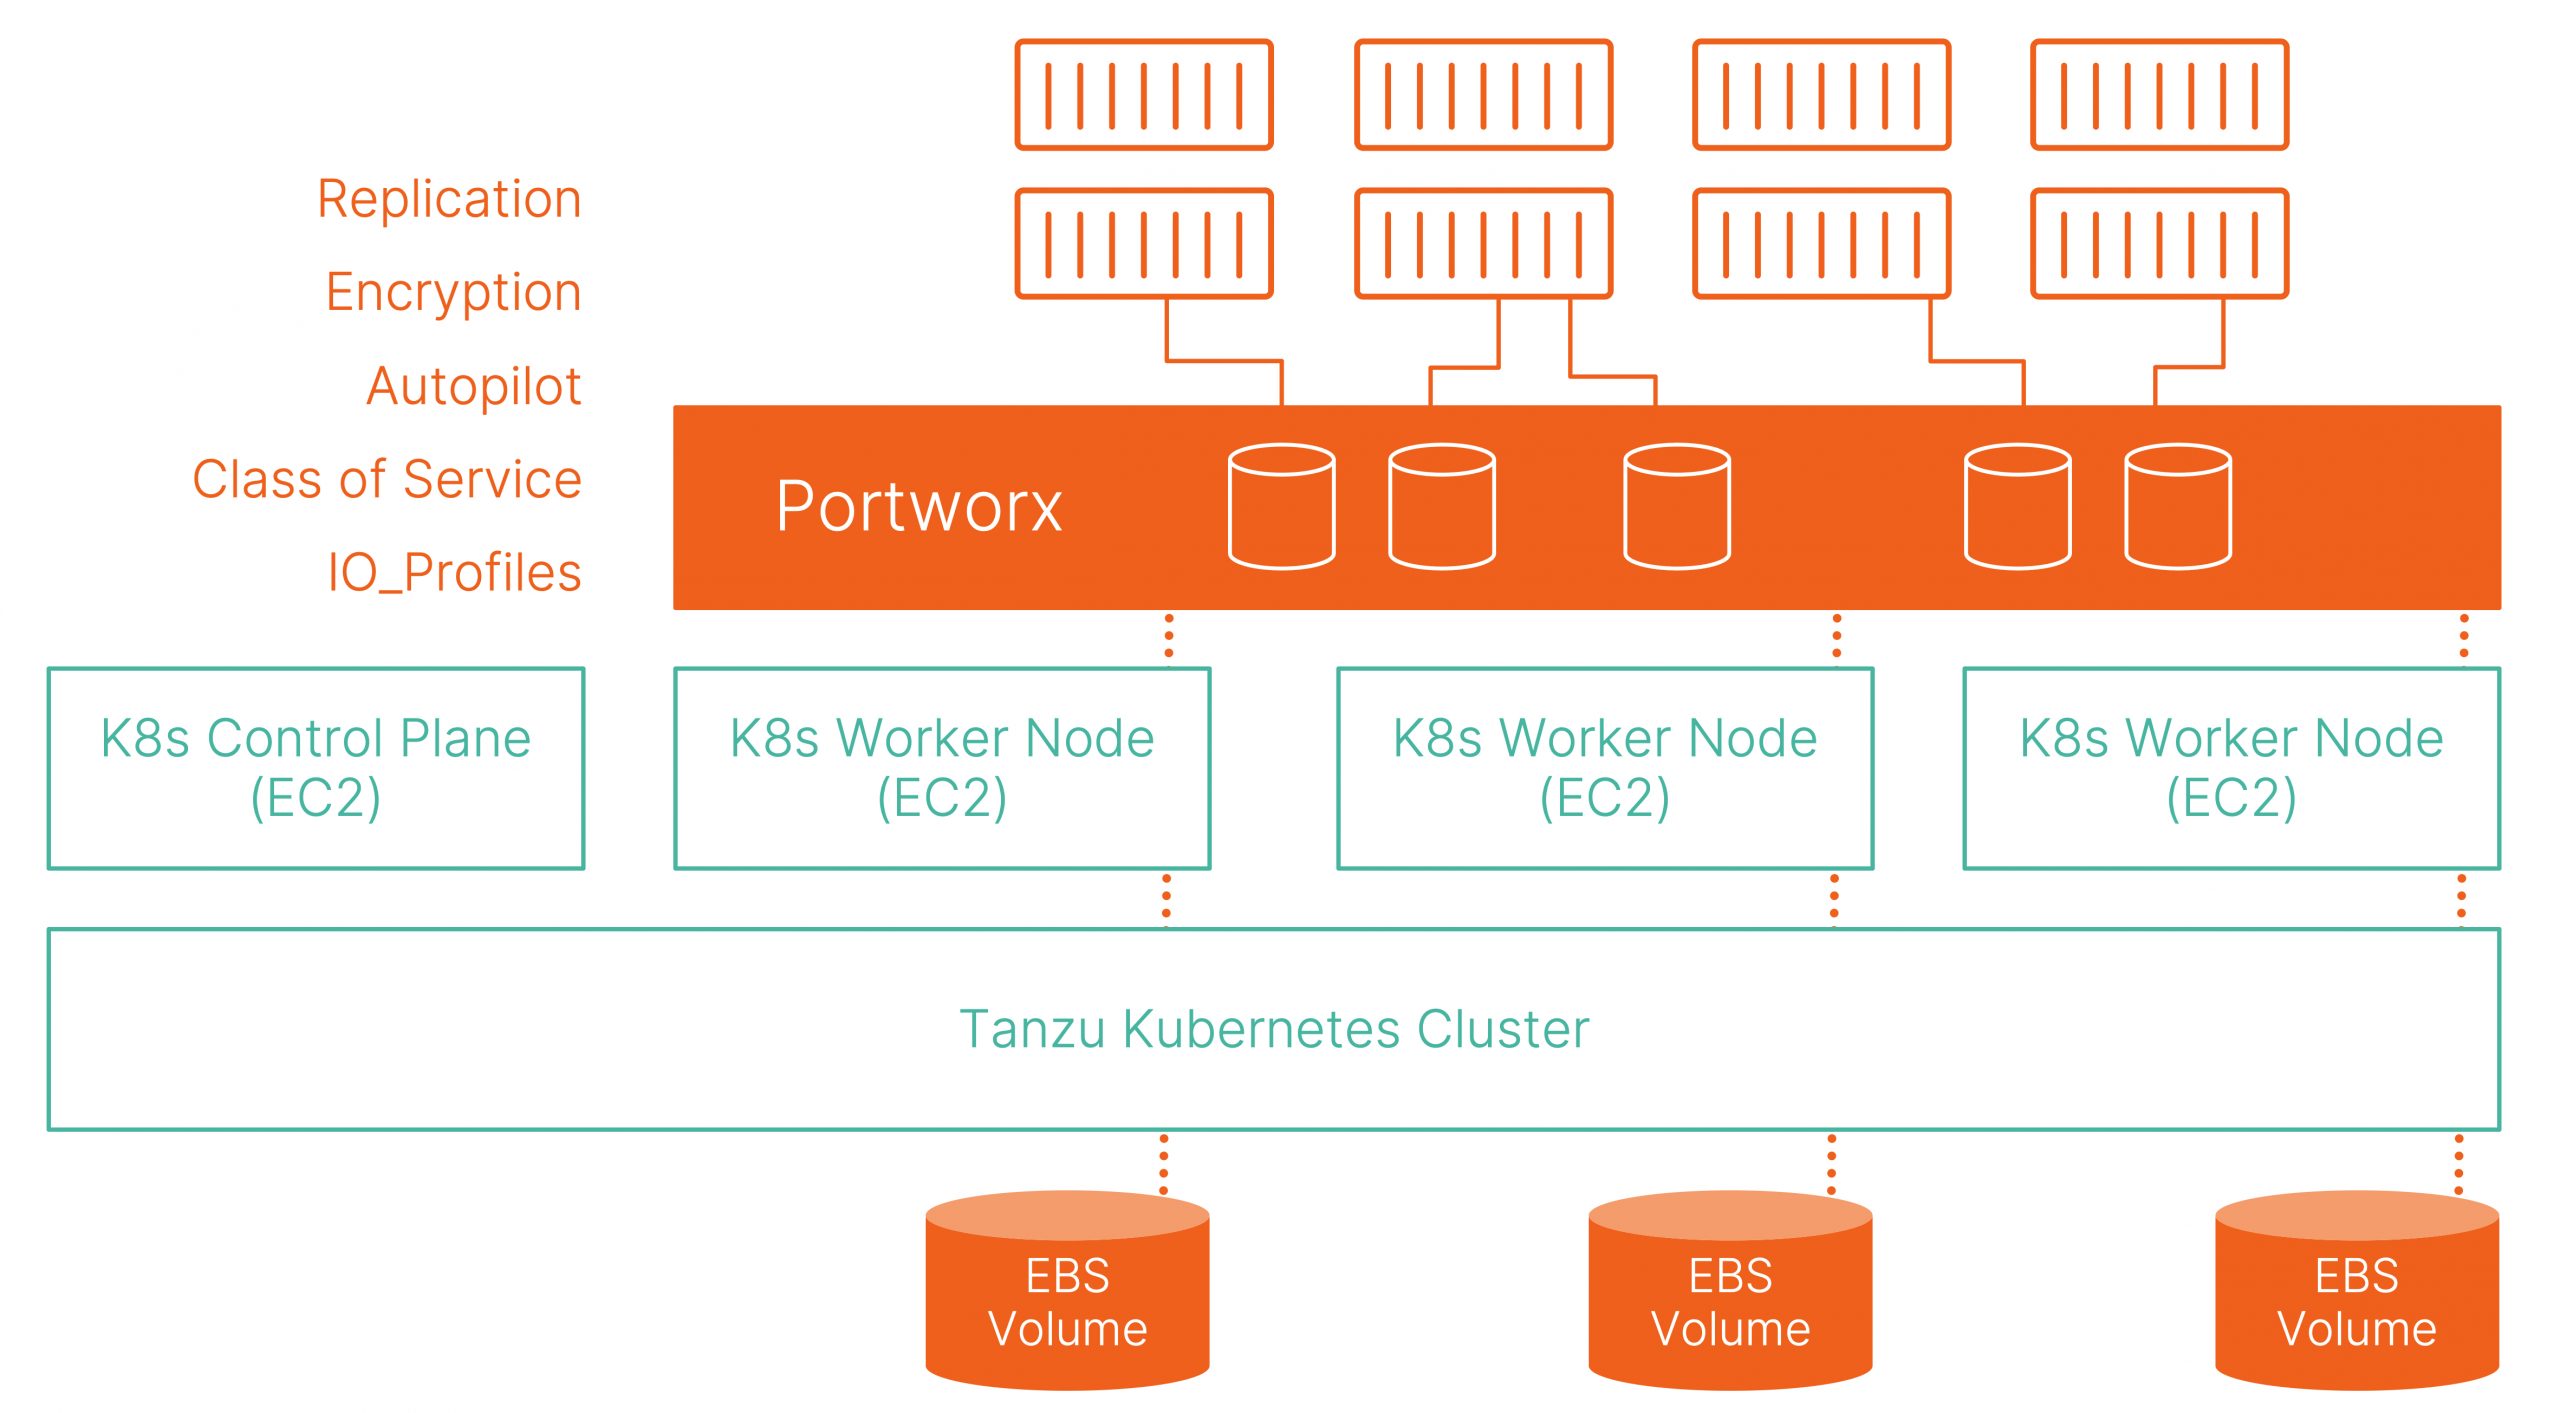
To get started, we have a five node Tanzu Kubernetes cluster running Kubernetes version 1.19.7 with the Portworx 2.8 release. The latest release from Portworx allows VI Admins to dynamically provision disks using the CNS CSI plugin and aggregate those disks to create a Portworx storage pool that can be used by your Kubernetes applications. We will discuss the deployment and setup of Portworx on VMware Tanzu in a later blog.
Once we have the cluster up and running, we will start by deploying the Cassandra Operator. Use the following commands to deploy the Cassandra Operator and verify that everything was deployed successfully:
kubectl apply -f
kubectl get all -n cass-operator
Next, we will create a new Portworx StorageClass, which will be used to dynamically provision the Cassandra persistent volumes. We will use a replication factor of “2” and set the IO priority to “high.”
cat > px-cassandra-sc.yaml << EOF
kind: StorageClass
apiVersion: storage.k8s.io/v1
metadata:
  name: portworx-sc
provisioner: kubernetes.io/portworx-volume
parameters:
  repl: "2"
  priority_io: "high"
  group: "cassandra_vg"
EOF
kubectl apply -f px-cassandra-sc.yaml
kubectl get sc
Once the StorageClass is up and running, we will deploy our Cassandra database instance using the following yaml file. We will name the Cassandra Datacenter “dc1” and the cluster “cluster1.” We will use the StorageClass defined in the previous step to dynamically provision ReadWriteOnce volumes for Cassandra.
cat > cass-instance.yaml << EOF
apiVersion: cassandra.datastax.com/v1beta1
kind: CassandraDatacenter
metadata:
  name: dc1
spec:
  clusterName: cluster1
  serverType: cassandra
  serverVersion: "3.11.7"
  managementApiAuth:
    insecure: {}
  size: 3
  storageConfig:
    cassandraDataVolumeClaimSpec:
      storageClassName: portworx-sc
      accessModes:
        - ReadWriteOnce
      resources:
        requests:
          storage: 10Gi
  config:
    cassandra-yaml:
      authenticator: org.apache.cassandra.auth.PasswordAuthenticator
      authorizer: org.apache.cassandra.auth.CassandraAuthorizer
      role_manager: org.apache.cassandra.auth.CassandraRoleManager
    jvm-options:
      initial_heap_size: "800M"
      max_heap_size: "800M"
      max_direct_memory: "800M"
      additional-jvm-opts:
        - "-Ddse.system_distributed_replication_dc_names=dc1"
        - "-Ddse.system_distributed_replication_per_dc=3"
EOF
kubectl apply -f cass-instance.yaml -n cass-operator
This will deploy a three node Cassandra cluster using a StatefulSet. It takes a few minutes for all the containers in the pods to be in a running state and the Cassandra DB to be online. If you don’t want to use the Cassandra Operator, you can also deploy Cassandra using a simple stateful set.
Once you have deployed the Cassandra Database, you can run the following commands to verify that everything is working as expected:
kubectl get pods -n cass-operator
kubectl get pvc -n cass-operator
kubectl -n cass-operator get pods --selector
cassandra.datastax.com/cluster=cluster1
kubectl -n cass-operator get cassdc/dc1 -o "jsonpath={.status.cassandraOperatorProgress}"
kubectl -n cass-operator exec -it -c cassandra cluster1-dc1-default-sts-0 -- nodetool status
kubectl get pvc -n cass-operator
We will also use the following commands to verify the persistent volumes and their replication status. To do that, we will exec into one of the Portworx pods running in the kube-system namespace and then use the pxctl utility from Portworx to list all the volumes and inspect them.
kubectl exec <<portworx_pod>> -n kube-system -it – bash
/opt/pwx/bin/pxctl volume list
/opt/pwx/bin/pxctl volume inspect <<volume_id>>
At this point, you should have a fully functional Cassandra instance that is ready to be used. We will use the following commands to create a new table and add some entries to the table. Since we are using K8ssandra, we will start by fetching the username and password for the superuser account:
CASS_USER=$(kubectl -n cass-operator get secret cluster1-superuser -o json | jq -r '.data.username' | base64 --decode)
CASS_PASS=$(kubectl -n cass-operator get secret cluster1-superuser -o json | jq -r '.data.password' | base64 --decode)
kubectl -n cass-operator exec -ti cluster1-dc1-default-sts-0 -c cassandra -- sh -c "cqlsh -u '$CASS_USER' -p '$CASS_PASS'"
CREATE KEYSPACE demodb WITH REPLICATION = { 'class' : 'SimpleStrategy', 'replication_factor' : 2 };
use demodb;
CREATE TABLE emp(emp_id int PRIMARY KEY, emp_name text, emp_city text, emp_sal varint,emp_phone varint);
INSERT INTO emp (emp_id, emp_name, emp_city, emp_phone, emp_sal) VALUES(123423445,'Steve', 'Denver', 5910234452, 50000);
INSERT INTO emp (emp_id, emp_name, emp_city, emp_phone, emp_sal) VALUES(123423446,'Brian', 'San Jose', 2525672346, 100000);
INSERT INTO emp (emp_id, emp_name, emp_city, emp_phone, emp_sal) VALUES(123423447,'Eric', 'New York', 2123579895, 95000);
select * from emp;
Now that we have a database with a few entries, let’s look at a failure scenario. Each Cassandra pod has a persistent volume where data is stored. One of the key benefits of using Portworx for running Cassandra is data locality. STORK (Storage Orchestration Runtime for Kubernetes) ensures that persistent volumes are provisioned in such a way that the pod and a replica of the persistent volume are running on the same node. To simulate a failure scenario, you can use the following two commands to get the node that is running one of the Cassandra pods.
kubectl get pods -n cass-operator -o json | jq '.items[] | {"name": .metadata.name,"hostname": .spec.nodeName, "hostIP": .status.hostIP, "PodIP": .status.podIP}'
kubectl exec <<portworx_pod>> -n kube-system -it -- bash
/opt/pwx/bin/pxctl volume list
/opt/pwx/bin/pxctl volume inspect <<volumeID>>
Once we have identified a Cassandra pod that we want to delete, let’s cordon the Kubernetes node that is running that pod.
kubectl cordon <<nodename>>
kubectl delete pods <<Cassandra-pod-name>> -n cass-operator
This will basically force Kubernetes to deploy another pod to replace the deleted pod. STORK works with Kubernetes to ensure that the new pod is provisioned on a node that has a replica of the persistent volume available to ensure data locality.
Once the pod is back up and running, we will log into the pod and then verify that all of our database entries are still intact.
CASS_USER=$(kubectl -n cass-operator get secret cluster1-superuser -o json | jq -r '.data.username' | base64 --decode)
CASS_PASS=$(kubectl -n cass-operator get secret cluster1-superuser -o json | jq -r '.data.password' | base64 --decode)
kubectl -n cass-operator exec -ti <<podname>> -c cassandra -- sh -c "cqlsh -u '$CASS_USER' -p '$CASS_PASS'"
use demodb;
select * from emp;
Next, let’s talk about scaling. One of the key benefits that Cassandra has is its ability to linearly scale by just adding more nodes to the cluster. In our case, Cassandra is deployed using a StatefulSet, so scaling up is as easy as adding more replicas to the StatefulSet and seeing new pods and persistent volumes being provisioned for you. To add more replicas, you have two options. You can either use the cli and the following command:
vi cass-instance.yaml
Then edit the replica count in the spec section, and:
kubectl apply -f cass-instance -n cass-operator
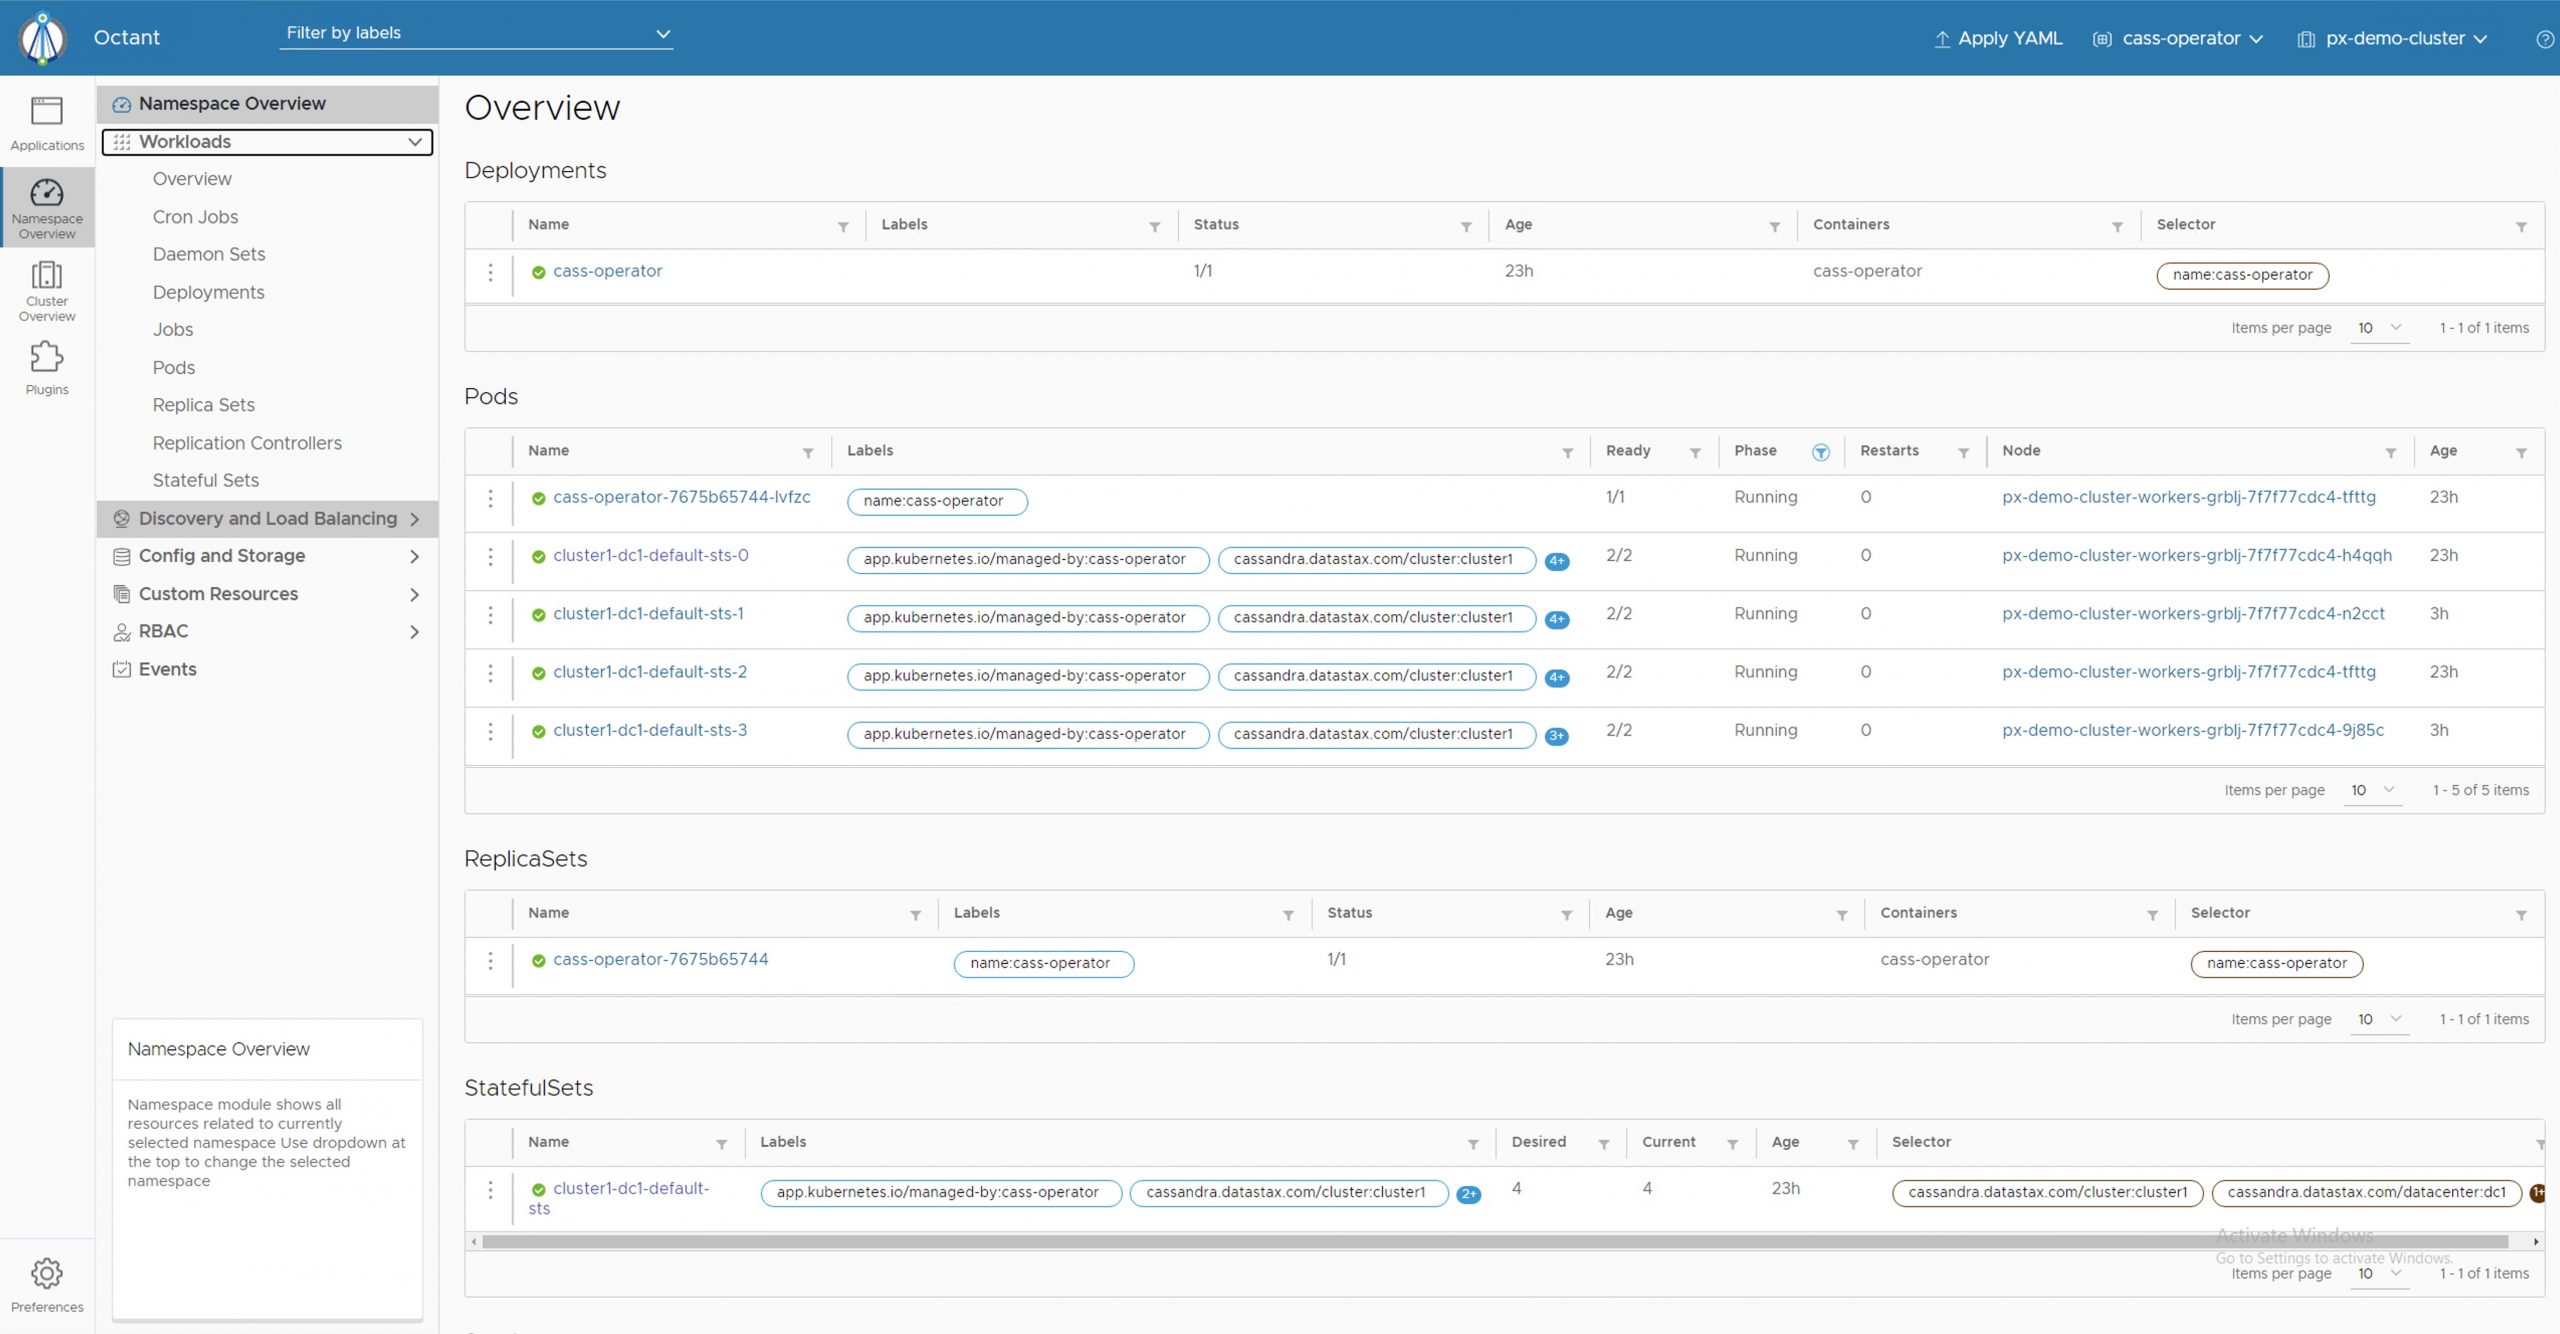
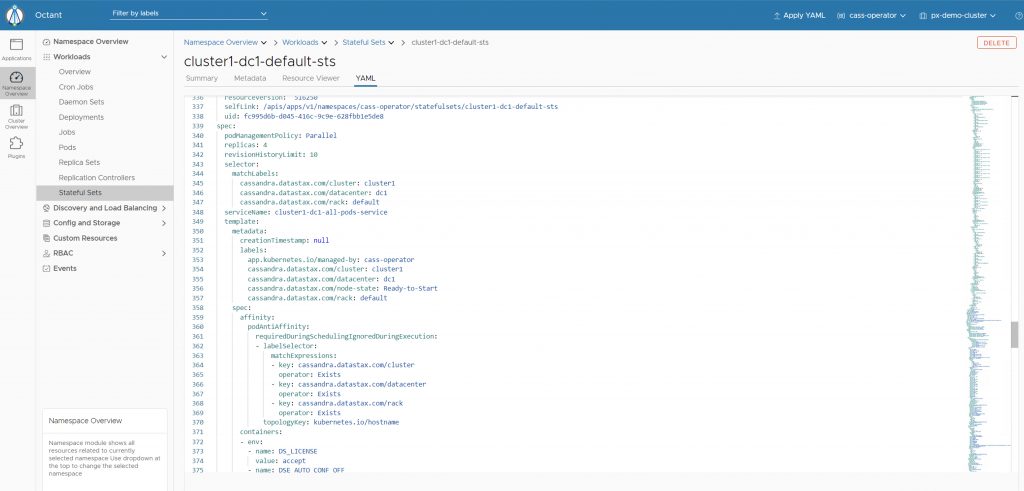
Alternatively, if you are using a UI like Octant, you can navigate to the Namespace Overview –> Workloads –> Stateful Sets –> YAML tab and edit the number of replicas under spec and hit “Update.”
That’s it. We have successfully scaled our Cassandra instance and provisioned new pods as part of the StatefulSet and dynamically provisioned new Portworx persistent volumes with two replicas each.
I hope this blog helps you get started with Cassandra on VMware Tanzu with Portworx as the Kubernetes storage layer. If you prefer to watch a video walkthrough of the steps described in this blog, you will find it below:
Share
Subscribe for Updates
About Us
Portworx is the leader in cloud native storage for containers.
Thanks for subscribing!