

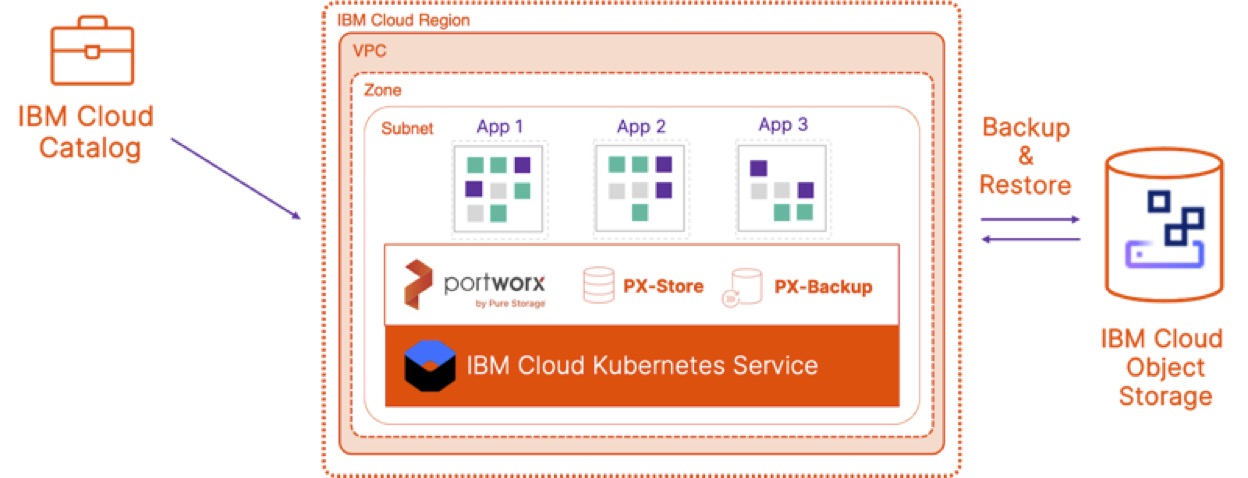
Portworx recently announced the launch of PX-Backup as an integrated data protection offering for IBM Cloud Kubernetes Service and Red Hat OpenShift on IBM Cloud via the IBM Cloud Catalog. As organizations are going through their application modernization journey, they need a modern data protection solution that is built for Kubernetes and can help users backup and restore their Kubernetes applications on a self-service basis.
In this blog, we will talk about how you can get started with PX-Backup and use it to protect your modern applications running on IBM Cloud Kubernetes Service (IKS) or IBM Cloud Satellite.
Before you deploy PX-Backup, you will need:
Once you have all the prerequisites configured, you can go ahead and navigate to the IBM Cloud Catalog and search for Portworx or PX-Backup. On the landing page for the service, provide your IBM Cloud API Key, and it will give a list of all the IKS clusters running in your IBM Cloud Account. All you need to do to deploy PX-Backup is select your IKS cluster, enter the namespace in which you want PX-Backup to be installed, and select a storage class that PX-Backup can use. This storage class will only be used for deploying PX-Backup components—and not for your application data.

PX-Backup deployment can take anywhere between 5–10 minutes. Once everything is deployed, you can log into the IKS cluster that is running PX-Backup and execute the following command to get the load balancer endpoint for the PX-Backup UI service and navigate to it.
kubectl get service -n <<namespace_where_px-backup_is_deployed>>
Enter the default login credentials (admin/admin) to log into the PX-Backup User Interface. As part of using this data protection solution, we will go through a simple 5-step process:
Before we start protecting your applications, we need to connect PX-Backup to your IBM Cloud account so it can leverage the IBM Cloud Object Storage Bucket as the backup location for your applications. To do this:
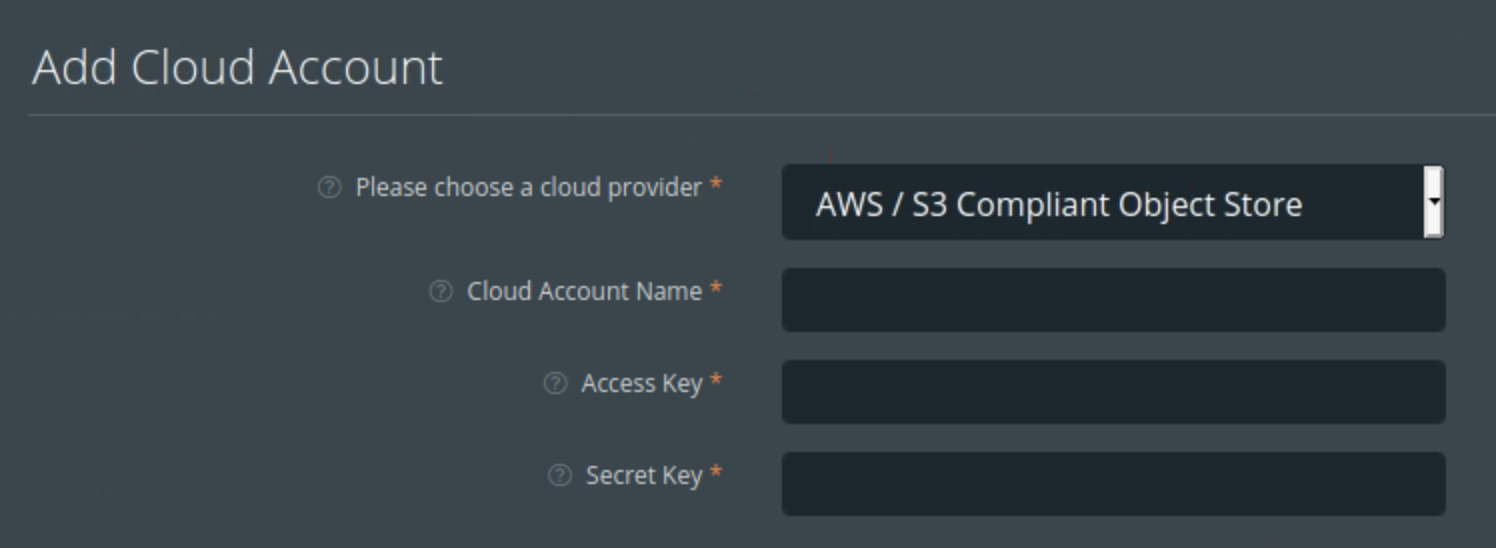
Next, we will add a backup location. To do that:
Next, we will add your Kubernetes cluster that is running the applications that you need to protect:
Once you have your cluster attached, PX-Backup will gather information about all the namespaces and applications that are running on it.
To ensure application consistent backups, PX-Backup gives you the capability to configure pre- and post-backup scripts that will be executed every time a backup snapshot is triggered. If you are using applications that need additional scripts to ensure application consistent snapshots, you can use this option to create those rules for different databases or custom Kubernetes pods. You can find pre and post scripts that you can use for some of the most popular stateful applications, like Cassandra, MongoDB, PostgreSQL, etc. on our documentation site.
To configure these rules, you just need to navigate to “Dashboard” → “Rules” → “Add New”.
PX-Backup allows users to create backup schedules that can be used by one or more backup jobs to meet their application SLAs. These backup schedule policies can be configured for a periodic (minutes/hours), daily, weekly, and monthly basis. To create a backup schedule policy, navigate to the “Dashboard” → “Settings” → “Schedule Policies.” Click on “Add,” and you can specify a name, select a type (periodic, daily, weekly, monthly). Based on your selection, you can specify the time of the day, day of the week/month when the backup job will be triggered. And you can also configure the number of snapshots that you can retain.
All of these things can be configured by the Operator, so any developer who wants to protect their application doesn’t have to reinvent the wheel and configure them for each individual application. Now that we have the higher-level constructs ready to go, we will configure a backup job for an application and then restore the same application from one of the backup snapshots.
PX-Backup allows developers to create backup jobs for their own applications, or an operator can create backup jobs for all the production applications running on all Kubernetes clusters. To create an application backup, navigate to the PX-Backup Dashboard, select the IKS cluster that is running your application, and then select the namespace in which your application is running. You can create a backup for all the resources in a specific namespace, if you want to create separate backups for Kubernetes objects with a specific label inside the namespace, or if you only want to backup certain Kubernetes objects (e.g., only backup the Persistent Volumes and Persistent Volume Claims), PX-Backup gives you full control to configure backups for resources that you need.
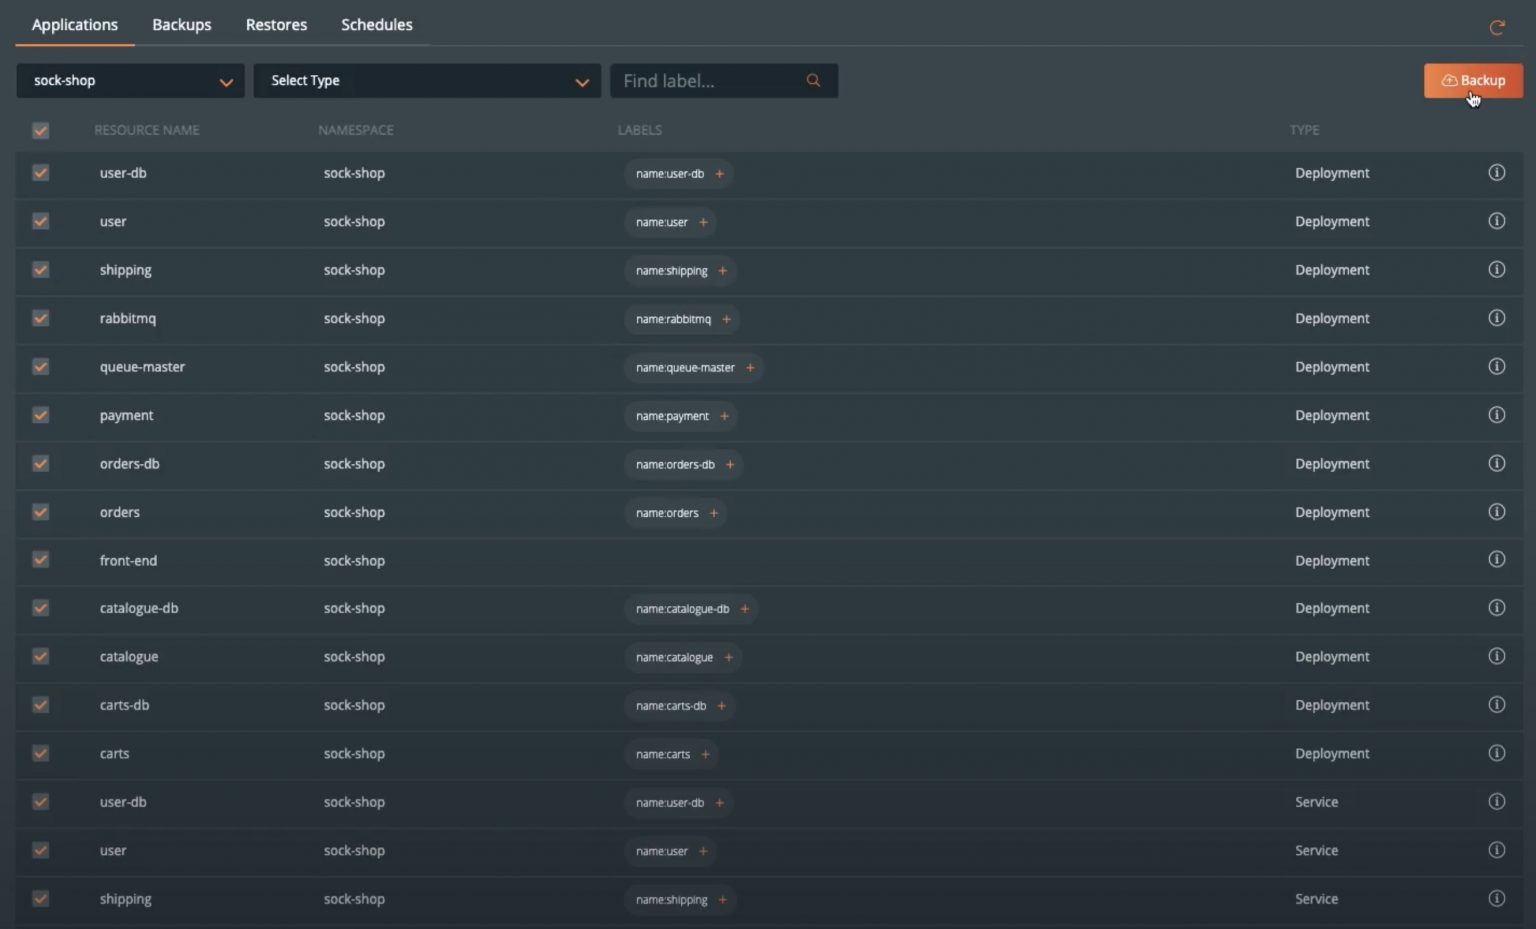
Once you have selected the resources that you want to backup, click on “Backup” on the top right, and here you can give the backup job a name, select the backup location, schedule policy and pre- and post-backup rules that we created earlier in the blog and hit “Create.” In addition to setting a schedule, users also have the flexibility to create on-demand backup jobs for their applications. You can monitor the status of the backup jobs from the Backup tab. Once you have a few successful runs, we can go ahead with the next section, where we will restore the application.
Backups are only as good as the restore. A backup on its own is useless if users can’t restore their applications when needed. To perform an application restore, let’s navigate to the “Backups” tab, select the backup that you want to restore from, and select “Restore Backup.” You can give the restore job a name and choose whether you want to restore to the same cluster and namespace or to a different cluster and namespace. This helps with a couple of different scenarios, such as accidental deletion of a few resources or deletion of the source cluster itself. You can also choose to restore all the resources that are part of the backup, or if you only deleted a persistent volume and want to restore that back for your application, you can select the persistent volume you want to restore and click “Restore.”

You can monitor the status of your restore job from the “Restores” tab, or you can go back to the CLI and monitor the restore using the watch command.
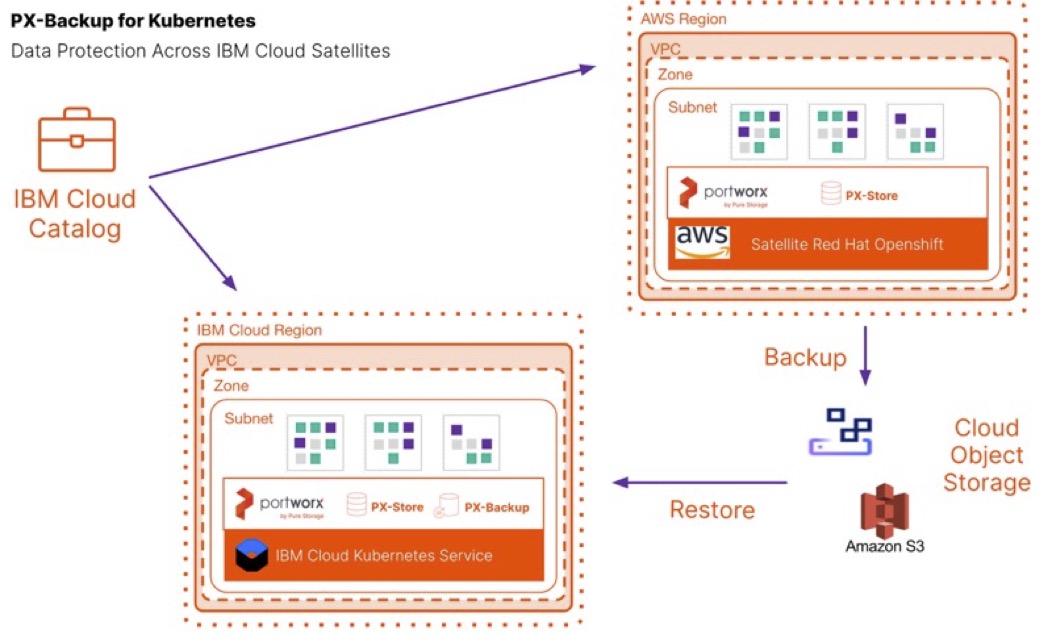
IBM Cloud Satellites allow you to use your own compute infrastructure that is in your on-premises data center, other cloud providers, or edge networks to create a Satellite location. Then, you use the capabilities of Satellite to run IBM Cloud services on your infrastructure, such as Openshift and Portworx, allowing you to consistently deploy, manage, and control your app workloads. Using PX-Backup, you can easily add your Satellite location using the same steps above in the “Configuring a cloud account, a backup location and a Kubernetes cluster” section. Simply add your Satellite Kubernetes cluster to PX-Backup, and you can backup and restore to and from your Satellite or IKS clusters.
That’s how easy it is to get started with PX-Backup on IBM Cloud and use a modern data protection solution for your modern applications. Watch a video walkthrough of the things we discussed in this blog below:
Kubernetes Data Protection for IBM Cloud Kubernetes Service using PX-Backup:
Kubernetes Data Protection for IBM Cloud Satellite