A common question in storage is how to accommodate and centralize multiple types of applications. YugabyteDB has a distinctive approach to storage replication over most traditional SQL databases by having a replication factor for each block of data. This can be combined with Portworx for an optimized and portable approach to managing storage infrastructure for your Yugabyte database as well as other storage profiles in your application deployment. Even with Yugabyte’s distributed nature, Portworx can be used for a holistic and environment-agnostic storage management experience. In addition Portworx provides IO profile optimization for databases and can provide additional resilience for data as well as using snapshot, backup and recovery and DR capabilities.
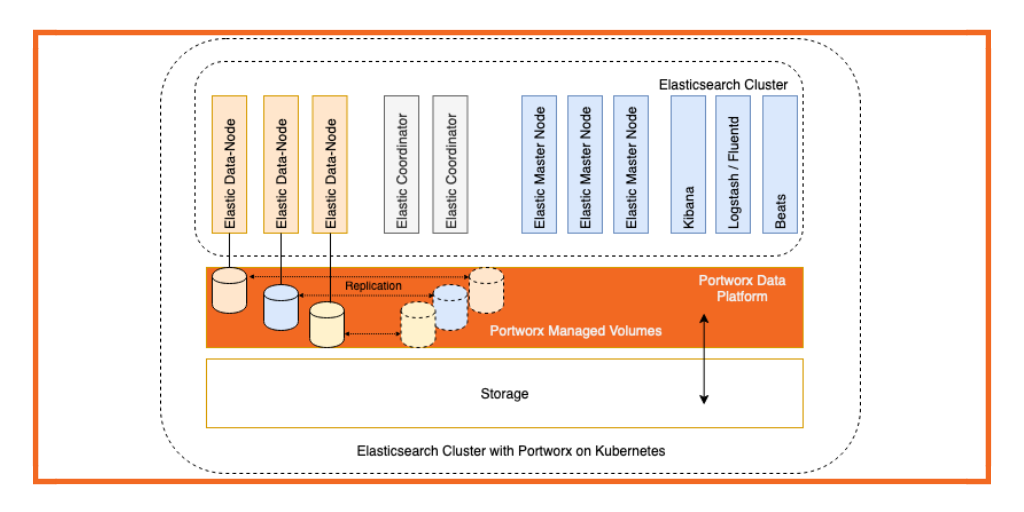
Portworx is a cloud native data management & storage solution. It is built for containers and can provide storage for applications in public, hybrid and multi cloud environments. It can be run on multiple container orchestration solutions including Kubernetes. It pools server capacity thereby transforming on-premises or cloud instances into converged, highly available compute and storage nodes. Portworx clusters span hardware racks and availability zones so that the applications are uninterrupted by hardware and cloud provider outages.
YugabyteDB is a high-performance distributed SQL database for global, internet-scale applications. Built using a unique combination of high-performance document store, auto sharding, per-shard distributed consensus replication and multi-shard ACID transactions (inspired by Google Spanner), YugabyteDB serves both scale-out RDBMS and internet-scale OLTP workloads with low query latency, extreme resilience against failures and global data distribution. As a cloud-native database, it can be deployed across public and private clouds as well as in Kubernetes environments with ease.
Prerequisites
It is important to check pre-reqs for installing Portworx because meeting all the requirements is key to standing up the environment.
- Portworx requires a specific Kubernetes template node with a Linux OS, such as Ubuntu. For example, using GKE’s COS will not allow the backend Portworx modules to install correctly.
- Portworx requires at least 4CPU and 4GB RAM per node in addition to whatever resource requirements your applications and other sidecars require.
- Portworx requires appropriate access to compute and storage service accounts to be able to dynamically provision more storage for volumes. It also requires a role within the Kubernetes account to allow it administrative access to cluster resources. For example:
gcloud services enable compute.googleapis.com

kubectl create clusterrolebinding myname-cluster-admin-binding \

--clusterrole=cluster-admin --user=`gcloud info --format='value(config.account)'`
Refer to this page from Portworx for more documentation.
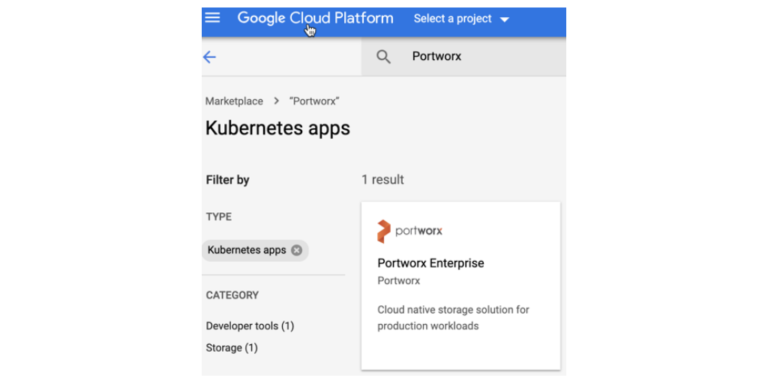
Install Portworx on GKE cluster
Clone the yb-portworx-db repository. Change to yb-portworx-db directory in the cloned directory. The px-internal.yaml file included in the repo is built for an example cluster running Kubernetes 1.13 in GKE and will create an etcd service in your Kubernetes cluster called kvdb. If you are using a different cloud provider or would like to use your own etcd service or a hosted etcd service from Portworx for testing, you can access the spec generator tool here. When you have a file customized to your environment, apply the specs:
kubectl apply -f px-internal.yaml
Now wait till all Portworx pods show as ready in the below output.
kubectl get pods -o wide -n kube-system -l name=portworx
Check Portworx cluster status.
PX_POD=$(kubectl get pods -l name=portworx -n kube-system -o jsonpath='{.items[0].metadata.name}')

kubectl exec $PX_POD -n kube-system -- /opt/pwx/bin/pxctl status
If the Portworx pods in your cluster do not start correctly, you should review if you have the correct backend node OS, enough resource requirements, and appropriate permissions.
You can check the Portworx official documentation here for more detailed usage and options. Once you have a good Portworx configuration in your environment, proceed to the Yugabyte installation.
Install YugabyteDB
We are creating 3 yb-master & 3 yb-tserver instances within the namespace “yb-px-db”. For dynamic provisioning using the Portworx storage classes we don’t need to create Portworx volumes, they will be created automatically. For that we have created a storage class “portworx-sc” with provisioner as kubernetes.io/portworx-volume. You can see this in the yugabyte-portworx-db.yaml here:
—
kind: StorageClass

apiVersion: storage.k8s.io/v1

metadata:

namespace: yb-px-db

name: portworx-sc

provisioner: kubernetes.io/portworx-volume

parameters:

repl: "1"

io_profile: "db"

disable_io_profile_protection: "1"
The repl parameter controls how many backend replicas of each volume should be created. The io_profile parameter controls the specific tuning algorithm Portworx should use for IO given these persistent volumes. While “db” is the most appropriate, because Yugabyte replicates its own data for its own scalability and availability, we need to override the default of repl: “3” that Portworx normally requires to enforce this profile. For more details, please refer to the Portworx documentation here.
For creating persistent volumes we have created volumeClaimTemplates for both yb-master and yb-tserver so that we can request PVCs from the storage class which can be dynamically created and bounded.
kubectl create -f yugabyte-portworx-db.yaml
Test YugabyteDB cluster
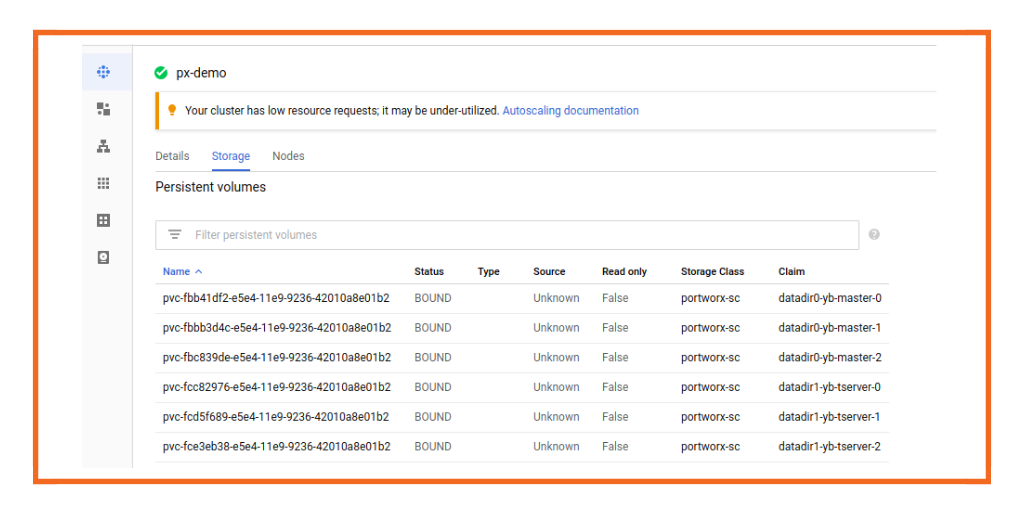
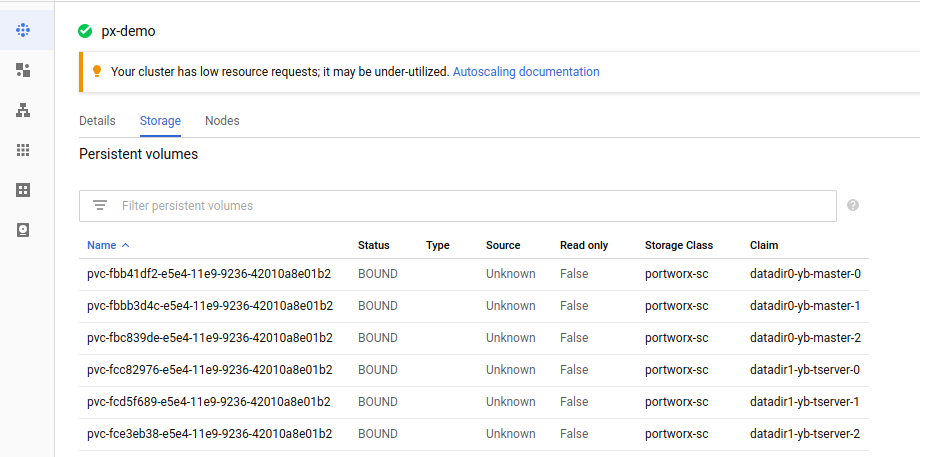
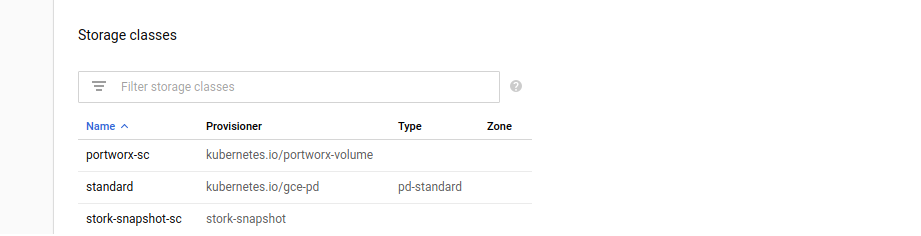
You can check the storage created by Portworx on a GCP console and the storage class with provisioner as portworx-volume.
For accessing Portworx UI you will need “Lighthouse”, which is a GUI dashboard that can be used to monitor Portworx clusters & can be accessed using a NodePort service:
kubectl get svc -n kube-system px-lighthouse
Now go to http://<node_ip>:<service_nodeport>
The default login is admin/Password1.
You can now check the volumes created under Portworx UI:

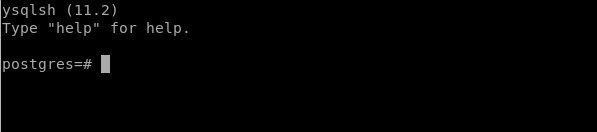
When the pods are ready, execute following command to run PostgreSQL-compatible YSQL API of YugabyteDB:
kubectl exec -it yb-tserver-0 /home/yugabyte/bin/ysqlsh -- -h yb-tserver-0 --echo-queries
You should enter the ysql prompt as shown below:
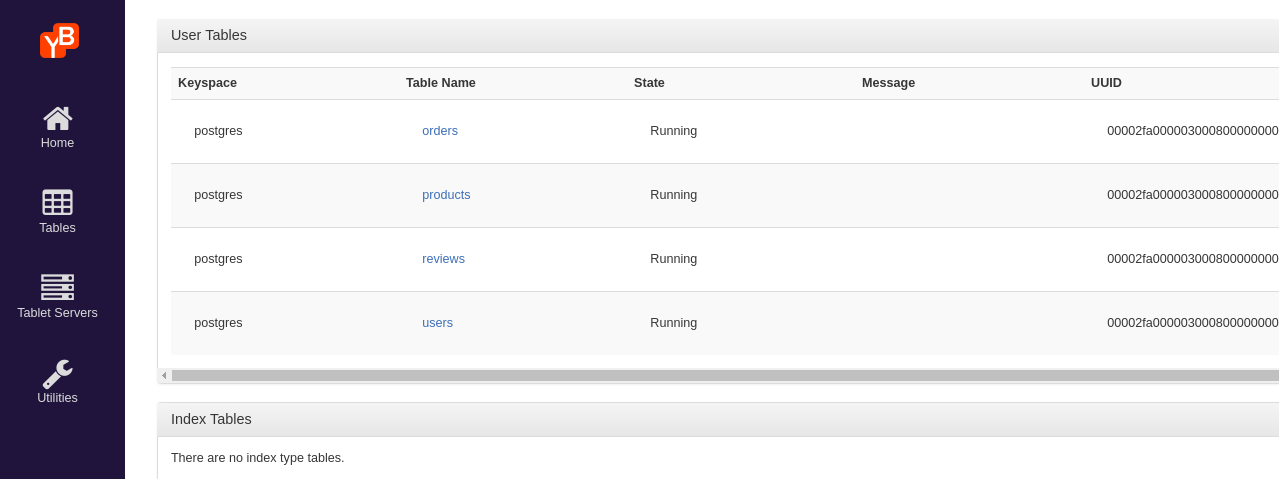
Now you can start creating databases and tables in YugabyteDB. You can see user tables in the YugabyteDB UI, which is shared by default on port 7000, as shown:
Please let us know if you have any issues via our slack or GitHub. For Portworx, please visit their site here.
Share
Subscribe for Updates
About Us
Portworx is the leader in cloud native storage for containers.
Thanks for subscribing!

Andrew Nelson
Andrew is currently working for Yugabyte as a Developer Advocate for Cloud and Kubernetes ecosystems. Andrew has also worked as a Distributed Systems Specialist at Nutanix as well as a Systems Engineer in the Office of the CTO for VMware.

Vick Kelkar
Vick is Director of Product at Portworx. With over 15 years in the technology and software industry, Vick’s focus is on developing new data infrastructure products for platforms like Kubernetes, Docker, PCF, and PKS.