It’s standard practice for organizations to run backups for mission-critical applications running in their cloud or data center environments. With containerized applications on Red Hat OpenShift, it is just as imperative to include your data protection or disaster recovery plan as part of your standard practices. In OpenShift environments today, teams often have access to a OpenShift cluster, or they deploy applications as a tenant with access to a namespaces within a shared OpenShift cluster. These application resources are often provisioned in a self-service model when it comes to creating applications, volumes, secrets, and services. With PX-Backup, backups of OpenShift applications can also be provided in a secure, self-service environment.
Nearly 55% of Kubernetes IT professionals say that backup and restore is a top concern for their stateful applications running on Kubernetes.
The Pure Storage Survey was conducted by Wakefield Research (www.wakefieldresearch.com) among 500 IT Professionals, employed full-time in the US (250) or UK (250) at companies of 500+ employees, who self-identify as possessing significant knowledge of their company’s Kubernetes usage and currently running stateful applications on Kubernetes.
Backing up and restoring stateful components of your applications—such as persistent volumes from a deployment or statefulset on OpenShift—comes with challenges. PX-Backup enables teams to easily create backups and restores for these tricky stateful components as well as the stateless ones. Users are authenticated and authorized to login and perform actions within a given OpenShift cluster. As we explored in an earlier blog post, it is critical to extend security components to your OpenShift data management systems, and PX-Backup extends this level of access controls by enabling teams to run ad hoc or scheduled application-consistent backups with user management and role-based access controls. Extending these capabilities into backup and restore for application teams is key for self-service data protection and disaster recovery.
In this blog, we will explore how PX-Backup can provide self-service backup and restore for stateful and stateless applications on Red Hat OpenShift clusters using role-based access controls and user management with LDAP integrations.
RBAC with PX-Backup on OpenShift Container Platform
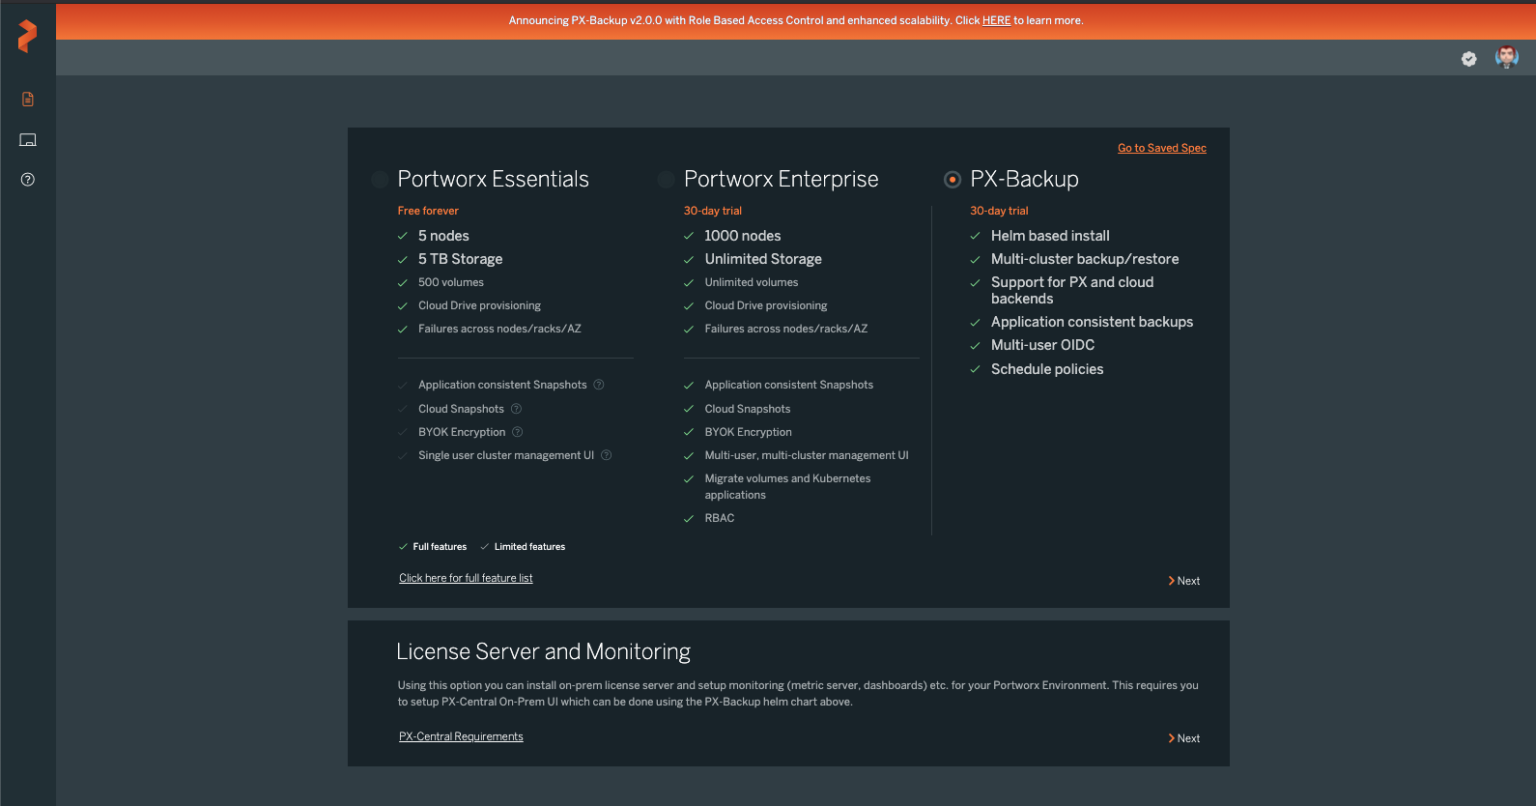
First, to install PX-Backup, navigate to https://central.portworx.com and select PX-Backup from the installation spec generators. This will take you through a list of questions on where and how you will install PX-Backup.
> Note: PX-Backup is often installed in a central location so it can provide a single pane of glass backup and restore management capabilities to one or more OpenShift clusters.
Once PX-backup is installed, log in as the Administrator and navigate to the PX-Backup Security menu in the bottom left-hand corner of the PX-Backup user interface.

From the PX-Backup Security view, you will be able to handle the following tasks:
- Manage imported or created backup users and groups
- Manage, create, or delete backup roles
- Apply role mappings to backup users and groups
In order to add users to a PX-Backup installation, you will need to access the Keycloak administration console deployed with PX-Backup. First, identify the Keycloak service by running the following commands on the Red Hat OpenShift cluster that PX-Backup is deployed to:
$ kubectl get svc pxcentral-keycloak-http -n central
NAME                      TYPE       CLUSTER-IP       EXTERNAL-IP   PORT(S)                       AGE
pxcentral-keycloak-http   NodePort   10.104.180.137   <none>        80:30544/TCP,8443:32488/TCP   33d
In the above scenario, the Keycloak service will be available at the NodePort of 32488. You may also choose to use LoadBalancers or OpenShift routes to expose these services.
https://<URL>:32488/auth
Once you access the Keycloak administration console, click on “Administration Console.” This will prompt you for the PX-Backup admin user and password.

Once logged in, you may manage users manually by navigating to the “Users” section on the left. However, we will explain how to federate PX-Backup users with an LDAP provider.
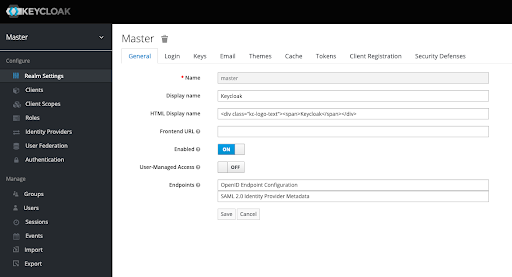
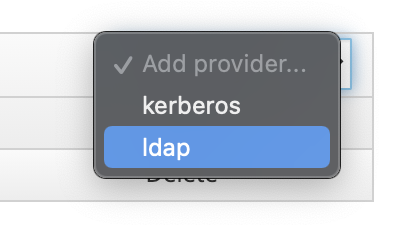
Head to the “User Federation” section on the left-hand menu. From here, you can “Add Provider” and choose “ldap”.
Fill out the necessary LDAP settings and click “Save.”

You may also choose to set up automatic synchronization of new or updated users. This will keep your PX-backup users up to date.

After synchronizing all users with your PX-Backup installation, PX-Backup should report all users and give them the “px-backup-app.user” role by default.
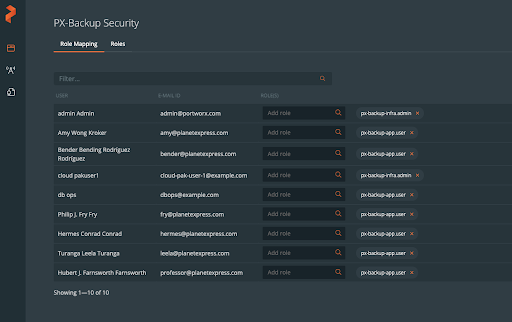
The default roles available within PX-Backup are as follows:
- px-backup-infra.admin: Infrastructure owner with admin privileges for all PX-Backup objects
- px-backup-app.admin: Application owner—manage the apps you own with admin privileges for Schedules and Rules. You can also use existing cloud accounts.
- px-backup-app.user: Application user—You can backup and restore your application but cannot create a schedule policy or rules.
To create groups within PX-Backup, navigate to “Groups” on the left-hand menu of the Keycloak administration console and click “New.” Enter a new group name and click “Save.”
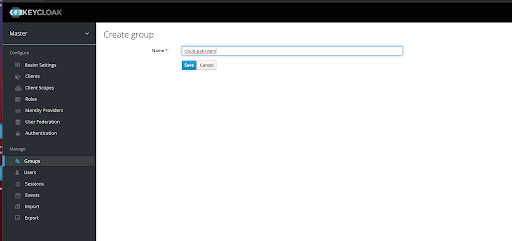
You can then map PX-Backup roles to these new groups so any user within the group can participate using this role.

Then, from the Keycloak administration console, you can add users to these groups.

Creating a Backup and Restore as an Application User
Once the administrative tasks are complete, users—such as the “db-ops” user below—may sign into both the Red Hat console and the PX-Backup console. Note: If Red Hat OpenShift imports the same users as PX-Backup, users can log in using the same credentials.


Red Hat OpenShift users will need some minimum RBAC permissions in order to use PX-Backup to successfully backup and restore applications within their namespaces. The below Role, RoleBinding, read-only Cluster-Role, and ClusterRoleBinding are examples for the db-ops user used in this blog post who only has access to the “db-ops” project (namespace) within OpenShift.
apiVersion: rbac.authorization.k8s.io/v1
kind: Role
metadata:
  name: team-users
rules:
- apiGroups:
    - "*"
  resources:
  - "*"
  verbs:
  - "*"
---
apiVersion: rbac.authorization.k8s.io/v1beta1
kind: RoleBinding
metadata:
  name: db-ops-team-user-bindings
  namespace: db-ops
roleRef:
  apiGroup: rbac.authorization.k8s.io
  kind: Role
  name: team-users
subjects:
- kind: User
  name: db-ops
  apiGroup: rbac.authorization.k8s.io
---
apiVersion: rbac.authorization.k8s.io/v1
kind: ClusterRole
metadata:
  name: read-only
rules:
- apiGroups:
  - ""
  resources: ["*"]
  verbs:
  - get
  - list
  - watch
- apiGroups:
  - extensions
  resources: ["*"]
  verbs:
  - get
  - list
  - watch
- apiGroups:
  - apps
  resources: ["*"]
  verbs:
  - get
  - list
  - watch
- apiGroups:
  - snapshot.storage.k8s.io
  resources: ["*"]
  verbs:
  - get
  - list
  - watch
- apiGroups:
  - stork.libopenstorage.org
  resources: ["*"]
  verbs:
  - get
  - list
---
kind: ClusterRoleBinding
apiVersion: rbac.authorization.k8s.io/v1
metadata:
  name: db-opsuser-cr-binding
subjects:
- kind: User
  name: db-ops
  namespace: db-ops
roleRef:
  kind: ClusterRole
  name: read-only
  apiGroup: rbac.authorization.k8s.io
Once a user is logged into PX-Backup and wants to start backups for an application, a user must first add the application cluster to PX-Backup.
# oc login -u db-ops
Authentication required for https://api.px-ocp-b-1.openshift.portworx.com:6443 (openshift)
Username: db-ops
Password:
Login successful.

You have access to 65 projects, the list has been suppressed. You can list all projects with 'oc projects'

Using project "".
Then the user needs to navigate to “Backups” and then “Add Cluster,” produce his or her specific kubeconfig, and enter it in the “Add Cluster” details along with an arbitrary name.
# kubectl config view --flatten --minify
apiVersion: v1
clusters:
- cluster:
    certificate-authority-data: LS0tLS1CRUdJTiBDRVJUSUZJQ0FURS0tLS0tC…<snip>
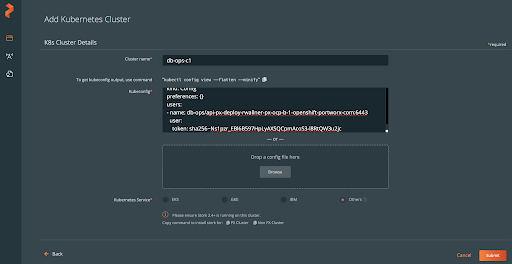
In this case, the db-ops user can “view” all resources within the cluster as read-only because of their OpenShift RBAC permissions. This user is also a “px-backup-app.user,” so they can backup and restore your application, but they cannot create a schedule policy, cloud credentials, backup locations, or rules from within PX-Backup.
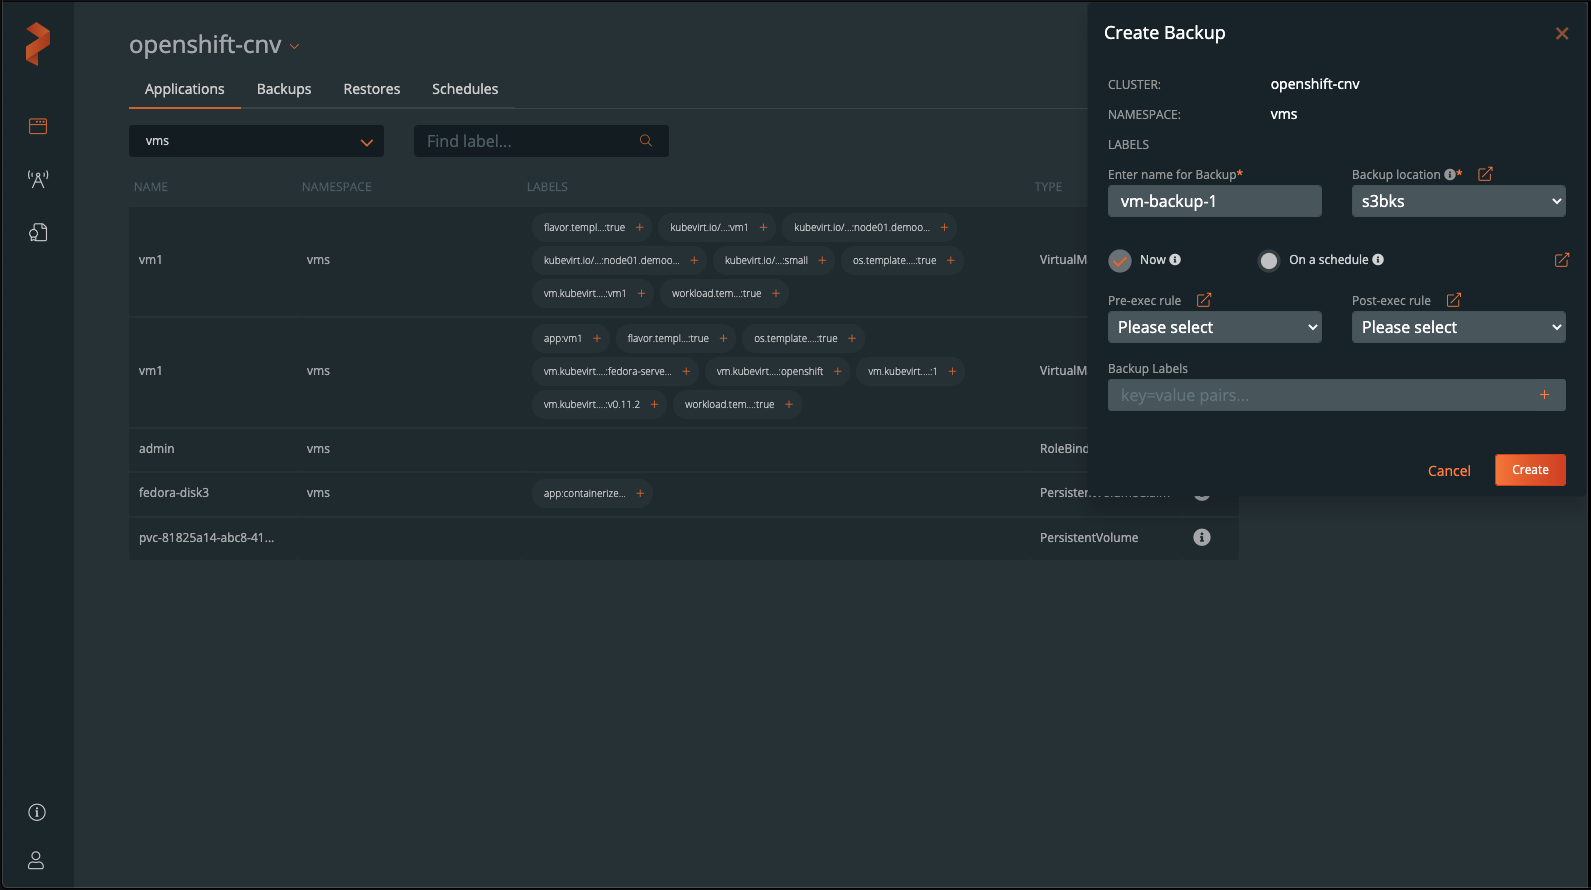
From the “Applications” tab, the db-ops user can filter by resource or tag to backup the entire db-ops namespace or specific resources within it.
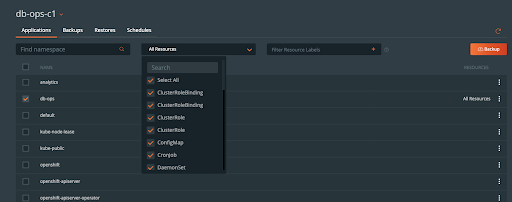
Since this user cannot create rules, schedules, or backup locations, the user must use rules, schedules, and backup locations that are provided by an admin user (aws in the example shown). The user should give their backup a name and click “Create.”

The db-ops user will then be taken to a backups timeline view, where they may see their backups, status, frequency, and details.

To restore from a backup, click on the backup you wish to restore and navigate to the “Restore” selection within the backup pop-out menu.
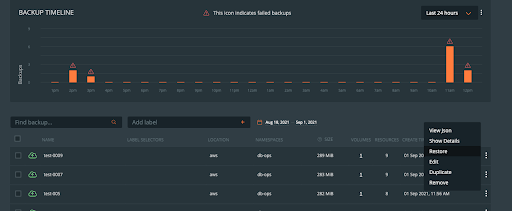
Fill out the restore dialog with a restore name, a destination cluster (the same one in this case), and click “replace existing resources” since we only have access to the one namespace and cannot restore to another with the db-ops user.

The restore should turn green when it is successfully restored.

PX-Backup users will not be able to create backups for other namespaces or resources within the RedHat OpenShift cluster they do not have access to. The example below shows the error the “db-ops” user would see if they tried to backup resources from the “analytics” namespace, which they do not have access to.
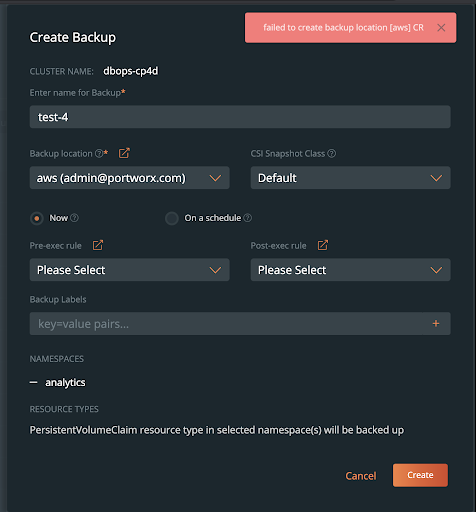
Remember, PX-Backup provides RBAC for backup objects—such as backup locations, rules, schedules, backups, and restores—while OpenShift RBAC dictates the roles and access allowed for users within the OpenShift cluster. Users add their kubeconfig to PX-Backup and thus are limited only to the resources exposed by their OpenShift admins. This allows PX-Backup and Red Hat OpenShift to work together to provide the most secure backup and restore capabilities for applications running on Red Hat OpenShift.
Check out the demo below to see PX-Backup and Red Hat OpenShift in action.
Share
Subscribe for Updates
About Us
Portworx is the leader in cloud native storage for containers.
Thanks for subscribing!


