Background
Over the last few years, I have seen increasing interest within the Oracle community in PostgreSQL and now in Yugabyte.
With all the recent excitement about YugabyteDB, I thought I would try and build my own YugabyteDB environment using Oracle Kubernetes Engine(OKE), Portworx storage, and the YugabyteDB Kubernetes Operator.
Check the Kubernetes Environment
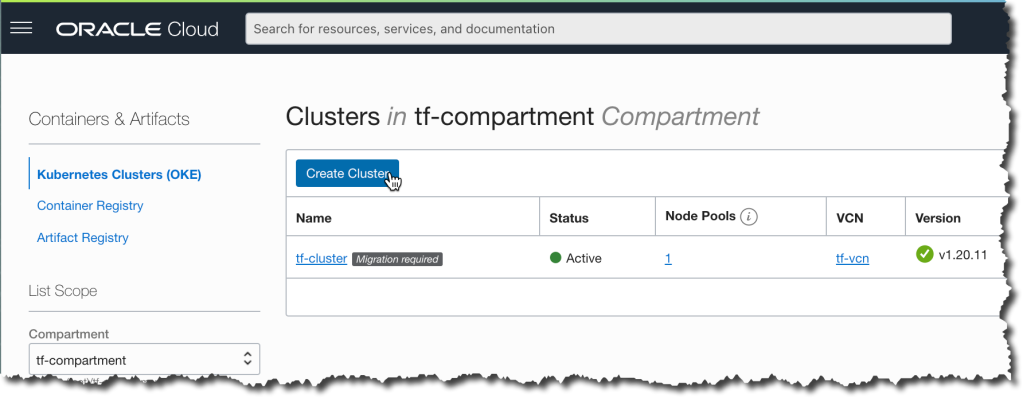
Before we install the YugabyteDB Operator, let’s have a quick look at my Oracle Cloud Infrastructure (OCI) Oracle Kubernetes Engine (OKE) environment, which I built using a Terraform script. I have made it available within GitHub.
I am using Kubernetes version 1.20.1. We can check the version with kubectl version. It’s important to note that the client versions need to be within one minor version of the server, so you may need to upgrade/downgrade.
% kubectl version --short | awk -Fv '/Server Version: / {print $3}'
1.20.11
We can check the number of nodes, operating system, and container runtime in the Kubernetes Cluster with kubectl get nodes.
% kubectl get nodes -o wide
NAME         STATUS   ROLES   AGE   VERSION    INTERNAL-IP   EXTERNAL-IP     OS-IMAGE                  KERNEL-VERSION                     CONTAINER-RUNTIME
10.0.1.157   Ready    node    11d   v1.20.11   10.0.1.157    132.145.33.86   Oracle Linux Server 7.8   4.14.35-1902.306.2.el7uek.x86_64   cri-o://1.20.2
10.0.1.163   Ready    node    11d   v1.20.11  10.0.1.163    144.21.51.173   Oracle Linux Server 7.8   4.14.35-1902.306.2.el7uek.x86_64   cri-o://1.20.2
10.0.1.205   Ready    node    11d   v1.20.11   10.0.1.205    132.145.69.16   Oracle Linux Server 7.8   4.14.35-1902.306.2.el7uek.x86_64   cri-o://1.20.2
We can also check the OCI regions and Availability Domains with kubectl get nodes –show-labels:
% kubectl get nodes --show-labels
NAME         STATUS   ROLES   AGE   VERSION    LABELS

10.0.1.157   Ready    node    11d   v1.20.11   beta.kubernetes.io/arch=amd64,beta.kubernetes.io/instance-type=VM.Standard2.1,beta.kubernetes.io/os=linux,displayName=oke-cgr3bekcbka-n5k6rizv7zq-sbgpx554ada-1,failure-domain.beta.kubernetes.io/region=uk-london-1,failure-domain.beta.kubernetes.io/zone=UK-LONDON-1-AD-3,hostname=oke-cgr3bekcbka-n5k6rizv7zq-sbgpx554ada-1,internal_addr=10.0.1.157,kubernetes.io/arch=amd64,kubernetes.io/hostname=10.0.1.157,kubernetes.io/os=linux,node-role.kubernetes.io/node=,node.info.ds_proxymux_client=true,node.info/compartment.id_prefix=ocid1.compartment.oc1,node.info/compartment.id_suffix=aaaaaaaauktztjuam57uhird7up5gxp32svboo6bmjfxvotkja75tfndc2sq,node.info/compartment.name=tf-compartment,node.info/kubeletVersion=v1.20,oci.oraclecloud.com/fault-domain=FAULT-DOMAIN-2,oke.oraclecloud.com/node.info.private_subnet=false,oke.oraclecloud.com/node.info.private_worker=true,oke.oraclecloud.com/tenant_agent.version=1.38.5-8f5c194266-712,px/enabled=true,px/metadata-node=true
10.0.1.163   Ready    node    11d   v1.20.11   beta.kubernetes.io/arch=amd64,beta.kubernetes.io/instance-type=VM.Standard2.1,beta.kubernetes.io/os=linux,displayName=oke-cgr3bekcbka-n5k6rizv7zq-sbgpx554ada-0,failure-domain.beta.kubernetes.io/region=uk-london-1,failure-domain.beta.kubernetes.io/zone=UK-LONDON-1-AD-2,hostname=oke-cgr3bekcbka-n5k6rizv7zq-sbgpx554ada-0,internal_addr=10.0.1.163,kubernetes.io/arch=amd64,kubernetes.io/hostname=10.0.1.163,kubernetes.io/os=linux,last-migration-failure=get_kubesvc_failure,node-role.kubernetes.io/node=,node.info.ds_proxymux_client=true,node.info/compartment.id_prefix=ocid1.compartment.oc1,node.info/compartment.id_suffix=aaaaaaaauktztjuam57uhird7up5gxp32svboo6bmjfxvotkja75tfndc2sq,node.info/compartment.name=tf-compartment,node.info/kubeletVersion=v1.20,oci.oraclecloud.com/fault-domain=FAULT-DOMAIN-1,oke.oraclecloud.com/node.info.private_subnet=false,oke.oraclecloud.com/node.info.private_worker=true,oke.oraclecloud.com/tenant_agent.version=1.38.5-8f5c194266-712,px/enabled=true,px/metadata-node=true
10.0.1.205   Ready    node    11d   v1.20.11   beta.kubernetes.io/arch=amd64,beta.kubernetes.io/instance-type=VM.Standard2.1,beta.kubernetes.io/os=linux,displayName=oke-cgr3bekcbka-n5k6rizv7zq-sbgpx554ada-2,failure-domain.beta.kubernetes.io/region=uk-london-1,failure-domain.beta.kubernetes.io/zone=UK-LONDON-1-AD-1,hostname=oke-cgr3bekcbka-n5k6rizv7zq-sbgpx554ada-2,internal_addr=10.0.1.205,kubernetes.io/arch=amd64,kubernetes.io/hostname=10.0.1.205,kubernetes.io/os=linux,node-role.kubernetes.io/node=,node.info.ds_proxymux_client=true,node.info/compartment.id_prefix=ocid1.compartment.oc1,node.info/compartment.id_suffix=aaaaaaaauktztjuam57uhird7up5gxp32svboo6bmjfxvotkja75tfndc2sq,node.info/compartment.name=tf-compartment,node.info/kubeletVersion=v1.20,oci.oraclecloud.com/fault-domain=FAULT-DOMAIN-3,oke.oraclecloud.com/node.info.private_subnet=false,oke.oraclecloud.com/node.info.private_worker=true,oke.oraclecloud.com/tenant_agent.version=1.38.5-8f5c194266-712,px/enabled=true,px/metadata-node=true
My three-node Kubernetes cluster is spread across three Availability Domains (ADs) located within the UK-London-1 Region, as per the diagram below.
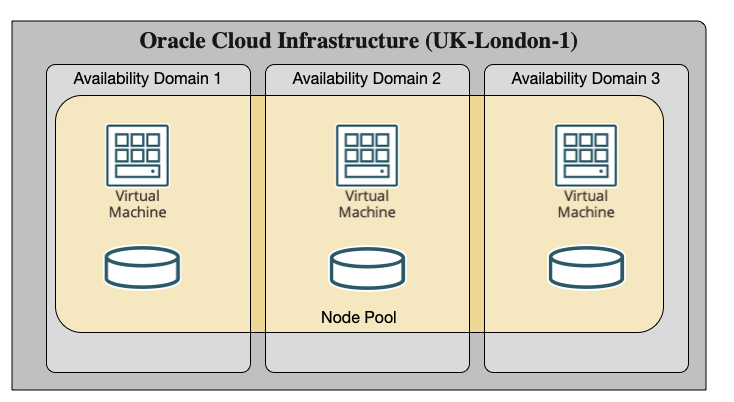
Note: UK-London-region has three Availability Domains (ADs), but some regions are limited to a single AD. Check OCI Region documentation for availability in your region.
I have already installed Portworx into my OKE cluster, so we can check the version using pxctl –version.
% PX_POD=$(kubectl get pods -l name=portworx -n kube-system -o jsonpath='{.items[0].metadata.name}')
  kubectl exec $PX_POD -n kube-system -- /opt/pwx/bin/pxctl --version

Defaulting container name to portworx.
Use 'kubectl describe pod/px-cluster-21a6ec62-0ed7-48b8-b6ac-b6833005b533-c6tq6 -n kube-system' to see all of the containers in this pod.
pxctl version 2.8.0.0-1ef62f8
If you are not already using Portworx and want to install the Free Forever Portworx version into your OKE environment, you may want to read this helpful blog post: Portworx Essentials installation on Oracle Kubernetes Engine (OKE).
Create the Storage Class
Let’s start by creating a Portworx Kubernetes Container Storage Interface (CSI) Storage Class. Since I will be using a Yugabyte replication, I will use a Portworx replication of 1.
% cat px-yb-csi-sc.yaml
kind: StorageClass
apiVersion: storage.k8s.io/v1
metadata:
  name: px-yb-csi-sc
provisioner: pxd.portworx.com
parameters:
  repl: "1"
  io_profile: "auto"
allowVolumeExpansion: True
And I will apply it with kubectl apply.
% kubectl apply -f px-yb-csi-sc.yaml
storageclass.storage.k8s.io/px-yb-csi-sc created
We can examine the settings with kubectl describe. For example, from the below information, you can see I have a replication factor of 1 and io_profile of auto.
% kubectl describe sc/px-yb-csi-sc
Name:            px-yb-csi-sc
IsDefaultClass:  No
Annotations:     kubectl.kubernetes.io/last-applied-configuration={"allowVolumeExpansion":true,"apiVersion":"storage.k8s.io/v1","kind":"StorageClass","metadata":{"annotations":{},"name":"px-yb-csi-sc"},"parameters":{"io_profile":"auto","repl":"1"},"provisioner":"pxd.portworx.com"}
Provisioner:           pxd.portworx.com
Parameters:            io_profile=auto,repl=1
AllowVolumeExpansion:  True
MountOptions:          <none>
ReclaimPolicy:         Delete
VolumeBindingMode:     Immediate
Events:                <none>
List the StorageClasses (SCs) in the cluster with kubectl get sc. The default StorageClass is marked with (default), for example:
% kubectl get sc
NAME                             PROVISIONER                       RECLAIMPOLICY   VOLUMEBINDINGMODE      ALLOWVOLUMEEXPANSION
oci (default)                    oracle.com/oci                    Delete          Immediate              false
oci-bv                           blockvolume.csi.oraclecloud.com   Delete          WaitForFirstConsumer   false
px-db                            kubernetes.io/portworx-volume     Delete          Immediate              true
px-db-cloud-snapshot             kubernetes.io/portworx-volume     Delete          Immediate              true
px-db-cloud-snapshot-encrypted   kubernetes.io/portworx-volume     Delete          Immediate              true
px-db-encrypted                  kubernetes.io/portworx-volume     Delete          Immediate              true
px-db-local-snapshot             kubernetes.io/portworx-volume     Delete          Immediate              true
px-db-local-snapshot-encrypted   kubernetes.io/portworx-volume     Delete          Immediate              true
px-replicated                    kubernetes.io/portworx-volume     Delete          Immediate              true
px-replicated-encrypted          kubernetes.io/portworx-volume     Delete          Immediate              true
px-yb-csi-sc                     pxd.portworx.com                  Delete          Immediate              true
stork-snapshot-sc                stork-snapshot                    Delete          Immediate              true
Install
Now let’s start by cloning the Yugabyte Operator back to our desktop.
% git clone https://github.com/yugabyte/yugabyte-operator.git
Cloning into 'yugabyte-operator'...
remote: Enumerating objects: 346, done.
remote: Counting objects: 100% (346/346), done.
remote: Compressing objects: 100% (204/204), done.
remote: Total 346 (delta 170), reused 275 (delta 121), pack-reused 0
Receiving objects: 100% (346/346), 284.64 KiB | 1.98 MiB/s, done.
Resolving deltas: 100% (170/170), done.
Deploy the YugabyteDB Cluster Operator
Navigate to yugabyte-operator and register the Custom Resource Definition (CRD).
% kubectl create -f deploy/crds/yugabyte.com_ybclusters_crd.yaml
customresourcedefinition.apiextensions.k8s.io/ybclusters.yugabyte.com created
Confirm ybclusters.yugabyte.com CRD has been created.
% kubectl get crd/ybclusters.yugabyte.com
NAME                      CREATED AT
ybclusters.yugabyte.com   2021-10-21T14:00:25Z
From the same directory, create the YugabyteDB Operator.
% kubectl create -f deploy/operator.yaml
namespace/yb-operator created
serviceaccount/yugabyte-operator created
clusterrole.rbac.authorization.k8s.io/yugabyte-operator created
clusterrolebinding.rbac.authorization.k8s.io/yugabyte-operator created
deployment.apps/yugabyte-operator created
From the above information, we can see a namespace called yb-operator has been created for us.
Wait a second or two for the Operator to start, and confirm running with the below information.
% kubectl -n yb-operator get po,deployment

NAME                                     READY   STATUS    RESTARTS   AGE
pod/yugabyte-operator-5dd57b9f8c-w66qr   1/1     Running   0          119s
NAME                                READY   UP-TO-DATE   AVAILABLE   AGE
deployment.apps/yugabyte-operator   1/1     1            1           119s
We can now create a YugabyteDB cluster using the Operator.
You can see I have defined three YugabyteDB Master Servers for the management of system metadata and three YugabyteDB Tablet Servers for the data IO.
The Operator also provides a storage section. Here I specified one volume per Master and TServer using count, a size of 1G, and my Portworx StorageClass.
Below is my example manifest:
apiVersion: yugabyte.com/v1alpha1
kind: YBCluster
metadata:
  name: px-ybcluster
  namespace: yb-operator
spec:
  replicationFactor: 3
  domain: cluster.local
  master:
    replicas: 3
    storage:
      count: 1
      size: 1Gi
      storageClass: px-yb-csi-sc
  tserver:
    replicas: 3
    storage:
      count: 1
      size: 1Gi
      storageClass: px-yb-csi-sc
You can create this with kubectl create -f <filename>, for example.
% kubectl create -f px-yb-cluster.yaml
ybcluster.yugabyte.com/px-ybcluster created
Verify that the cluster is up and running with the below command. You should see three pods each for YB-Master and YB-TServer.
% kubectl get po,sts,svc -n yb-operator
NAME                                     READY   STATUS    RESTARTS   AGE
pod/yb-master-0                          1/1     Running   0          8m2s
pod/yb-master-1                          1/1     Running   0          8m2s
pod/yb-master-2                          1/1     Running   0          8m2s
pod/yb-tserver-0                         1/1     Running   0          8m2s
pod/yb-tserver-1                         1/1     Running   0          8m2s
pod/yb-tserver-2                         1/1     Running   0          8m2s
pod/yugabyte-operator-5dd57b9f8c-w66qr   1/1     Running   0          52m

NAME                          READY   AGE
statefulset.apps/yb-master    3/3     8m3s
statefulset.apps/yb-tserver   3/3     8m3s

NAME                                TYPE        CLUSTER-IP     EXTERNAL-IP   PORT(S)                               AGE
service/yb-master-ui                ClusterIP   10.96.18.198   <none>        7000/TCP                              8m3s
service/yb-masters                  ClusterIP   None           <none>        7000/TCP,7100/TCP                     8m4s
service/yb-tservers                 ClusterIP   None           <none>        9100/TCP,9042/TCP,6379/TCP,5433/TCP   8m4s
service/yugabyte-operator-metrics   ClusterIP   10.96.87.164   <none>        8383/TCP,8686/TCP                     51m
We should also now see six Persistent Volume Claims (PVCs) and one volume per Pod in the yb-operator namespace using the Portworx px-yb-csi-sc Storage Class.
% kubectl get pvc -n yb-operator

NAME                    STATUS   VOLUME                                     CAPACITY   ACCESS MODES   STORAGECLASS   AGE
datadir0-yb-master-0    Bound    pvc-e5f2c02e-ca27-4561-aa0e-7fc15f95f34d   1Gi        RWO            px-yb-csi-sc   2m24s
datadir0-yb-master-1    Bound    pvc-c7a3c692-11fd-4f95-8d27-6db962aaaf9c   1Gi        RWO            px-yb-csi-sc   2m24s
datadir0-yb-master-2    Bound    pvc-87fb6b66-6f88-4658-bda9-ee22c6100ed2   1Gi        RWO            px-yb-csi-sc   2m24s
datadir0-yb-tserver-0   Bound    pvc-97bbaf86-7a27-4a5d-988a-22d306127b2f   1Gi        RWO            px-yb-csi-sc   2m24s
datadir0-yb-tserver-1   Bound    pvc-7accafb2-e2c1-4636-bb5f-a4d2e2550470   1Gi        RWO            px-yb-csi-sc   2m24s
datadir0-yb-tserver-2   Bound    pvc-39ddaeb9-b852-461f-a327-54ce392ee775   1Gi        RWO            px-yb-csi-sc   2m24s
We can also see the volumes from Portworx using pxctl volume list, for example:
% kubectl exec -it $PX_POD -n kube-system -- /opt/pwx/bin/pxctl volume list
Defaulting container name to portworx.
Use 'kubectl describe pod/px-cluster-21a6ec62-0ed7-48b8-b6ac-b6833005b533-c6tq6 -n kube-system' to see all of the containers in this pod.

ID NAME SIZE HA SHARED ENCRYPTED PROXY-VOLUME IO_PRIORITY STATUS SNAP-ENABLED
828496762191136181 pvc-39ddaeb9-b852-461f-a327-54ce392ee775 1 GiB 1 no no no MEDIUM up - attached on 10.0.1.163 no
925209006038916696 pvc-7accafb2-e2c1-4636-bb5f-a4d2e2550470 1 GiB 1 no no no MEDIUM up - attached on 10.0.1.205 no
231918167691463467 pvc-87fb6b66-6f88-4658-bda9-ee22c6100ed2 1 GiB 1 no no no MEDIUM up - attached on 10.0.1.163 no
965782486596909278 pvc-97bbaf86-7a27-4a5d-988a-22d306127b2f 1 GiB 1 no no no MEDIUM up - attached on 10.0.1.157 no
600324875059410877 pvc-c7a3c692-11fd-4f95-8d27-6db962aaaf9c 1 GiB 1 no no no MEDIUM up - attached on 10.0.1.205 no
852880312411130158 pvc-e5f2c02e-ca27-4561-aa0e-7fc15f95f34d 1 GiB 1 no no no MEDIUM up - attached on 10.0.1.157 no
Let’s check the version using ysqlsh:
% kubectl exec --namespace yb-operator -it yb-tserver-0 -- /home/yugabyte/bin/ysqlsh
ysqlsh (11.2-YB-2.7.0.0-b0)
Type "help" for help.

yugabyte=# select version();
                                                  version
------------------------------------------------------------------------------------------------------------
 PostgreSQL 11.2-YB-2.7.0.0-b0 on x86_64-pc-linux-gnu, compiled by gcc (Homebrew gcc 5.5.0_4) 5.5.0, 64-bit
(1 row)

yugabyte=# alter role yugabyte with password 'portworx';
ALTER ROLE
yugabyte=# \q
Clean Up
To avoid unnecessary costs we can scale compute nodes down to zero or remove the YugabyteDB cluster using kubectl delete, for example:
% kubectl delete -f px-yb-cluster.yaml
ybcluster.yugabyte.com "px-ybcluster" deleted
The yb-master and yb-tserver pods have now terminated:
% kubectl get po -n yb-operator
NAME                                 READY   STATUS    RESTARTS   AGE
yugabyte-operator-5dd57b9f8c-w66qr   1/1     Running   0          21h
This will not delete the Persistent Volume Claims (PVCs); therefore, the data will persist if you recreate the cluster.
However, if you no longer require the data, delete the PVCs with kubectl delete pvc:
% kubectl get pvc -n yb-operator
NAME                    STATUS   VOLUME                                     CAPACITY   ACCESS MODES   STORAGECLASS   AGE
datadir0-yb-master-0    Bound    pvc-e5f2c02e-ca27-4561-aa0e-7fc15f95f34d   1Gi        RWO            px-yb-csi-sc   22h
datadir0-yb-master-1    Bound    pvc-c7a3c692-11fd-4f95-8d27-6db962aaaf9c   1Gi        RWO            px-yb-csi-sc   22h
datadir0-yb-master-2    Bound    pvc-87fb6b66-6f88-4658-bda9-ee22c6100ed2   1Gi        RWO            px-yb-csi-sc   22h
datadir0-yb-tserver-0   Bound    pvc-97bbaf86-7a27-4a5d-988a-22d306127b2f   1Gi        RWO            px-yb-csi-sc   22h
datadir0-yb-tserver-1   Bound    pvc-7accafb2-e2c1-4636-bb5f-a4d2e2550470   1Gi        RWO            px-yb-csi-sc   22h
datadir0-yb-tserver-2   Bound    pvc-39ddaeb9-b852-461f-a327-54ce392ee775   1Gi        RWO            px-yb-csi-sc   22h

% kubectl delete pvc -n yb-operator --all
persistentvolumeclaim "datadir0-yb-master-0" deleted
persistentvolumeclaim "datadir0-yb-master-1" deleted
persistentvolumeclaim "datadir0-yb-master-2" deleted
persistentvolumeclaim "datadir0-yb-tserver-0" deleted
persistentvolumeclaim "datadir0-yb-tserver-1" deleted
persistentvolumeclaim "datadir0-yb-tserver-2" deleted

% kubectl get pvc -n yb-operator
No resources found in yb-operator namespace.
Summary
In this post, I have shared how we can install a YugabyteDB cluster on an Oracle Kubernetes Engine (OKE) cluster and provide persistent Portworx storage to the database cluster.
Share
Subscribe for Updates
About Us
Portworx is the leader in cloud native storage for containers.
Thanks for subscribing!

Ron Ekins
Principal Field Solutions ArchitectExplore Related Content:
- database
- kubernetes
- postgresql